« SE2a5 2023/2024 EC1 » : différence entre les versions
m (Modification procédure installation OpenWrt (remove package wpad-basics pour pas de conflits avec le package wpad)) |
(Ajout des lignes de commandes pour la création des device, interface et ssid) |
||
| Ligne 7 556 : | Ligne 7 556 : | ||
== Commandes en ligne pour configurer le point d'accès == | == Commandes en ligne pour configurer le point d'accès == | ||
---- | Création d'un device vlan : | ||
uci add network device | |||
uci set network.@device[-1].name='br-lan.2' | |||
uci set network.@device[-1].type='8021q' | |||
uci set network.@device[-1].ifname='br-lan' | |||
uci set network.@device[-1].vid='2' | |||
uci set network.@device[-1].macaddr='A8:42:A1:B2:B6:D4' | |||
uci set network.@device[-1].mtu='1500' | |||
uci set network.@device[-1].txqueuelen='1000' | |||
uci set network.@device[-1].ipv6='auto' | |||
uci set network.@device[-1].ipv6mtu='1500' | |||
uci set network.@device[-1].dadtransmits='1' | |||
uci set network.@device[-1].promisc='1' | |||
uci set network.@device[-1].acceptlocal='1' | |||
uci set network.@device[-1].arp_accept='1' | |||
uci set network.@device[-1].drop_gratuitous_arp='0' | |||
uci set network.@device[-1].sendredirects='1' | |||
Création d'une interface wifi1 : | |||
uci set network.wifi1=interface | |||
uci set network.wifi1.proto='static' | |||
uci set network.wifi1.device='br-lan.2' | |||
uci set network.wifi1.ipaddr='192.168.2.2' | |||
uci set network.wifi1.netmask='255.255.255.0' | |||
uci set network.wifi1.gateway='192.168.2.1' | |||
Pour enregistrer les modifications sur le device vlan et l'interface : | |||
uci commit network | |||
/etc/init.d/network restart | |||
Création du ssid Wifi1: | |||
uci set wireless.@wifi-iface[0]=wifi-iface | |||
uci set wireless.@wifi-iface[0].network='wifi1' | |||
uci set wireless.@wifi-iface[0].device='radio0' | |||
uci set wireless.@wifi-iface[0].mode='ap' | |||
uci set wireless.@wifi-iface[0].ssid='Wifi1' | |||
uci set wireless.@wifi-iface[0].encryption='wpa' | |||
uci set wireless.@wifi-iface[0].auth_server='192.168.2.1' | |||
uci set wireless.@wifi-iface[0].auth_port='2020' | |||
uci set wireless.@wifi-iface[0].auth_secret='passwordSecret' | |||
uci set wireless.@wifi-iface[0].auth_type='WPA-EAP' | |||
Pour enregistrer les modifications sur le ssid 'Wifi1': | |||
uci commit wireless | |||
wifi | |||
== Procédure pour configurer le point d'accès avec LuCi == | == Procédure pour configurer le point d'accès avec LuCi == | ||
Version du 12 juin 2024 à 15:48
Objectifs
A la base il vous est demandé d'implanter à nouveau le point 7.2 de votre sujet de travaux pratiques pour le module "sécurité dans les systèmes et réseaux" mais avec des différences notables.
Les différences sont les suivantes :
- le point d'accès n'est pas un point d'accès aironet avec un IOS cisco mais un point d'accès TP-LINK EAP615 avec le logiciel OpenWRT ;
- le réseau est réduit à un seul PC, de préférence connecté à Internet ;
- vous n'implanterez que 2 SSID sur 2 VLAN pour simuler deux groupes d'élèves, appellons les SSID
WiFi1etWiFi2associés aux VLAN 2 et VLAN 3.
Vous êtes libre de choisir les réseaux IPv4 à configurer sur les VLAN 2 et VLAN 3 du moment que vous utilisez des réseau non routés n'étant pas en conflit avec un réseau déjà utilisé par votre PC.
Vous devez installer les services suivants sur le PC :
- créez deux interfaces
vlan2etvlan3au dessus de l'interface Ethernet de connexion avec le point d'accès ; - deux serveurs d'identification à base de
freeradius, faites en sorte que chaque instance utilise un répertoire de configuration différent, une instance doit se lier àvlan2et la seconde àvlan3; - deux serveurs DHCP, une instances doit se lier à l'interface code>vlan2 et la seconde à l'interface
vlan3; - réalisez une mascarade pour permettre aux machines utilisant
WiFi1etWiFi2d'accèder à Internet.
Concernant le point d'accès vous devez déjà installer le logiciel OpenWRT.
Un fois OpenWRT opérationnel, il est est demandé de configurer deux SSID, un associé avec le VLAN 2 et l'autre avec le VLAN 3 avec une identification par WPA-EAP en pointant vers vos deux instances de freeradius. Vous devez tester deux méthodes de configuration. Une première via des lignes de commandes à taper sous OpenWRT via ssh, une seconde en utilisant l'interface Web LuCi d'OpenWRT. Ne tentez pas de méthode mixte.
Vous pouvez considérer qu'une configuration fonctionne si elle respecte les contraintes ci-dessus et si un téléphone peut se connecter en WiFi sur chaque SSID et sortir sur Internet (e.g. navigation Web).
Il s'agit là d'un cahier des charges initial qui peut être revu en cas d'ambigüité. Vous avez jusqu'au 15 juin pour réaliser cette épreuve complémentaire. Il vous est fortement conseillé de produire un travail régulier le plus tôt possible et de faire des rapports réguliers (en particulier au travers de ce Wiki) à votre encadrant. S'y prendre à la dernière minute avec un seul retour la veille de la date limite risque fortement de conduire à un échec.
Matériel nécessaire
Le matériel nécessaire est constitué :
- d'un PC sous Linux pour l'implantation du serveur d'identification ;
- d'un adaptateur USB/Ethernet pour connecter le PC au point d'accès sans impacter la connexion du PC à l'Internet, cet adaptateur est fourni par l'encadrant ;
- d'un point d'accès TP-Link EAP615 permettant l'installation d'OpenWRT, ce point d'accès est fourni par l'encadrant.
Travail réalisé
Documents Rendus
Interfaces VLAN
Fichier de configuration pour la création des interfaces VLAN sous Linux :
vérification de l'interface de connexion du convertisseur ethernet to USB-C:


Création des vlans 2 et 3 sur l'interface enx0c3796a8eabc:

/etc/network/interfaces

# interfaces(5) file used by ifup(8) and ifdown(8)
# Include files from /etc/network/interfaces.d:
source /etc/network/interfaces.d/*

auto vlan2
iface vlan2 inet static
	address 192.168.2.1
	netmask 255.255.255.0
	vlan-raw-device enx0c3796a8eabc


auto vlan3
iface vlan3 inet static
	address 192.168.3.1
	netmask 255.255.255.0
	vlan-raw-device enx0c3796a8eabc
Pour vérification de la création des interfaces vlans -> systemctl restart networking / systemctl status networking (pour voir qu'il n'y a pas d'erreurs) / ip a :


Script de lancement
Script de lancement des serveurs d'identification et des serveurs DHCP
lancement des serveurs en mode débug (ouvrir un terminal spécifique à l'utilisation du script de lancement) -> permet de voir les connexions en temps réel et vérifier que l'utilisateur / mot de passe sont corrects. Indication si erreur lors de l'identification).
systemctl restart networking
systemctl restart isc-dhcp-server

freeradius -X -d /etc/freeradius/vlan2/ &
freeradius -X -d /etc/freeradius/vlan3/ &

wait
Fichiers de configuration Radius
Création des deux instances freeradius : dupliquer le fichier "3.0" dans /etc/freeradius , les renommer avec un autre nom :


Pour l'instance VLAN2 :

fichier users :

greleve1     Cleartext-Password := "mdp123"
	Tunnel-Type = VLAN,
	Tunnel-Medium-Type = IEEE-802,
	Tunnel-Private-Group-Id = "2"


#
# 	Configuration file for the rlm_files module.
# 	Please see rlm_files(5) manpage for more information.
#
# 	This file contains authentication security and configuration
#	information for each user.  Accounting requests are NOT processed
#	through this file.  Instead, see 'accounting', in this directory.
#
#	The first field is the user's name and can be up to
#	253 characters in length.  This is followed (on the same line) with
#	the list of authentication requirements for that user.  This can
#	include password, comm server name, comm server port number, protocol
#	type (perhaps set by the "hints" file), and huntgroup name (set by
#	the "huntgroups" file).
#
#	If you are not sure why a particular reply is being sent by the
#	server, then run the server in debugging mode (radiusd -X), and
#	you will see which entries in this file are matched.
#
#	When an authentication request is received from the comm server,
#	these values are tested. Only the first match is used unless the
#	"Fall-Through" variable is set to "Yes".
#
#	A special user named "DEFAULT" matches on all usernames.
#	You can have several DEFAULT entries. All entries are processed
#	in the order they appear in this file. The first entry that
#	matches the login-request will stop processing unless you use
#	the Fall-Through variable.
#
#	Indented (with the tab character) lines following the first
#	line indicate the configuration values to be passed back to
#	the comm server to allow the initiation of a user session.
#	This can include things like the PPP configuration values
#	or the host to log the user onto.
#
#	You can include another `users' file with `$INCLUDE users.other'

#
#	For a list of RADIUS attributes, and links to their definitions,
#	see: http://www.freeradius.org/rfc/attributes.html
#
#	Entries below this point are examples included in the server for
#	educational purposes. They may be deleted from the deployed
#	configuration without impacting the operation of the server.
#

#
# Deny access for a specific user.  Note that this entry MUST
# be before any other 'Auth-Type' attribute which results in the user
# being authenticated.
#
# Note that there is NO 'Fall-Through' attribute, so the user will not
# be given any additional resources.
#
#lameuser	Auth-Type := Reject
#		Reply-Message = "Your account has been disabled."

#
# Deny access for a group of users.
#
# Note that there is NO 'Fall-Through' attribute, so the user will not
# be given any additional resources.
#
#DEFAULT	Group == "disabled", Auth-Type := Reject
#		Reply-Message = "Your account has been disabled."
#

#
# This is a complete entry for "steve". Note that there is no Fall-Through
# entry so that no DEFAULT entry will be used, and the user will NOT
# get any attributes in addition to the ones listed here.
#
#steve	Cleartext-Password := "testing"
#	Service-Type = Framed-User,
#	Framed-Protocol = PPP,
#	Framed-IP-Address = 172.16.3.33,
#	Framed-IP-Netmask = 255.255.255.0,
#	Framed-Routing = Broadcast-Listen,
#	Framed-Filter-Id = "std.ppp",
#	Framed-MTU = 1500,
#	Framed-Compression = Van-Jacobsen-TCP-IP

#
# The canonical testing user which is in most of the
# examples.
#
bob	Cleartext-Password := "hello"
	Reply-Message := "Hello, %{User-Name}"
#

#
# This is an entry for a user with a space in their name.
# Note the double quotes surrounding the name.  If you have
# users with spaces in their names, you must also change
# the "filter_username" policy to allow spaces.
#
# See raddb/policy.d/filter, filter_username {} section.
#
#"John Doe"	Cleartext-Password := "hello"
#		Reply-Message = "Hello, %{User-Name}"

#
# Dial user back and telnet to the default host for that port
#
#Deg	Cleartext-Password := "ge55ged"
#	Service-Type = Callback-Login-User,
#	Login-IP-Host = 0.0.0.0,
#	Callback-Number = "9,5551212",
#	Login-Service = Telnet,
#	Login-TCP-Port = Telnet

#
# Another complete entry. After the user "dialbk" has logged in, the
# connection will be broken and the user will be dialed back after which
# he will get a connection to the host "timeshare1".
#
#dialbk	Cleartext-Password := "callme"
#	Service-Type = Callback-Login-User,
#	Login-IP-Host = timeshare1,
#	Login-Service = PortMaster,
#	Callback-Number = "9,1-800-555-1212"

#
# user "swilson" will only get a static IP number if he logs in with
# a framed protocol on a terminal server in Alphen (see the huntgroups file).
#
# Note that by setting "Fall-Through", other attributes will be added from
# the following DEFAULT entries
#
#swilson	Service-Type == Framed-User, Huntgroup-Name == "alphen"
#		Framed-IP-Address = 192.0.2.65,
#		Fall-Through = Yes

#
# If the user logs in as 'username.shell', then authenticate them
# using the default method, give them shell access, and stop processing
# the rest of the file.
#
#DEFAULT	Suffix == ".shell"
#		Service-Type = Login-User,
#		Login-Service = Telnet,
#		Login-IP-Host = your.shell.machine


#
# The rest of this file contains the several DEFAULT entries.
# DEFAULT entries match with all login names.
# Note that DEFAULT entries can also Fall-Through (see first entry).
# A name-value pair from a DEFAULT entry will _NEVER_ override
# an already existing name-value pair.
#

# Sample defaults for all framed connections.
#
#DEFAULT	Service-Type == Framed-User
#	Framed-IP-Address = 255.255.255.254,
#	Framed-MTU = 576,
#	Service-Type = Framed-User,
#	Fall-Through = Yes

#
# Default for PPP: dynamic IP address, PPP mode, VJ-compression.
# NOTE: we do not use Hint = "PPP", since PPP might also be auto-detected
#	by the terminal server in which case there may not be a "P" suffix.
#	The terminal server sends "Framed-Protocol = PPP" for auto PPP.
#
DEFAULT	Framed-Protocol == PPP
	Framed-Protocol = PPP,
	Framed-Compression = Van-Jacobson-TCP-IP

#
# Default for CSLIP: dynamic IP address, SLIP mode, VJ-compression.
#
DEFAULT	Hint == "CSLIP"
	Framed-Protocol = SLIP,
	Framed-Compression = Van-Jacobson-TCP-IP

#
# Default for SLIP: dynamic IP address, SLIP mode.
#
DEFAULT	Hint == "SLIP"
	Framed-Protocol = SLIP

#
# Last default: rlogin to our main server.
#
#DEFAULT
#	Service-Type = Login-User,
#	Login-Service = Rlogin,
#	Login-IP-Host = shellbox.ispdomain.com

# #
# # Last default: shell on the local terminal server.
# #
# DEFAULT
# 	Service-Type = Administrative-User


# On no match, the user is denied access.


#########################################################
# You should add test accounts to the TOP of this file! #
# See the example user "bob" above.                     #
#########################################################
fichier clients.conf:

## clients.conf -- client configuration directives
##
##	$Id$

#######################################################################
#
#  Define RADIUS clients (usually a NAS, Access Point, etc.).

#
#  Defines a RADIUS client.
#
#  '127.0.0.1' is another name for 'localhost'.  It is enabled by default,
#  to allow testing of the server after an initial installation.  If you
#  are not going to be permitting RADIUS queries from localhost, we suggest
#  that you delete, or comment out, this entry.
#
#

#
#  Each client has a "short name" that is used to distinguish it from
#  other clients.
#
#  In version 1.x, the string after the word "client" was the IP
#  address of the client.  In 2.0, the IP address is configured via
#  the "ipaddr" or "ipv6addr" fields.  For compatibility, the 1.x
#  format is still accepted.
#

client tplink {
	ipaddr = 192.168.2.2
	secret = passwordSecret
}


client localhost {
	#  Only *one* of ipaddr, ipv4addr, ipv6addr may be specified for
	#  a client.
	#
	#  ipaddr will accept IPv4 or IPv6 addresses with optional CIDR
	#  notation '/<mask>' to specify ranges.
	#
	#  ipaddr will accept domain names e.g. example.org resolving
	#  them via DNS.
	#
	#  If both A and AAAA records are found, A records will be
	#  used in preference to AAAA.
	ipaddr = 127.0.0.1

	#  Same as ipaddr but allows v4 addresses only. Requires A
	#  record for domain names.
#	ipv4addr = *	# any.  127.0.0.1 == localhost

	#  Same as ipaddr but allows v6 addresses only. Requires AAAA
	#  record for domain names.
#	ipv6addr = ::	# any.  ::1 == localhost

	#
	#  A note on DNS:  We STRONGLY recommend using IP addresses
	#  rather than host names.  Using host names means that the
	#  server will do DNS lookups when it starts, making it
	#  dependent on DNS.  i.e. If anything goes wrong with DNS,
	#  the server won't start!
	#
	#  The server also looks up the IP address from DNS once, and
	#  only once, when it starts.  If the DNS record is later
	#  updated, the server WILL NOT see that update.
	#

	#
	#  The transport protocol.
	#
	#  If unspecified, defaults to "udp", which is the traditional
	#  RADIUS transport.  It may also be "tcp", in which case the
	#  server will accept connections from this client ONLY over TCP.
	#
	proto = *

	#
	#  The shared secret use to "encrypt" and "sign" packets between
	#  the NAS and FreeRADIUS.  You MUST change this secret from the
	#  default, otherwise it's not a secret any more!
	#
	#  The secret can be any string, up to 8k characters in length.
	#
	#  Control codes can be entered vi octal encoding,
	#	e.g. "\101\102" == "AB"
	#  Quotation marks can be entered by escaping them,
	#	e.g. "foo\"bar"
	#
	#  A note on security:  The security of the RADIUS protocol
	#  depends COMPLETELY on this secret!  We recommend using a
	#  shared secret that is composed of:
	#
	#	upper case letters
	#	lower case letters
	#	numbers
	#
	#  And is at LEAST 8 characters long, preferably 16 characters in
	#  length.  The secret MUST be random, and should not be words,
	#  phrase, or anything else that is recognisable.
	#
	#  The default secret below is only for testing, and should
	#  not be used in any real environment.
	#
	secret = testing123

	#
	#  Old-style clients do not send a Message-Authenticator
	#  in an Access-Request.  RFC 5080 suggests that all clients
	#  SHOULD include it in an Access-Request.  The configuration
	#  item below allows the server to require it.  If a client
	#  is required to include a Message-Authenticator and it does
	#  not, then the packet will be silently discarded.
	#
	#  allowed values: yes, no
	require_message_authenticator = no

	#
	#  The short name is used as an alias for the fully qualified
	#  domain name, or the IP address.
	#
	#  It is accepted for compatibility with 1.x, but it is no
	#  longer necessary in >= 2.0
	#
#	shortname = localhost

	#
	# the following three fields are optional, but may be used by
	# checkrad.pl for simultaneous use checks
	#

	#
	# The nas_type tells 'checkrad.pl' which NAS-specific method to
	#  use to query the NAS for simultaneous use.
	#
	#  Permitted NAS types are:
	#
	#	cisco
	#	computone
	#	livingston
	#	juniper
	#	max40xx
	#	multitech
	#	netserver
	#	pathras
	#	patton
	#	portslave
	#	tc
	#	usrhiper
	#	other		# for all other types

	#
	nas_type	 = other	# localhost isn't usually a NAS...

	#
	#  The following two configurations are for future use.
	#  The 'naspasswd' file is currently used to store the NAS
	#  login name and password, which is used by checkrad.pl
	#  when querying the NAS for simultaneous use.
	#
#	login	   = !root
#	password	= someadminpas

	#
	#  As of 2.0, clients can also be tied to a virtual server.
	#  This is done by setting the "virtual_server" configuration
	#  item, as in the example below.
	#
#	virtual_server = home1

	#
	#  A pointer to the "home_server_pool" OR a "home_server"
	#  section that contains the CoA configuration for this
	#  client.  For an example of a coa home server or pool,
	#  see raddb/sites-available/originate-coa
#	coa_server = coa

	#
	#  Response window for proxied packets.  If non-zero,
	#  then the lower of (home, client) response_window
	#  will be used.
	#
	#  i.e. it can be used to lower the response_window
	#  packets from one client to a home server.  It cannot
	#  be used to raise the response_window.
	#
#	response_window = 10.0

	#
	#  Connection limiting for clients using "proto = tcp".
	#
	#  This section is ignored for clients sending UDP traffic
	#
	limit {
		#
		#  Limit the number of simultaneous TCP connections from a client
		#
		#  The default is 16.
		#  Setting this to 0 means "no limit"
		max_connections = 16

		#  The per-socket "max_requests" option does not exist.

		#
		#  The lifetime, in seconds, of a TCP connection.  After
		#  this lifetime, the connection will be closed.
		#
		#  Setting this to 0 means "forever".
		lifetime = 0

		#
		#  The idle timeout, in seconds, of a TCP connection.
		#  If no packets have been received over the connection for
		#  this time, the connection will be closed.
		#
		#  Setting this to 0 means "no timeout".
		#
		#  We STRONGLY RECOMMEND that you set an idle timeout.
		#
		idle_timeout = 30
	}
}

# IPv6 Client
client localhost_ipv6 {
	ipv6addr	= ::1
	secret		= testing123
}

# All IPv6 Site-local clients
#client sitelocal_ipv6 {
#	ipv6addr	= fe80::/16
#	secret		= testing123
#}

#client example.org {
#	ipaddr		= radius.example.org
#	secret		= testing123
#}

#
#  You can now specify one secret for a network of clients.
#  When a client request comes in, the BEST match is chosen.
#  i.e. The entry from the smallest possible network.
#
#client private-network-1 {
#	ipaddr		= 192.0.2.0/24
#	secret		= testing123-1
#}

#client private-network-2 {
#	ipaddr		= 198.51.100.0/24
#	secret		= testing123-2
#}

#######################################################################
#
#  Per-socket client lists.  The configuration entries are exactly
#  the same as above, but they are nested inside of a section.
#
#  You can have as many per-socket client lists as you have "listen"
#  sections, or you can re-use a list among multiple "listen" sections.
#
#  Un-comment this section, and edit a "listen" section to add:
#  "clients = per_socket_clients".  That IP address/port combination
#  will then accept ONLY the clients listed in this section.
#
#  There are additional considerations when using clients from SQL.
#
#  A client can be link to a virtual server via modules such as SQL.
#  This link is done via the following process:
#
#  If there is no listener in a virtual server, SQL clients are added
#  to the global list for that virtual server.
#
#  If there is a listener, and the first listener does not have a
#  "clients=..." configuration item, SQL clients are added to the
#  global list.
#
#  If there is a listener, and the first one does have a "clients=..."
#  configuration item, SQL clients are added to that list.  The client
#  { ...} ` configured in that list are also added for that listener.
#
#  The only issue is if you have multiple listeners in a virtual
#  server, each with a different client list, then the SQL clients are
#  added only to the first listener.
#
#clients per_socket_clients {
#	client socket_client {
#		ipaddr = 192.0.2.4
#		secret = testing123
#	}
#}
fichier /mods-enabled/eap :

##  eap.conf -- Configuration for EAP types (PEAP, TTLS, etc.)
##
##	$Id$

#######################################################################
#
#  Whatever you do, do NOT set 'Auth-Type := EAP'.  The server
#  is smart enough to figure this out on its own.  The most
#  common side effect of setting 'Auth-Type := EAP' is that the
#  users then cannot use ANY other authentication method.
#
eap {
	#  Invoke the default supported EAP type when
	#  EAP-Identity response is received.
	#
	#  The incoming EAP messages DO NOT specify which EAP
	#  type they will be using, so it MUST be set here.
	#
	#  For now, only one default EAP type may be used at a time.
	#
	#  If the EAP-Type attribute is set by another module,
	#  then that EAP type takes precedence over the
	#  default type configured here.
	#
	default_eap_type = peap

	#  A list is maintained to correlate EAP-Response
	#  packets with EAP-Request packets.  After a
	#  configurable length of time, entries in the list
	#  expire, and are deleted.
	#
	timer_expire = 60

	#  There are many EAP types, but the server has support
	#  for only a limited subset.  If the server receives
	#  a request for an EAP type it does not support, then
	#  it normally rejects the request.  By setting this
	#  configuration to "yes", you can tell the server to
	#  instead keep processing the request.  Another module
	#  MUST then be configured to proxy the request to
	#  another RADIUS server which supports that EAP type.
	#
	#  If another module is NOT configured to handle the
	#  request, then the request will still end up being
	#  rejected.
	#
	ignore_unknown_eap_types = no

	# Cisco AP1230B firmware 12.2(13)JA1 has a bug.  When given
	# a User-Name attribute in an Access-Accept, it copies one
	# more byte than it should.
	#
	# We can work around it by configurably adding an extra
	# zero byte.
	#
	cisco_accounting_username_bug = no

	#  Help prevent DoS attacks by limiting the number of
	#  sessions that the server is tracking.  For simplicity,
	#  this is taken from the "max_requests" directive in
	#  radiusd.conf.
	#
	max_sessions = ${max_requests}


	############################################################
	#
	#  Supported EAP-types
	#


	#  EAP-MD5
	#
	#  We do NOT recommend using EAP-MD5 authentication
	#  for wireless connections.  It is insecure, and does
	#  not provide for dynamic WEP keys.
	#
	md5 {
	}


	#  EAP-pwd -- secure password-based authentication
	#
	#pwd {
	#	group = 19

	#	server_id = theserver@example.com

		#  This has the same meaning as for TLS.
		#
	#	fragment_size = 1020

		# The virtual server which determines the
		# "known good" password for the user.
		# Note that unlike TLS, only the "authorize"
		# section is processed.  EAP-PWD requests can be
		# distinguished by having a User-Name, but
		# no User-Password, CHAP-Password, EAP-Message, etc.
		#
	#	virtual_server = "inner-tunnel"
	#}


	#  Cisco LEAP
	#
	#  We do not recommend using LEAP in new deployments.  See:
	#  http://www.securiteam.com/tools/5TP012ACKE.html
	#
	#  As of 3.0.22, LEAP has been removed from the server.
	#  It is insecure, and no one should be using it.
	#


	#  EAP-GTC -- Generic Token Card
	#
	#  Currently, this is only permitted inside of EAP-TTLS,
	#  or EAP-PEAP.  The module "challenges" the user with
	#  text, and the response from the user is taken to be
	#  the User-Password.
	#
	#  Proxying the tunneled EAP-GTC session is a bad idea,
	#  the users password will go over the wire in plain-text,
	#  for anyone to see.
	#
	gtc {
		#  The default challenge, which many clients
		#  ignore..
		#
	#	challenge = "Password: "

		#  The plain-text response which comes back
		#  is put into a User-Password attribute,
		#  and passed to another module for
		#  authentication.  This allows the EAP-GTC
		#  response to be checked against plain-text,
		#  or crypt'd passwords.
		#
		#  If you say "Local" instead of "PAP", then
		#  the module will look for a User-Password
		#  configured for the request, and do the
		#  authentication itself.
		#
		auth_type = PAP
	}


	#  Common TLS configuration for TLS-based EAP types
	#  ------------------------------------------------
	#
	#  See raddb/certs/README.md for additional comments
	#  on certificates.
	#
	#  If OpenSSL was not found at the time the server was
	#  built, the "tls", "ttls", and "peap" sections will
	#  be ignored.
	#
	#  If you do not currently have certificates signed by
	#  a trusted CA you may use the 'snakeoil' certificates.
	#  Included with the server in raddb/certs.
	#
	#  If these certificates have not been auto-generated:
	#    cd raddb/certs
	#    make
	#
	#  These test certificates SHOULD NOT be used in a normal
	#  deployment.  They are created only to make it easier
	#  to install the server, and to perform some simple
	#  tests with EAP-TLS, TTLS, or PEAP.
	#
	#  Note that you should NOT use a globally known CA here!
	#  e.g. using a Verisign cert as a "known CA" means that
	#  ANYONE who has a certificate signed by them can
	#  authenticate via EAP-TLS!  This is likely not what you want.
	#
	tls-config tls-common {
		private_key_password = whatever
		private_key_file = /etc/ssl/private/ssl-cert-snakeoil.key

		#  If Private key & Certificate are located in
		#  the same file, then private_key_file &
		#  certificate_file must contain the same file
		#  name.
		#
		#  If ca_file (below) is not used, then the
		#  certificate_file below SHOULD also include all of
		#  the intermediate CA certificates used to sign the
		#  server certificate, but NOT the root CA.
		#
		#  Including the ROOT CA certificate is not useful and
		#  merely inflates the exchanged data volume during
		#  the TLS negotiation.
		#
		#  This file should contain the server certificate,
		#  followed by intermediate certificates, in order.
		#  i.e. If we have a server certificate signed by CA1,
		#  which is signed by CA2, which is signed by a root
		#  CA, then the "certificate_file" should contain
		#  server.pem, followed by CA1.pem, followed by
		#  CA2.pem.
		#
		#  When using "ca_file" or "ca_dir", the
		#  "certificate_file" should contain only
		#  "server.pem".  And then you may (or may not) need
		#  to set "auto_chain", depending on your version of
		#  OpenSSL.
		#
		#  In short, SSL / TLS certificates are complex.
		#  There are many versions of software, each of which
		#  behave slightly differently.  It is impossible to
		#  give advice which will work everywhere.  Instead,
		#  we give general guidelines.
		#
		certificate_file = /etc/ssl/certs/ssl-cert-snakeoil.pem

		#  Trusted Root CA list
		#
		#  This file can contain multiple CA certificates.
		#  ALL of the CA's in this list will be trusted to
		#  issue client certificates for authentication.
		#
		#  In general, you should use self-signed
		#  certificates for 802.1x (EAP) authentication.
		#  In that case, this CA file should contain
		#  *one* CA certificate.
		#
		ca_file = /etc/ssl/certs/ca-certificates.crt

	 	#  OpenSSL will automatically create certificate chains,
	 	#  unless we tell it to not do that.  The problem is that
	 	#  it sometimes gets the chains right from a certificate
	 	#  signature view, but wrong from the clients view.
		#
		#  When setting "auto_chain = no", the server certificate
		#  file MUST include the full certificate chain.
		#
	#	auto_chain = yes

		#  If OpenSSL supports TLS-PSK, then we can use a
		#  fixed PSK identity and (hex) password.  As of
		#  3.0.18, these can be used at the same time as the
		#  certificate configuration, but only for TLS 1.0
		#  through 1.2.
		#
		#  If PSK and certificates are configured at the same
		#  time for TLS 1.3, then the server will warn you,
		#  and will disable TLS 1.3, as it will not work.
		#
		#  The work around is to have two modules (or for
		#  RadSec, two listen sections).  One will have PSK
		#  configured, and the other will have certificates
		#  configured.
		#
	#	psk_identity = "test"
	#	psk_hexphrase = "036363823"

		#  Dynamic queries for the PSK.  If TLS-PSK is used,
		#  and psk_query is set, then you MUST NOT use
		#  psk_identity or psk_hexphrase.
		#
		#  Instead, use a dynamic expansion similar to the one
		#  below.  It keys off of TLS-PSK-Identity.  It should
		#  return a of string no more than 512 hex characters.
		#  That string will be converted to binary, and will
		#  be used as the dynamic PSK hexphrase.
		#
		#  Note that this query is just an example.  You will
		#  need to customize it for your installation.
		#
	#	psk_query = "%{sql:select hex(key) from psk_keys where keyid = '%{TLS-PSK-Identity}'}"

		#  For DH cipher suites to work in OpenSSL < 1.1.0,
		#  you have to run OpenSSL to create the DH file
		#  first:
		#
		#    openssl dhparam -out certs/dh 2048
		#
		#  For OpenSSL >= 1.1.0, just leave this commented
		#  out, and OpenSSL will do the right thing.
		#
	#	dh_file = ${certdir}/dh

		#  If your system doesn't have /dev/urandom,
		#  you will need to create this file, and
		#  periodically change its contents.
		#
		#  For security reasons, FreeRADIUS doesn't
		#  write to files in its configuration
		#  directory.
		#
	#	random_file = /dev/urandom

		#  This can never exceed the size of a RADIUS
		#  packet (4096 bytes), and is preferably half
		#  that, to accommodate other attributes in
		#  RADIUS packet.  On most APs the MAX packet
		#  length is configured between 1500 - 1600
		#  In these cases, fragment size should be
		#  1024 or less.
		#
	#	fragment_size = 1024

		#  include_length is a flag which is
		#  by default set to yes If set to
		#  yes, Total Length of the message is
		#  included in EVERY packet we send.
		#  If set to no, Total Length of the
		#  message is included ONLY in the
		#  First packet of a fragment series.
		#
	#	include_length = yes


		#  Check the Certificate Revocation List
		#
		#  1) Copy CA certificates and CRLs to same directory.
		#  2) Execute 'c_rehash <CA certs&CRLs Directory>'.
		#     'c_rehash' is OpenSSL's command.
		#  3) uncomment the lines below.
		#  5) Restart radiusd
	#	check_crl = yes

		# Check if intermediate CAs have been revoked.
	#	check_all_crl = yes

		ca_path = ${cadir}

		# OpenSSL does not reload contents of ca_path dir over time.
		# That means that if check_crl is enabled and CRLs are loaded
		# from ca_path dir, at some point CRLs will expire and
		# RADIUSd will stop authenticating users.
		# If ca_path_reload_interval is non-zero, it will force OpenSSL
		# to reload all data from ca_path periodically
		#
		# Flush ca_path each hour
	#	ca_path_reload_interval = 3600


		# Accept an expired Certificate Revocation List
		#
	#	allow_expired_crl = no

		#  If check_cert_issuer is set, the value will
		#  be checked against the DN of the issuer in
		#  the client certificate.  If the values do not
		#  match, the certificate verification will fail,
		#  rejecting the user.
		#
		#  This check can be done more generally by checking
		#  the value of the TLS-Client-Cert-Issuer attribute.
		#  This check can be done via any mechanism you
		#  choose.
		#
	#	check_cert_issuer = "/C=GB/ST=Berkshire/L=Newbury/O=My Company Ltd"

		#  If check_cert_cn is set, the value will
		#  be xlat'ed and checked against the CN
		#  in the client certificate.  If the values
		#  do not match, the certificate verification
		#  will fail rejecting the user.
		#
		#  This check is done only if the previous
		#  "check_cert_issuer" is not set, or if
		#  the check succeeds.
		#
		#  This check can be done more generally by writing
		#  "unlang" statements to examine the value of the
		#  TLS-Client-Cert-Common-Name attribute.
		#
	#	check_cert_cn = %{User-Name}

		#
		#  This configuration item only applies when there is
		#  an intermediate CA between the "root" CA, and the
		#  client certificate.  If we trust the root CA, then
		#  by definition we also trust ANY intermediate CA
		#  which is signed by that root.  This means ANOTHER
		#  intermediate CA can issue client certificates, and
		#  have them accepted by the EAP module.
		#
		#  The solution is to list ONLY the trusted CAs in the
		#  FreeRADIUS configuration, and then set this
		#  configuration item to "yes".
		#
		#  Then, when the server receives a client certificate
		#  from an untrusted CA, that authentication request
		#  can be rejected.
		#
		#  It is possible to do these checks in "unlang", by
		#  checking for unknown names in the
		#  TLS-Cert-Common-Name attribute, but that is
		#  more complex.  So we add a configuration option
		#  which can be set once, and which works for all
		#  possible intermediate CAs, no matter what their
		#  value.
		#
	#	reject_unknown_intermediate_ca = no

		#  Set this option to specify the allowed
		#  TLS cipher suites.  The format is listed
		#  in "man 1 ciphers".
		#
		cipher_list = "DEFAULT"

		#  If enabled, OpenSSL will use server cipher list
		#  (possibly defined by cipher_list option above)
		#  for choosing right cipher suite rather than
		#  using client-specified list which is OpenSSl default
		#  behavior.  Setting this to "yes" means that OpenSSL
		#  will choose the servers ciphers, even if they do not
		#  best match what the client sends.
		#
		#  TLS negotiation is usually good, but can be imperfect.
		#  This setting allows administrators to "fine tune" it
		#  if necessary.
		#
		cipher_server_preference = no

		#  You can selectively disable TLS versions for
		#  compatability with old client devices.
		#
		#  If your system has OpenSSL 1.1.0 or greater, do NOT
		#  use these.  Instead, set tls_min_version and
		#  tls_max_version.
		#
#		disable_tlsv1_2 = yes
#		disable_tlsv1_1 = yes
#		disable_tlsv1 = yes


		#  Set min / max TLS version.
		#
		#  Generally speaking you should NOT use TLS 1.0 or
		#  TLS 1.1.  They are old, possibly insecure, and
		#  deprecated.  However, it is sometimes necessary to
		#  enable it for compatibility with legact systems.
		#  We recommend replacing those legacy systems, and
		#  using at least TLS 1.2.
		#
		#  Some Debian versions disable older versions of TLS,
		#  and requires the application to manually enable
		#  them.
		#
		#  If you are running such a distribution, you should
		#  set these options, otherwise older clients will not
		#  be able to connect.
		#
		#  Allowed values are "1.0", "1.1", "1.2", and "1.3".
		#
		#  As of 2021, it is STRONGLY RECOMMENDED to set
		#
		#	tls_min_version = "1.2"
		#
		#  Older TLS versions are insecure and deprecated.
		#
		#  In order to enable TLS 1.0 and TLS 1.1, you may
		#  also need to update cipher_list below to:
		#
		#   * OpenSSL >= 3.x
		#
		#	cipher_list = "DEFAULT@SECLEVEL=0"
		#
		#   * OpenSSL < 3.x
		#
		#	cipher_list = "DEFAULT@SECLEVEL=1"
		#
		#  The values must be in quotes.
		#
		#  We also STRONGLY RECOMMEND to set
		#
		#	tls_max_version = "1.2"
		#
		#  While the server will accept "1.3" as a value,
		#  most EAP supplicants WILL NOT DO TLS 1.3 PROPERLY.
		#
		#  i.e. they WILL NOT WORK, SO DO NOT ASK QUESTIONS ON
		#  THE LIST ABOUT WHY IT DOES NOT WORK.
		#
		#  The TLS 1.3 support is here for future
		#  compatibility, as clients get upgraded, and people
		#  don't upgrade their copies of FreeRADIUS.
		#
		#  Also note that we only support TLS 1.3 for EAP-TLS.
		#  Other versions of EAP (PEAP, TTLS, FAST) DO NOT
		#  SUPPORT TLS 1.3.
		#
		tls_min_version = "1.2"
		tls_max_version = "1.2"

		#  Elliptical cryptography configuration
		#
		#  This configuration should be one of the following:
		#
		#  * a name of the curve to use, e.g. "prime256v1".
		#
		#  * a colon separated list of curve NIDs or names.
		#
		#  * an empty string, in which case OpenSSL will choose
		#    the "best" curve for the situation.
		#
		#  For supported curve names, please run
		#
		#	openssl ecparam -list_curves
		#
		ecdh_curve = ""

		#  Session resumption / fast reauthentication
		#  cache.
		#
		#  The cache contains the following information:
		#
		#   session Id - unique identifier, managed by SSL
		#   User-Name  - from the Access-Accept
		#   Stripped-User-Name - from the Access-Request
		#   Cached-Session-Policy - from the Access-Accept
		#
		#  See also the "store" subsection below for
		#  additional attributes which can be cached.
		#
		#  The "Cached-Session-Policy" is the name of a
		#  policy which should be applied to the cached
		#  session.  This policy can be used to assign
		#  VLANs, IP addresses, etc.  It serves as a useful
		#  way to re-apply the policy from the original
		#  Access-Accept to the subsequent Access-Accept
		#  for the cached session.
		#
		#  On session resumption, these attributes are
		#  copied from the cache, and placed into the
		#  reply list.
		#
		#  You probably also want "use_tunneled_reply = yes"
		#  when using fast session resumption.
		#
		#  You can check if a session has been resumed by
		#  looking for the existence of the EAP-Session-Resumed
		#  attribute.  Note that this attribute will *only*
		#  exist in the "post-auth" section.
		#
		#  CAVEATS: The cache is stored and reloaded BEFORE
		#  the "post-auth" section is run.  This limitation
		#  makes caching more difficult than it should be.  In
		#  practice, it means that the first authentication
		#  session must set the reply attributes before the
		#  post-auth section is run.
		#
		#  When the session is resumed, the attributes are
		#  restored and placed into the session-state list.
		#
		cache {
			#  Enable it.  The default is "no". Deleting the entire "cache"
			#  subsection also disables caching.
			#
			#  The session cache requires the use of the
			#  "name" and "persist_dir" configuration
			#  items, below.
			#
			#  The internal OpenSSL session cache has been permanently
			#  disabled.
			#
			#  You can disallow resumption for a particular user by adding the
			#  following attribute to the control item list:
			#
			#    Allow-Session-Resumption = No
			#
			#  If "enable = no" below, you CANNOT enable resumption for just one
			#  user by setting the above attribute to "yes".
			#
			enable = no

			#  Lifetime of the cached entries, in hours. The sessions will be
			#  deleted/invalidated after this time.
			#
			lifetime = 24 # hours

			#  Internal "name" of the session cache. Used to
			#  distinguish which TLS context sessions belong to.
			#
			#  The server will generate a random value if unset.
			#  This will change across server restart so you MUST
			#  set the "name" if you want to persist sessions (see
			#  below).
			#
		#	name = "EAP module"

			#  Simple directory-based storage of sessions.
			#  Two files per session will be written, the SSL
			#  state and the cached VPs. This will persist session
			#  across server restarts.
			#
			#  The default directory is ${logdir}, for historical
			#  reasons.  You should ${db_dir} instead.  And check
			#  the value of db_dir in the main radiusd.conf file.
			#  It should not point to ${raddb}
			#
			#  The server will need write perms, and the directory
			#  should be secured from anyone else. You might want
			#  a script to remove old files from here periodically:
			#
			#    find ${logdir}/tlscache -mtime +2 -exec rm -f {} \;
			#
			#  This feature REQUIRES "name" option be set above.
			#
		#	persist_dir = "${logdir}/tlscache"

			#
			#  As of 3.0.20, it is possible to partially
			#  control which attributes exist in the
			#  session cache.  This subsection lists
			#  attributes which are taken from the reply,
			#  and saved to the on-disk cache.  When the
			#  session is resumed, these attributes are
			#  added to the "session-state" list.  The
			#  default configuration will then take care
			#  of copying them to the reply.
			#
			store {
				Tunnel-Private-Group-Id
			}
		}

		#  Client certificates can be validated via an
		#  external command.  This allows dynamic CRLs or OCSP
		#  to be used.
		#
		#  This configuration is commented out in the
		#  default configuration.  Uncomment it, and configure
		#  the correct paths below to enable it.
		#
		#  If OCSP checking is enabled, and the OCSP checks fail,
		#  the verify section is not run.
		#
		#  If OCSP checking is disabled, the verify section is
		#  run on successful certificate validation.
		#
		verify {
			#  If the OCSP checks succeed, the verify section
			#  is run to allow additional checks.
			#
			#  If you want to skip verify on OCSP success,
			#  uncomment this configuration item, and set it
			#  to "yes".
			#
		#	skip_if_ocsp_ok = no

			#  A temporary directory where the client
			#  certificates are stored.  This directory
			#  MUST be owned by the UID of the server,
			#  and MUST not be accessible by any other
			#  users.  When the server starts, it will do
			#  "chmod go-rwx" on the directory, for
			#  security reasons.  The directory MUST
			#  exist when the server starts.
			#
			#  You should also delete all of the files
			#  in the directory when the server starts.
			#
		#	tmpdir = /tmp/radiusd

			#  The command used to verify the client cert.
			#  We recommend using the OpenSSL command-line
			#  tool.
			#
			#  The ${..ca_path} text is a reference to
			#  the ca_path variable defined above.
			#
			#  The %{TLS-Client-Cert-Filename} is the name
			#  of the temporary file containing the cert
			#  in PEM format.  This file is automatically
			#  deleted by the server when the command
			#  returns.
			#
		#	client = "/path/to/openssl verify -CApath ${..ca_path} %{TLS-Client-Cert-Filename}"
		}

		#  OCSP Configuration
		#
		#  Certificates can be verified against an OCSP
		#  Responder. This makes it possible to immediately
		#  revoke certificates without the distribution of
		#  new Certificate Revocation Lists (CRLs).
		#
		ocsp {
			#  Enable it.  The default is "no".
			#  Deleting the entire "ocsp" subsection
			#  also disables ocsp checking
			#
			enable = no

			#  The OCSP Responder URL can be automatically
			#  extracted from the certificate in question.
			#  To override the OCSP Responder URL set
			#  "override_cert_url = yes".
			#
			override_cert_url = yes

			#  If the OCSP Responder address is not extracted from
			#  the certificate, the URL can be defined here.
			#
			url = "http://127.0.0.1/ocsp/"

			# If the OCSP Responder can not cope with nonce
			# in the request, then it can be disabled here.
			#
			# For security reasons, disabling this option
			# is not recommended as nonce protects against
			# replay attacks.
			#
			# Note that Microsoft AD Certificate Services OCSP
			# Responder does not enable nonce by default. It is
			# more secure to enable nonce on the responder than
			# to disable it in the query here.
			# See http://technet.microsoft.com/en-us/library/cc770413%28WS.10%29.aspx
			#
		#	use_nonce = yes

			# Number of seconds before giving up waiting
			# for OCSP response. 0 uses system default.
			#
		#	timeout = 0

			# Normally an error in querying the OCSP
			# responder (no response from server, server did
			# not understand the request, etc) will result in
			# a validation failure.
			#
			# To treat these errors as 'soft' failures and
			# still accept the certificate, enable this
			# option.
			#
			# Warning: this may enable clients with revoked
			# certificates to connect if the OCSP responder
			# is not available. Use with caution.
			#
		#	softfail = no
		}

		#
		#  The server can present different certificates based
		#  on the realm presented in EAP.  See
		#  raddb/certs/realms/README.md for examples of how to
		#  configure this.
		#
		#  Note that the default is to use the same set of
		#  realm certificates for both EAP and RadSec!  If
		#  this is not what you want, you should use different
		#  subdirectories or each, e.g. ${certdir}/realms/radsec/,
		#  and ${certdir}/realms/eap/
		#
	#	realm_dir = ${certdir}/realms/
	}


	#  EAP-TLS
	#
	#  The TLS configuration for TLS-based EAP types is held in
	#  the "tls-config" section, above.
	#
	tls {
		#  Point to the common TLS configuration
		#
		tls = tls-common

		#  As part of checking a client certificate, the EAP-TLS
		#  sets some attributes such as TLS-Client-Cert-Common-Name. This
		#  virtual server has access to these attributes, and can
		#  be used to accept or reject the request.
		#
	#	virtual_server = check-eap-tls

		#  You can control whether or not EAP-TLS requires a
		#  client certificate by setting
		#
		#	configurable_client_cert = yes
		#
		#  Once that setting has been changed, you can then set
		#
		#	EAP-TLS-Require-Client-Cert = No
		#
		#  in the control items for a request, and the EAP-TLS
		#  module will not require a client certificate from
		#  the supplicant.
		#
		#  WARNING: This configuration should only be used
		#  when the users are placed into a "captive portal"
		#  or "walled garden", where they have limited network
		#  access.  Otherwise the configuraton will allow
		#  anyone on the network, without authenticating them!
		#
#		configurable_client_cert = no
	}


	#  EAP-TTLS -- Tunneled TLS
	#
	#  The TTLS module implements the EAP-TTLS protocol,
	#  which can be described as EAP inside of Diameter,
	#  inside of TLS, inside of EAP, inside of RADIUS...
	#
	#  Surprisingly, it works quite well.
	#
	ttls {
		#  Which tls-config section the TLS negotiation parameters
		#  are in - see EAP-TLS above for an explanation.
		#
		#  In the case that an old configuration from FreeRADIUS
		#  v2.x is being used, all the options of the tls-config
		#  section may also appear instead in the 'tls' section
		#  above. If that is done, the tls= option here (and in
		#  tls above) MUST be commented out.
		#
		tls = tls-common

		#  The tunneled EAP session needs a default EAP type
		#  which is separate from the one for the non-tunneled
		#  EAP module.  Inside of the TTLS tunnel, we recommend
		#  using EAP-MD5.  If the request does not contain an
		#  EAP conversation, then this configuration entry is
		#  ignored.
		#
		default_eap_type = md5

		#  The tunneled authentication request does not usually
		#  contain useful attributes like 'Calling-Station-Id',
		#  etc.  These attributes are outside of the tunnel,
		#  and normally unavailable to the tunneled
		#  authentication request.
		#
		#  By setting this configuration entry to 'yes',
		#  any attribute which is NOT in the tunneled
		#  authentication request, but which IS available
		#  outside of the tunnel, is copied to the tunneled
		#  request.
		#
		#  allowed values: {no, yes}
		#
		copy_request_to_tunnel = no

		#  This configuration item is deprecated.  Instead,
		#  you should use:
		#
		#    update outer.session-state {
		#      ...
		#    }
		#
		#  This will cache attributes for the final Access-Accept.
		#
		#  See "update outer.session-state" in the "post-auth"
		#  sections of sites-available/default, and of
		#  sites-available/inner-tunnel
		#
		#  The reply attributes sent to the NAS are usually
		#  based on the name of the user 'outside' of the
		#  tunnel (usually 'anonymous').  If you want to send
		#  the reply attributes based on the user name inside
		#  of the tunnel, then set this configuration entry to
		#  'yes', and the reply to the NAS will be taken from
		#  the reply to the tunneled request.
		#
		#  allowed values: {no, yes}
		#
		use_tunneled_reply = no

		#  The inner tunneled request can be sent
		#  through a virtual server constructed
		#  specifically for this purpose.
		#
		#  A virtual server MUST be specified.
		#
		virtual_server = "inner-tunnel"

		#  This has the same meaning, and overwrites, the
		#  same field in the "tls" configuration, above.
		#  The default value here is "yes".
		#
	#	include_length = yes

		#  Unlike EAP-TLS, EAP-TTLS does not require a client
		#  certificate. However, you can require one by setting the
		#  following option. You can also override this option by
		#  setting
		#
		#    EAP-TLS-Require-Client-Cert = Yes
		#
		#  in the control items for a request.
		#
		#  Note that the majority of supplicants do not support using a
		#  client certificate with EAP-TTLS, so this option is unlikely
		#  to be usable for most people.
		#
	#	require_client_cert = yes
	}


	#  EAP-PEAP
	#

	##################################################
	#
	#  !!!!! WARNINGS for Windows compatibility  !!!!!
	#
	##################################################
	#
	#  If you see the server send an Access-Challenge,
	#  and the client never sends another Access-Request,
	#  then
	#
	#		STOP!
	#
	#  The server certificate has to have special OID's
	#  in it, or else the Microsoft clients will silently
	#  fail.  See the "scripts/xpextensions" file for
	#  details, and the following page:
	#
	#	https://support.microsoft.com/en-us/help/814394/
	#
	#  If is still doesn't work, and you're using Samba,
	#  you may be encountering a Samba bug.  See:
	#
	#	https://bugzilla.samba.org/show_bug.cgi?id=6563
	#
	#  Note that we do not necessarily agree with their
	#  explanation... but the fix does appear to work.
	#
	##################################################

	#  The tunneled EAP session needs a default EAP type
	#  which is separate from the one for the non-tunneled
	#  EAP module.  Inside of the TLS/PEAP tunnel, we
	#  recommend using EAP-MS-CHAPv2.
	#
	peap {
		#  Which tls-config section the TLS negotiation parameters
		#  are in - see EAP-TLS above for an explanation.
		#
		#  In the case that an old configuration from FreeRADIUS
		#  v2.x is being used, all the options of the tls-config
		#  section may also appear instead in the 'tls' section
		#  above. If that is done, the tls= option here (and in
		#  tls above) MUST be commented out.
		#
		tls = tls-common

		#  The tunneled EAP session needs a default
		#  EAP type which is separate from the one for
		#  the non-tunneled EAP module.  Inside of the
		#  PEAP tunnel, we recommend using MS-CHAPv2,
		#  as that is the default type supported by
		#  Windows clients.
		#
		default_eap_type = mschapv2

		#  The PEAP module also has these configuration
		#  items, which are the same as for TTLS.
		#
		copy_request_to_tunnel = no

		#  This configuration item is deprecated.  Instead,
		#  you should use:
		#
		#    update outer.session-state {
		#      ...
		#    }
		#
		#  This will cache attributes for the final Access-Accept.
		#
		#  See "update outer.session-state" in the "post-auth"
		#  sections of sites-available/default, and of
		#  sites-available/inner-tunnel
		#
		use_tunneled_reply = no

		#  When the tunneled session is proxied, the
		#  home server may not understand EAP-MSCHAP-V2.
		#  Set this entry to "no" to proxy the tunneled
		#  EAP-MSCHAP-V2 as normal MSCHAPv2.
		#
		#  This setting can be over-ridden on a packet by
		#  packet basis by setting
		#
		#	&control:Proxy-Tunneled-Request-As-EAP = yes
		#
	#	proxy_tunneled_request_as_eap = yes

		#  The inner tunneled request can be sent
		#  through a virtual server constructed
		#  specifically for this purpose.
		#
		#  A virtual server MUST be specified.
		#
		virtual_server = "inner-tunnel"

		#  This option enables support for MS-SoH
		#  see doc/SoH.txt for more info.
		#  It is disabled by default.
		#
	#	soh = yes

		#  The SoH reply will be turned into a request which
		#  can be sent to a specific virtual server:
		#
	#	soh_virtual_server = "soh-server"

		#  Unlike EAP-TLS, PEAP does not require a client certificate.
		#  However, you can require one by setting the following
		#  option. You can also override this option by setting
		#
		#    EAP-TLS-Require-Client-Cert = Yes
		#
		#  in the control items for a request.
		#
		#  Note that the majority of supplicants do not support using a
		#  client certificate with PEAP, so this option is unlikely to
		#  be usable for most people.
		#
	#	require_client_cert = yes
	}


	#  EAP-MSCHAPv2
	#
	#  Note that it is the EAP MS-CHAPv2 sub-module, not
	#  the main 'mschap' module.
	#
	#  Note also that in order for this sub-module to work,
	#  the main 'mschap' module MUST ALSO be configured.
	#
	#  This module is the *Microsoft* implementation of MS-CHAPv2
	#  in EAP.  There is another (incompatible) implementation
	#  of MS-CHAPv2 in EAP by Cisco, which FreeRADIUS does not
	#  currently support.
	#
	mschapv2 {
		#  In earlier versions of the server, this module
		#  never sent the MS-CHAP-Error message to the client.
		#  This worked, but it had issues when the cached
		#  password was wrong.  The server *should* send
		#  "E=691 R=0" to the client, which tells it to prompt
		#  the user for a new password.
		#
		#  The default is to use that functionality.  which is
		#  known to work.  If you set "send_error = yes", then
		#  the error message will be sent back to the client.
		#  This *may* help some clients work better, but *may*
		#  also cause other clients to stop working.
		#
	#	send_error = no

		#  Server identifier to send back in the challenge.
		#  This should generally be the host name of the
		#  RADIUS server.  Or, some information to uniquely
		#  identify it.
		#
	#	identity = "FreeRADIUS"
	}


	#  EAP-FAST
	#
	#  The FAST module implements the EAP-FAST protocol
	#
	#fast {
		#  Point to the common TLS configuration
		#
	#	tls = tls-common

		#  If 'cipher_list' is set here, it will over-ride the
		#  'cipher_list' configuration from the 'tls-common'
		#  configuration.  The EAP-FAST module has it's own
		#  over-ride for 'cipher_list' because the
		#  specifications mandata a different set of ciphers
		#  than are used by the other EAP methods.
		#
		#  cipher_list though must include "ADH" for anonymous provisioning.
		#  This is not as straight forward as appending "ADH" alongside
		#  "DEFAULT" as "DEFAULT" contains "!aNULL" so instead it is
		#  recommended "ALL:!EXPORT:!eNULL:!SSLv2" is used
		#
	#	cipher_list = "ALL:!EXPORT:!eNULL:!SSLv2"

		#  PAC lifetime in seconds (default: seven days)
		#
	#	pac_lifetime = 604800

		#  Authority ID of the server
		#
		#  If you are running a cluster of RADIUS servers, you should make
		#  the value chosen here (and for "pac_opaque_key") the same on all
		#  your RADIUS servers.  This value should be unique to your
		#  installation.  We suggest using a domain name.
		#
	#	authority_identity = "1234"

		#  PAC Opaque encryption key (must be exactly 32 bytes in size)
		#
		#  This value MUST be secret, and MUST be generated using
		#  a secure method, such as via 'openssl rand -hex 32'
		#
	#	pac_opaque_key = "0123456789abcdef0123456789ABCDEF"

		#  Same as for TTLS, PEAP, etc.
		#
	#	virtual_server = inner-tunnel
	#}
}
fichier radiusd.conf :

## radiusd.conf	-- FreeRADIUS server configuration file - 3.0.26
##
##	http://www.freeradius.org/
##	$Id$
##

######################################################################
#
#	The format of this (and other) configuration file is
#	documented in "man unlang".  There are also READMEs in many
#	subdirectories:
#
#	  raddb/README.rst
#		How to upgrade from v2.
#
#	  raddb/mods-available/README.rst
#		How to use mods-available / mods-enabled.
#		All of the modules are in individual files,
#		along with configuration items and full documentation.
#
#	  raddb/sites-available/README
#		virtual servers, "listen" sections, clients, etc.
#		The "sites-available" directory contains many
#		worked examples of common configurations.
#
#	  raddb/certs/README.md
#		How to create certificates for EAP or RadSec.
#
#	Every configuration item in the server is documented
#	extensively in the comments in the example configuration
#	files.
#
#	Before editing this (or any other) configuration file, PLEASE
#	read "man radiusd".  See the section titled DEBUGGING.  It
#	outlines a method where you can quickly create the
#	configuration you want, with minimal effort.
#
#	Run the server in debugging mode, and READ the output.
#
#		$ radiusd -X
#
#	We cannot emphasize this point strongly enough.  The vast
#	majority of problems can be solved by carefully reading the
#	debugging output, which includes warnings about common issues,
#	and suggestions for how they may be fixed.
#
#	There may be a lot of output, but look carefully for words like:
#	"warning", "error", "reject", or "failure".  The messages there
#	will usually be enough to guide you to a solution.
#
#	More documentation on "radiusd -X" is available on the wiki:
#		https://wiki.freeradius.org/radiusd-X
#
#	If you are going to ask a question on the mailing list, then
#	explain what you are trying to do, and include the output from
#	debugging mode (radiusd -X).  Failure to do so means that all
#	of the responses to your question will be people telling you
#	to "post the output of radiusd -X".
#
#	Guidelines for posting to the mailing list are on the wiki:
#		https://wiki.freeradius.org/list-help
#
#	Please read those guidelines before posting to the list.
#
#	Further documentation is available in the "doc" directory
#	of the server distribution, or on the wiki at:
#		https://wiki.freeradius.org/
#
#	New users to RADIUS should read the Technical Guide.  That guide
#	explains how RADIUS works, how FreeRADIUS works, and what each
#	part of a RADIUS system does.  It is not just "configure FreeRADIUS"!
#		https://networkradius.com/doc/FreeRADIUS-Technical-Guide.pdf
#
#	More documentation on dictionaries, modules, unlang, etc. is also
#	available on the Network RADIUS web site:
#		https://networkradius.com/freeradius-documentation/
#

######################################################################

prefix = /usr
exec_prefix = /usr
sysconfdir = /etc
localstatedir = /var
sbindir = ${exec_prefix}/sbin
logdir = /var/log/freeradius
raddbdir = /etc/freeradius/vlan3
radacctdir = ${logdir}/radacct

#
#  name of the running server.  See also the "-n" command-line option.
name = freeradius-vlan3

#  Location of config and logfiles.
confdir = ${raddbdir}
modconfdir = ${confdir}/mods-config
certdir = ${confdir}/certs
cadir   = ${confdir}/certs
run_dir = ${localstatedir}/run/${name}

# Should likely be ${localstatedir}/lib/radiusd
db_dir = ${raddbdir}

#
# libdir: Where to find the rlm_* modules.
#
#   This should be automatically set at configuration time.
#
#   If the server builds and installs, but fails at execution time
#   with an 'undefined symbol' error, then you can use the libdir
#   directive to work around the problem.
#
#   The cause is usually that a library has been installed on your
#   system in a place where the dynamic linker CANNOT find it.  When
#   executing as root (or another user), your personal environment MAY
#   be set up to allow the dynamic linker to find the library.  When
#   executing as a daemon, FreeRADIUS MAY NOT have the same
#   personalized configuration.
#
#   To work around the problem, find out which library contains that symbol,
#   and add the directory containing that library to the end of 'libdir',
#   with a colon separating the directory names.  NO spaces are allowed.
#
#   e.g. libdir = /usr/local/lib:/opt/package/lib
#
#   You can also try setting the LD_LIBRARY_PATH environment variable
#   in a script which starts the server.
#
#   If that does not work, then you can re-configure and re-build the
#   server to NOT use shared libraries, via:
#
#	./configure --disable-shared
#	make
#	make install
#
libdir = /usr/lib/freeradius

#  pidfile: Where to place the PID of the RADIUS server.
#
#  The server may be signalled while it's running by using this
#  file.
#
#  This file is written when ONLY running in daemon mode.
#
#  e.g.:  kill -HUP `cat /var/run/radiusd/radiusd.pid`
#
pidfile = ${run_dir}/${name}.pid

#
#  correct_escapes: use correct backslash escaping
#
#  Prior to version 3.0.5, the handling of backslashes was a little
#  awkward, i.e. "wrong".  In some cases, to get one backslash into
#  a regex, you had to put 4 in the config files.
#
#  Version 3.0.5 fixes that.  However, for backwards compatibility,
#  the new method of escaping is DISABLED BY DEFAULT.  This means
#  that upgrading to 3.0.5 won't break your configuration.
#
#  If you don't have double backslashes (i.e. \\) in your configuration,
#  this won't matter to you.  If you do have them, fix that to use only
#  one backslash, and then set "correct_escapes = true".
#
#  You can check for this by doing:
#
#	$ grep '\\\\' $(find raddb -type f -print)
#
correct_escapes = true

#  panic_action: Command to execute if the server dies unexpectedly.
#
#  FOR PRODUCTION SYSTEMS, ACTIONS SHOULD ALWAYS EXIT.
#  AN INTERACTIVE ACTION MEANS THE SERVER IS NOT RESPONDING TO REQUESTS.
#  AN INTERACTICE ACTION MEANS THE SERVER WILL NOT RESTART.
#
#  THE SERVER MUST NOT BE ALLOWED EXECUTE UNTRUSTED PANIC ACTION CODE
#  PATTACH CAN BE USED AS AN ATTACK VECTOR.
#
#  The panic action is a command which will be executed if the server
#  receives a fatal, non user generated signal, i.e. SIGSEGV, SIGBUS,
#  SIGABRT or SIGFPE.
#
#  This can be used to start an interactive debugging session so
#  that information regarding the current state of the server can
#  be acquired.
#
#  The following string substitutions are available:
#  - %e   The currently executing program e.g. /sbin/radiusd
#  - %p   The PID of the currently executing program e.g. 12345
#
#  Standard ${} substitutions are also allowed.
#
#  An example panic action for opening an interactive session in GDB would be:
#
#panic_action = "gdb %e %p"
#
#  Again, don't use that on a production system.
#
#  An example panic action for opening an automated session in GDB would be:
#
#panic_action = "gdb -silent -x ${raddbdir}/panic.gdb %e %p 2>&1 | tee ${logdir}/gdb-${name}-%p.log"
#
#  That command can be used on a production system.
#

#  max_request_time: The maximum time (in seconds) to handle a request.
#
#  Requests which take more time than this to process may be killed, and
#  a REJECT message is returned.
#
#  WARNING: If you notice that requests take a long time to be handled,
#  then this MAY INDICATE a bug in the server, in one of the modules
#  used to handle a request, OR in your local configuration.
#
#  This problem is most often seen when using an SQL database.  If it takes
#  more than a second or two to receive an answer from the SQL database,
#  then it probably means that you haven't indexed the database.  See your
#  SQL server documentation for more information.
#
#  Useful range of values: 5 to 120
#
max_request_time = 30

#  cleanup_delay: The time to wait (in seconds) before cleaning up
#  a reply which was sent to the NAS.
#
#  The RADIUS request is normally cached internally for a short period
#  of time, after the reply is sent to the NAS.  The reply packet may be
#  lost in the network, and the NAS will not see it.  The NAS will then
#  re-send the request, and the server will respond quickly with the
#  cached reply.
#
#  If this value is set too low, then duplicate requests from the NAS
#  MAY NOT be detected, and will instead be handled as separate requests.
#
#  If this value is set too high, then the server will cache too many
#  requests, and some new requests may get blocked.  (See 'max_requests'.)
#
#  Useful range of values: 2 to 30
#
cleanup_delay = 5

#  max_requests: The maximum number of requests which the server keeps
#  track of.  This should be 256 multiplied by the number of clients.
#  e.g. With 4 clients, this number should be 1024.
#
#  If this number is too low, then when the server becomes busy,
#  it will not respond to any new requests, until the 'cleanup_delay'
#  time has passed, and it has removed the old requests.
#
#  If this number is set too high, then the server will use a bit more
#  memory for no real benefit.
#
#  If you aren't sure what it should be set to, it's better to set it
#  too high than too low.  Setting it to 1000 per client is probably
#  the highest it should be.
#
#  Useful range of values: 256 to infinity
#
max_requests = 16384

#  hostname_lookups: Log the names of clients or just their IP addresses
#  e.g., www.freeradius.org (on) or 206.47.27.232 (off).
#
#  The default is 'off' because it would be overall better for the net
#  if people had to knowingly turn this feature on, since enabling it
#  means that each client request will result in AT LEAST one lookup
#  request to the nameserver.   Enabling hostname_lookups will also
#  mean that your server may stop randomly for 30 seconds from time
#  to time, if the DNS requests take too long.
#
#  Turning hostname lookups off also means that the server won't block
#  for 30 seconds, if it sees an IP address which has no name associated
#  with it.
#
#  allowed values: {no, yes}
#
hostname_lookups = no

#
#  Run a "Post-Auth-Type Client-Lost" section.  This ONLY happens when
#  the server sends an Access-Challenge, and then client does not
#  respond to it.  The goal is to allow administrators to log
#  something when the client does not respond.
#
#  See sites-available/default, "Post-Auth-Type Client-Lost" for more
#  information.
#
#postauth_client_lost = no

#
#  Logging section.  The various "log_*" configuration items
#  will eventually be moved here.
#
log {
	#
	#  Destination for log messages.  This can be one of:
	#
	#	files - log to "file", as defined below.
	#	syslog - to syslog (see also the "syslog_facility", below.
	#	stdout - standard output
	#	stderr - standard error.
	#
	#  The command-line option "-X" over-rides this option, and forces
	#  logging to go to stdout.
	#
	destination = files

	#
	#  Highlight important messages sent to stderr and stdout.
	#
	#  Option will be ignored (disabled) if output if TERM is not
	#  an xterm or output is not to a TTY.
	#
	colourise = yes

	#
	#  The logging messages for the server are appended to the
	#  tail of this file if destination == "files"
	#
	#  If the server is running in debugging mode, this file is
	#  NOT used.
	#
	file = ${logdir}/radius.log

	#
	#  Which syslog facility to use, if ${destination} == "syslog"
	#
	#  The exact values permitted here are OS-dependent.  You probably
	#  don't want to change this.
	#
	syslog_facility = daemon

	#  Log the full User-Name attribute, as it was found in the request.
	#
	# allowed values: {no, yes}
	#
	stripped_names = no

	#  Log all (accept and reject) authentication results to the log file.
	#
	#  This is the same as setting "auth_accept = yes" and
	#  "auth_reject = yes"
	#
	#  allowed values: {no, yes}
	#
	auth = no

	#  Log Access-Accept results to the log file.
	#
	#  This is only used if "auth = no"
	#
	#  allowed values: {no, yes}
	#
#	auth_accept = no

	#  Log Access-Reject results to the log file.
	#
	#  This is only used if "auth = no"
	#
	#  allowed values: {no, yes}
	#
#	auth_reject = no

	#  Log passwords with the authentication requests.
	#  auth_badpass  - logs password if it's rejected
	#  auth_goodpass - logs password if it's correct
	#
	#  allowed values: {no, yes}
	#
	auth_badpass = no
	auth_goodpass = no

	#  Log additional text at the end of the "Login OK" messages.
	#  for these to work, the "auth" and "auth_goodpass" or "auth_badpass"
	#  configurations above have to be set to "yes".
	#
	#  The strings below are dynamically expanded, which means that
	#  you can put anything you want in them.  However, note that
	#  this expansion can be slow, and can negatively impact server
	#  performance.
	#
#	msg_goodpass = ""
#	msg_badpass = ""

	#  The message when the user exceeds the Simultaneous-Use limit.
	#
	msg_denied = "You are already logged in - access denied"

	#  Suppress "secret" attributes when printing them in debug mode.
	#
	#  Secrets are NOT tracked across xlat expansions.  If your
	#  configuration puts secrets into other strings, they will
	#  still get printed.
	#
	#  Setting this to "yes" means that the server prints
	#
	#	<<< secret >>>
	#
	#  instead of the value, for attriburtes which contain secret
	#  information.  e.g. User-Name, Tunnel-Password, etc.
	#
	#  This configuration is disabled by default.  It is extremely
	#  important for administrators to be able to debug user logins
	#  by seeing what is actually being sent.
	#
#	suppress_secrets = no
}

#  The program to execute to do concurrency checks.
checkrad = ${sbindir}/checkrad

#
#  ENVIRONMENT VARIABLES
#
#  You can reference environment variables using an expansion like
#  `$ENV{PATH}`.  However it is sometimes useful to be able to also set
#  environment variables.  This section lets you do that.
#
#  The main purpose of this section is to allow administrators to keep
#  RADIUS-specific configuration in the RADIUS configuration files.
#  For example, if you need to set an environment variable which is
#  used by a module.  You could put that variable into a shell script,
#  but that's awkward.  Instead, just list it here.
#
#  Note that these environment variables are set AFTER the
#  configuration file is loaded.  So you cannot set FOO here, and
#  expect to reference it via `$ENV{FOO}` in another configuration file.
#  You should instead just use a normal configuration variable for
#  that.
#
ENV {
	#
	#  Set environment varable `FOO` to value '/bar/baz'.
	#
	#  NOTE: Note that you MUST use '='.  You CANNOT use '+=' to append
	#  values.
	#
#	FOO = '/bar/baz'

	#
	#  Delete environment variable `BAR`.
	#
#	BAR

	#
	#  `LD_PRELOAD` is special.  It is normally set before the
	#  application runs, and is interpreted by the dynamic linker.
	#  Which means you cannot set it inside of an application, and
	#  expect it to load libraries.
	#
	#  Since this functionality is useful, we extend it here.
	#
	#  You can set
	#
	#  LD_PRELOAD = /path/to/library.so
	#
	#  and the server will load the named libraries.  Multiple
	#  libraries can be loaded by specificing multiple individual
	#  `LD_PRELOAD` entries.
	#
	#
#	LD_PRELOAD = /path/to/library1.so
#	LD_PRELOAD = /path/to/library2.so
}

# SECURITY CONFIGURATION
#
#  There may be multiple methods of attacking on the server.  This
#  section holds the configuration items which minimize the impact
#  of those attacks
#
security {
	#  chroot: directory where the server does "chroot".
	#
	#  The chroot is done very early in the process of starting
	#  the server.  After the chroot has been performed it
	#  switches to the "user" listed below (which MUST be
	#  specified).  If "group" is specified, it switches to that
	#  group, too.  Any other groups listed for the specified
	#  "user" in "/etc/group" are also added as part of this
	#  process.
	#
	#  The current working directory (chdir / cd) is left
	#  *outside* of the chroot until all of the modules have been
	#  initialized.  This allows the "raddb" directory to be left
	#  outside of the chroot.  Once the modules have been
	#  initialized, it does a "chdir" to ${logdir}.  This means
	#  that it should be impossible to break out of the chroot.
	#
	#  If you are worried about security issues related to this
	#  use of chdir, then simply ensure that the "raddb" directory
	#  is inside of the chroot, end be sure to do "cd raddb"
	#  BEFORE starting the server.
	#
	#  If the server is statically linked, then the only files
	#  that have to exist in the chroot are ${run_dir} and
	#  ${logdir}.  If you do the "cd raddb" as discussed above,
	#  then the "raddb" directory has to be inside of the chroot
	#  directory, too.
	#
#	chroot = /path/to/chroot/directory

	# user/group: The name (or #number) of the user/group to run radiusd as.
	#
	#   If these are commented out, the server will run as the
	#   user/group that started it.  In order to change to a
	#   different user/group, you MUST be root ( or have root
	#   privileges ) to start the server.
	#
	#   We STRONGLY recommend that you run the server with as few
	#   permissions as possible.  That is, if you're not using
	#   shadow passwords, the user and group items below should be
	#   set to radius'.
	#
	#  NOTE that some kernels refuse to setgid(group) when the
	#  value of (unsigned)group is above 60000; don't use group
	#  "nobody" on these systems!
	#
	#  On systems with shadow passwords, you might have to set
	#  'group = shadow' for the server to be able to read the
	#  shadow password file.  If you can authenticate users while
	#  in debug mode, but not in daemon mode, it may be that the
	#  debugging mode server is running as a user that can read
	#  the shadow info, and the user listed below can not.
	#
	#  The server will also try to use "initgroups" to read
	#  /etc/groups.  It will join all groups where "user" is a
	#  member.  This can allow for some finer-grained access
	#  controls.
	#
	user = freerad
	group = freerad

	#  Core dumps are a bad thing.  This should only be set to
	#  'yes' if you're debugging a problem with the server.
	#
	#  allowed values: {no, yes}
	#
	allow_core_dumps = no

	#
	#  max_attributes: The maximum number of attributes
	#  permitted in a RADIUS packet.  Packets which have MORE
	#  than this number of attributes in them will be dropped.
	#
	#  If this number is set too low, then no RADIUS packets
	#  will be accepted.
	#
	#  If this number is set too high, then an attacker may be
	#  able to send a small number of packets which will cause
	#  the server to use all available memory on the machine.
	#
	#  Setting this number to 0 means "allow any number of attributes"
	max_attributes = 200

	#
	#  reject_delay: When sending an Access-Reject, it can be
	#  delayed for a few seconds.  This may help slow down a DoS
	#  attack.  It also helps to slow down people trying to brute-force
	#  crack a users password.
	#
	#  Setting this number to 0 means "send rejects immediately"
	#
	#  If this number is set higher than 'cleanup_delay', then the
	#  rejects will be sent at 'cleanup_delay' time, when the request
	#  is deleted from the internal cache of requests.
	#
	#  This number can be a decimal, e.g. 3.4
	#
	#  Useful ranges: 1 to 5
	reject_delay = 1

	#
	#  status_server: Whether or not the server will respond
	#  to Status-Server requests.
	#
	#  When sent a Status-Server message, the server responds with
	#  an Access-Accept or Accounting-Response packet.
	#
	#  This is mainly useful for administrators who want to "ping"
	#  the server, without adding test users, or creating fake
	#  accounting packets.
	#
	#  It's also useful when a NAS marks a RADIUS server "dead".
	#  The NAS can periodically "ping" the server with a Status-Server
	#  packet.  If the server responds, it must be alive, and the
	#  NAS can start using it for real requests.
	#
	#  See also raddb/sites-available/status
	#
	status_server = yes


}

# PROXY CONFIGURATION
#
#  proxy_requests: Turns proxying of RADIUS requests on or off.
#
#  The server has proxying turned on by default.  If your system is NOT
#  set up to proxy requests to another server, then you can turn proxying
#  off here.  This will save a small amount of resources on the server.
#
#  If you have proxying turned off, and your configuration files say
#  to proxy a request, then an error message will be logged.
#
#  To disable proxying, change the "yes" to "no", and comment the
#  $INCLUDE line.
#
#  allowed values: {no, yes}
#
proxy_requests  = yes
$INCLUDE proxy.conf


# CLIENTS CONFIGURATION
#
#  Client configuration is defined in "clients.conf".
#

#  The 'clients.conf' file contains all of the information from the old
#  'clients' and 'naslist' configuration files.  We recommend that you
#  do NOT use 'client's or 'naslist', although they are still
#  supported.
#
#  Anything listed in 'clients.conf' will take precedence over the
#  information from the old-style configuration files.
#
$INCLUDE clients.conf


# THREAD POOL CONFIGURATION
#
#  The thread pool is a long-lived group of threads which
#  take turns (round-robin) handling any incoming requests.
#
#  You probably want to have a few spare threads around,
#  so that high-load situations can be handled immediately.  If you
#  don't have any spare threads, then the request handling will
#  be delayed while a new thread is created, and added to the pool.
#
#  You probably don't want too many spare threads around,
#  otherwise they'll be sitting there taking up resources, and
#  not doing anything productive.
#
#  The numbers given below should be adequate for most situations.
#
thread pool {
	#  Number of servers to start initially --- should be a reasonable
	#  ballpark figure.
	start_servers = 5

	#  Limit on the total number of servers running.
	#
	#  If this limit is ever reached, clients will be LOCKED OUT, so it
	#  should NOT BE SET TOO LOW.  It is intended mainly as a brake to
	#  keep a runaway server from taking the system with it as it spirals
	#  down...
	#
	#  You may find that the server is regularly reaching the
	#  'max_servers' number of threads, and that increasing
	#  'max_servers' doesn't seem to make much difference.
	#
	#  If this is the case, then the problem is MOST LIKELY that
	#  your back-end databases are taking too long to respond, and
	#  are preventing the server from responding in a timely manner.
	#
	#  The solution is NOT do keep increasing the 'max_servers'
	#  value, but instead to fix the underlying cause of the
	#  problem: slow database, or 'hostname_lookups=yes'.
	#
	#  For more information, see 'max_request_time', above.
	#
	max_servers = 32

	#  Server-pool size regulation.  Rather than making you guess
	#  how many servers you need, FreeRADIUS dynamically adapts to
	#  the load it sees, that is, it tries to maintain enough
	#  servers to handle the current load, plus a few spare
	#  servers to handle transient load spikes.
	#
	#  It does this by periodically checking how many servers are
	#  waiting for a request.  If there are fewer than
	#  min_spare_servers, it creates a new spare.  If there are
	#  more than max_spare_servers, some of the spares die off.
	#  The default values are probably OK for most sites.
	#
	min_spare_servers = 3
	max_spare_servers = 10

	#  When the server receives a packet, it places it onto an
	#  internal queue, where the worker threads (configured above)
	#  pick it up for processing.  The maximum size of that queue
	#  is given here.
	#
	#  When the queue is full, any new packets will be silently
	#  discarded.
	#
	#  The most common cause of the queue being full is that the
	#  server is dependent on a slow database, and it has received
	#  a large "spike" of traffic.  When that happens, there is
	#  very little you can do other than make sure the server
	#  receives less traffic, or make sure that the database can
	#  handle the load.
	#
#	max_queue_size = 65536

	#  Clean up old threads periodically.  For no reason other than
	#  it might be useful.
	#
	#  '0' is a special value meaning 'infinity', or 'the servers never
	#  exit'
	max_requests_per_server = 0

	#  Automatically limit the number of accounting requests.
	#  This configuration item tracks how many requests per second
	#  the server can handle.  It does this by tracking the
	#  packets/s received by the server for processing, and
	#  comparing that to the packets/s handled by the child
	#  threads.
	#

	#  If the received PPS is larger than the processed PPS, *and*
	#  the queue is more than half full, then new accounting
	#  requests are probabilistically discarded.  This lowers the
	#  number of packets that the server needs to process.  Over
	#  time, the server will "catch up" with the traffic.
	#
	#  Throwing away accounting packets is usually safe and low
	#  impact.  The NAS will retransmit them in a few seconds, or
	#  even a few minutes.  Vendors should read RFC 5080 Section 2.2.1
	#  to see how accounting packets should be retransmitted.  Using
	#  any other method is likely to cause network meltdowns.
	#
	auto_limit_acct = no
}

######################################################################
#
#  SNMP notifications.  Uncomment the following line to enable
#  snmptraps.  Note that you MUST also configure the full path
#  to the "snmptrap" command in the "trigger.conf" file.
#
#$INCLUDE trigger.conf

# MODULE CONFIGURATION
#
#  The names and configuration of each module is located in this section.
#
#  After the modules are defined here, they may be referred to by name,
#  in other sections of this configuration file.
#
modules {
	#
	#  Each module has a configuration as follows:
	#
	#	name [ instance ] {
	#		config_item = value
	#		...
	#	}
	#
	#  The 'name' is used to load the 'rlm_name' library
	#  which implements the functionality of the module.
	#
	#  The 'instance' is optional.  To have two different instances
	#  of a module, it first must be referred to by 'name'.
	#  The different copies of the module are then created by
	#  inventing two 'instance' names, e.g. 'instance1' and 'instance2'
	#
	#  The instance names can then be used in later configuration
	#  INSTEAD of the original 'name'.  See the 'radutmp' configuration
	#  for an example.
	#

	#
	#  Some modules have ordering issues.  e.g. "sqlippool" uses
	#  the configuration from "sql".  In that case, the "sql"
	#  module must be read off of disk before the "sqlippool".
	#  However, the directory inclusion below just reads the
	#  directory from start to finish.  Which means that the
	#  modules are read off of disk randomly.
	#
	#  You can list individual modules *before* the directory
	#  inclusion.  Those modules will be loaded first.  Then, when
	#  the directory is read, those modules will be skipped and
	#  not read twice.
	#
#	$INCLUDE mods-enabled/sql

	#
	#  All modules are in ther mods-enabled/ directory.  Files
	#  matching the regex /[a-zA-Z0-9_.]+/ are read.  The
	#  modules are initialized ONLY if they are referenced in a
	#  processing section, such as authorize, authenticate,
	#  accounting, pre/post-proxy, etc.
	#
	$INCLUDE mods-enabled/
}

# Instantiation
#
#  This section sets the instantiation order of the modules.  listed
#  here will get started up BEFORE the sections like authorize,
#  authenticate, etc. get examined.
#
#  This section is not strictly needed.  When a section like authorize
#  refers to a module, the module is automatically loaded and
#  initialized.  However, some modules may not be listed in any of the
#  processing sections, so they should be listed here.
#
#  Also, listing modules here ensures that you have control over
#  the order in which they are initialized.  If one module needs
#  something defined by another module, you can list them in order
#  here, and ensure that the configuration will be OK.
#
#  After the modules listed here have been loaded, all of the modules
#  in the "mods-enabled" directory will be loaded.  Loading the
#  "mods-enabled" directory means that unlike Version 2, you usually
#  don't need to list modules here.
#
instantiate {
	#
	# We list the counter module here so that it registers
	# the check_name attribute before any module which sets
	# it
#	daily

	# subsections here can be thought of as "virtual" modules.
	#
	# e.g. If you have two redundant SQL servers, and you want to
	# use them in the authorize and accounting sections, you could
	# place a "redundant" block in each section, containing the
	# exact same text.  Or, you could uncomment the following
	# lines, and list "redundant_sql" in the authorize and
	# accounting sections.
	#
	#  The "virtual" module defined here can also be used with
	#  dynamic expansions, under a few conditions:
	#
	#  * The section is "redundant", or "load-balance", or
	#    "redundant-load-balance"
	#  * The section contains modules ONLY, and no sub-sections
	#  * all modules in the section are using the same rlm_
	#    driver, e.g. They are all sql, or all ldap, etc.
	#
	#  When those conditions are satisfied, the server will
	#  automatically register a dynamic expansion, using the
	#  name of the "virtual" module.  In the example below,
	#  it will be "redundant_sql".  You can then use this expansion
	#  just like any other:
	#
	#	update reply {
	#		Filter-Id := "%{redundant_sql: ... }"
	#	}
	#
	#  In this example, the expansion is done via module "sql1",
	#  and if that expansion fails, using module "sql2".
	#
	#  For best results, configure the "pool" subsection of the
	#  module so that "retry_delay" is non-zero.  That will allow
	#  the redundant block to quickly ignore all "down" SQL
	#  databases.  If instead we have "retry_delay = 0", then
	#  every time the redundant block is used, the server will try
	#  to open a connection to every "down" database, causing
	#  problems.
	#
	#redundant redundant_sql {
	#	sql1
	#	sql2
	#}
}

######################################################################
#
#  Policies are virtual modules, similar to those defined in the
#  "instantiate" section above.
#
#  Defining a policy in one of the policy.d files means that it can be
#  referenced in multiple places as a *name*, rather than as a series of
#  conditions to match, and actions to take.
#
#  Policies are something like subroutines in a normal language, but
#  they cannot be called recursively. They MUST be defined in order.
#  If policy A calls policy B, then B MUST be defined before A.
#
######################################################################
policy {
	$INCLUDE policy.d/
}

######################################################################
#
#	Load virtual servers.
#
#	This next $INCLUDE line loads files in the directory that
#	match the regular expression: /[a-zA-Z0-9_.]+/
#
#	It allows you to define new virtual servers simply by placing
#	a file into the raddb/sites-enabled/ directory.
#
$INCLUDE sites-enabled/

######################################################################
#
#	All of the other configuration sections like "authorize {}",
#	"authenticate {}", "accounting {}", have been moved to the
#	the file:
#
#		raddb/sites-available/default
#
#	This is the "default" virtual server that has the same
#	configuration as in version 1.0.x and 1.1.x.  The default
#	installation enables this virtual server.  You should
#	edit it to create policies for your local site.
#
#	For more documentation on virtual servers, see:
#
#		raddb/sites-available/README
#
######################################################################
Fichier sites-enabled/default:

######################################################################
#
#	As of 2.0.0, FreeRADIUS supports virtual hosts using the
#	"server" section, and configuration directives.
#
#	Virtual hosts should be put into the "sites-available"
#	directory.  Soft links should be created in the "sites-enabled"
#	directory to these files.  This is done in a normal installation.
#
#	If you are using 802.1X (EAP) authentication, please see also
#	the "inner-tunnel" virtual server.  You will likely have to edit
#	that, too, for authentication to work.
#
#	$Id$
#
######################################################################
#
#	Read "man radiusd" before editing this file.  See the section
#	titled DEBUGGING.  It outlines a method where you can quickly
#	obtain the configuration you want, without running into
#	trouble.  See also "man unlang", which documents the format
#	of this file.
#
#	This configuration is designed to work in the widest possible
#	set of circumstances, with the widest possible number of
#	authentication methods.  This means that in general, you should
#	need to make very few changes to this file.
#
#	The best way to configure the server for your local system
#	is to CAREFULLY edit this file.  Most attempts to make large
#	edits to this file will BREAK THE SERVER.  Any edits should
#	be small, and tested by running the server with "radiusd -X".
#	Once the edits have been verified to work, save a copy of these
#	configuration files somewhere.  (e.g. as a "tar" file).  Then,
#	make more edits, and test, as above.
#
#	There are many "commented out" references to modules such
#	as ldap, sql, etc.  These references serve as place-holders.
#	If you need the functionality of that module, then configure
#	it in radiusd.conf, and un-comment the references to it in
#	this file.  In most cases, those small changes will result
#	in the server being able to connect to the DB, and to
#	authenticate users.
#
######################################################################

server default {
#
#  If you want the server to listen on additional addresses, or on
#  additional ports, you can use multiple "listen" sections.
#
#  Each section make the server listen for only one type of packet,
#  therefore authentication and accounting have to be configured in
#  different sections.
#
#  The server ignore all "listen" section if you are using '-i' and '-p'
#  on the command line.
#
listen {
	#  Type of packets to listen for.
	#  Allowed values are:
	#	auth	listen for authentication packets
	#	acct	listen for accounting packets
	#       auth+acct listen for both authentication and accounting packets
	#	proxy   IP to use for sending proxied packets
	#	detail  Read from the detail file.  For examples, see
	#               raddb/sites-available/copy-acct-to-home-server
	#	status  listen for Status-Server packets.  For examples,
	#		see raddb/sites-available/status
	#	coa     listen for CoA-Request and Disconnect-Request
	#		packets.  For examples, see the file
	#		raddb/sites-available/coa
	#
	type = auth

	#  Note: "type = proxy" lets you control the source IP used for
	#        proxying packets, with some limitations:
	#
	#    * A proxy listener CANNOT be used in a virtual server section.
	#    * You should probably set "port = 0".
	#    * Any "clients" configuration will be ignored.
	#
	#  See also proxy.conf, and the "src_ipaddr" configuration entry
	#  in the sample "home_server" section.  When you specify the
	#  source IP address for packets sent to a home server, the
	#  proxy listeners are automatically created.

	#  ipaddr/ipv4addr/ipv6addr - IP address on which to listen.
	#  If multiple ones are listed, only the first one will
	#  be used, and the others will be ignored.
	#
	#  The configuration options accept the following syntax:
	#
	#  ipv4addr - IPv4 address (e.g.192.0.2.3)
	#  	    - wildcard (i.e. *)
	#  	    - hostname (radius.example.com)
	#  	      Only the A record for the host name is used.
	#	      If there is no A record, an error is returned,
	#	      and the server fails to start.
	#
	#  ipv6addr - IPv6 address (e.g. 2001:db8::1)
	#  	    - wildcard (i.e. *)
	#  	    - hostname (radius.example.com)
	#  	      Only the AAAA record for the host name is used.
	#	      If there is no AAAA record, an error is returned,
	#	      and the server fails to start.
	#
	#  ipaddr   - IPv4 address as above
	#  	    - IPv6 address as above
	#  	    - wildcard (i.e. *), which means IPv4 wildcard.
	#	    - hostname
	#	      If there is only one A or AAAA record returned
	#	      for the host name, it is used.
	#	      If multiple A or AAAA records are returned
	#	      for the host name, only the first one is used.
	#	      If both A and AAAA records are returned
	#	      for the host name, only the A record is used.
	#
	# ipv4addr = *
	# ipv6addr = *
	ipaddr = 192.168.2.1

	#  Port on which to listen.
	#  Allowed values are:
	#	integer port number (1812)
	#	0 means "use /etc/services for the proper port"
	port = 2020

	#  Some systems support binding to an interface, in addition
	#  to the IP address.  This feature isn't strictly necessary,
	#  but for sites with many IP addresses on one interface,
	#  it's useful to say "listen on all addresses for eth0".
	#
	#  If your system does not support this feature, you will
	#  get an error if you try to use it.
	#
#	interface = eth0

	#  Per-socket lists of clients.  This is a very useful feature.
	#
	#  The name here is a reference to a section elsewhere in
	#  radiusd.conf, or clients.conf.  Having the name as
	#  a reference allows multiple sockets to use the same
	#  set of clients.
	#
	#  If this configuration is used, then the global list of clients
	#  is IGNORED for this "listen" section.  Take care configuring
	#  this feature, to ensure you don't accidentally disable a
	#  client you need.
	#
	#  See clients.conf for the configuration of "per_socket_clients".
	#
#	clients = per_socket_clients

	#
	#  Set the default UDP receive buffer size.  In most cases,
	#  the default values set by the kernel are fine.  However, in
	#  some cases the NASes will send large packets, and many of
	#  them at a time.  It is then possible to overflow the
	#  buffer, causing the kernel to drop packets before they
	#  reach FreeRADIUS.  Increasing the size of the buffer will
	#  avoid these packet drops.
	#
#	recv_buff = 65536

	#
	#  Connection limiting for sockets with "proto = tcp".
	#
	#  This section is ignored for other kinds of sockets.
	#
	limit {
	      #
	      #  Limit the number of simultaneous TCP connections to the socket
	      #
	      #  The default is 16.
	      #  Setting this to 0 means "no limit"
	      max_connections = 16

	      #  The per-socket "max_requests" option does not exist.

	      #
	      #  The lifetime, in seconds, of a TCP connection.  After
	      #  this lifetime, the connection will be closed.
	      #
	      #  Setting this to 0 means "forever".
	      lifetime = 0

	      #
	      #  The idle timeout, in seconds, of a TCP connection.
	      #  If no packets have been received over the connection for
	      #  this time, the connection will be closed.
	      #
	      #  Setting this to 0 means "no timeout".
	      #
	      #  We STRONGLY RECOMMEND that you set an idle timeout.
	      #
	      idle_timeout = 30
	}
}

#
#  This second "listen" section is for listening on the accounting
#  port, too.
#
listen {
	ipaddr = 192.168.2.1
#	ipv6addr = ::
	port = 2021
	type = acct
#	interface = eth0
#	clients = per_socket_clients

	limit {
		#  The number of packets received can be rate limited via the
		#  "max_pps" configuration item.  When it is set, the server
		#  tracks the total number of packets received in the previous
		#  second.  If the count is greater than "max_pps", then the
		#  new packet is silently discarded.  This helps the server
		#  deal with overload situations.
		#
		#  The packets/s counter is tracked in a sliding window.  This
		#  means that the pps calculation is done for the second
		#  before the current packet was received.  NOT for the current
		#  wall-clock second, and NOT for the previous wall-clock second.
		#
		#  Useful values are 0 (no limit), or 100 to 10000.
		#  Values lower than 100 will likely cause the server to ignore
		#  normal traffic.  Few systems are capable of handling more than
		#  10K packets/s.
		#
		#  It is most useful for accounting systems.  Set it to 50%
		#  more than the normal accounting load, and you can be sure that
		#  the server will never get overloaded
		#
#		max_pps = 0

		# Only for "proto = tcp". These are ignored for "udp" sockets.
		#
#		idle_timeout = 0
#		lifetime = 0
#		max_connections = 0
	}
}

# IPv6 versions of the above - read their full config to understand options
#listen {
#	type = auth
#	ipv6addr = ::	# any.  ::1 == localhost
#	port = 0
#	interface = eth0
#	clients = per_socket_clients
#	limit {
#	      max_connections = 16
#	      lifetime = 0
#	      idle_timeout = 30
#	}
#}

#listen {
#	ipv6addr = ::
#	port = 0
#	type = acct
#	interface = eth0
#	clients = per_socket_clients

#	limit {
#		max_pps = 0
#		idle_timeout = 0
#		lifetime = 0
#		max_connections = 0
#	}
#}

#  Authorization. First preprocess (hints and huntgroups files),
#  then realms, and finally look in the "users" file.
#
#  Any changes made here should also be made to the "inner-tunnel"
#  virtual server.
#
#  The order of the realm modules will determine the order that
#  we try to find a matching realm.
#
#  Make *sure* that 'preprocess' comes before any realm if you
#  need to setup hints for the remote radius server
authorize {
	#
	#  Take a User-Name, and perform some checks on it, for spaces and other
	#  invalid characters.  If the User-Name appears invalid, reject the
	#  request.
	#
	#  See policy.d/filter for the definition of the filter_username policy.
	#
	filter_username

	#
	#  Some broken equipment sends passwords with embedded zeros.
	#  i.e. the debug output will show
	#
	#	User-Password = "password\000\000"
	#
	#  This policy will fix it to just be "password".
	#
#	filter_password

	#
	#  The preprocess module takes care of sanitizing some bizarre
	#  attributes in the request, and turning them into attributes
	#  which are more standard.
	#
	#  It takes care of processing the 'raddb/mods-config/preprocess/hints'
	#  and the 'raddb/mods-config/preprocess/huntgroups' files.
	preprocess

	#  If you intend to use CUI and you require that the Operator-Name
	#  be set for CUI generation and you want to generate CUI also
	#  for your local clients then uncomment the operator-name
	#  below and set the operator-name for your clients in clients.conf
#	operator-name

	#
	#  If you want to generate CUI for some clients that do not
	#  send proper CUI requests, then uncomment the
	#  cui below and set "add_cui = yes" for these clients in clients.conf
#	cui

	#
	#  If you want to have a log of authentication requests,
	#  un-comment the following line.
#	auth_log

	#
	#  The chap module will set 'Auth-Type := CHAP' if we are
	#  handling a CHAP request and Auth-Type has not already been set
	chap

	#
	#  If the users are logging in with an MS-CHAP-Challenge
	#  attribute for authentication, the mschap module will find
	#  the MS-CHAP-Challenge attribute, and add 'Auth-Type := MS-CHAP'
	#  to the request, which will cause the server to then use
	#  the mschap module for authentication.
	mschap

	#
	#  If you have a Cisco SIP server authenticating against
	#  FreeRADIUS, uncomment the following line, and the 'digest'
	#  line in the 'authenticate' section.
	digest

	#
	#  The WiMAX specification says that the Calling-Station-Id
	#  is 6 octets of the MAC.  This definition conflicts with
	#  RFC 3580, and all common RADIUS practices.  If you are using
	#  old style WiMAX (non LTE) the un-commenting the "wimax" module
	#  here means that it will fix the Calling-Station-Id attribute to
	#  the normal format as specified in RFC 3580 Section 3.21.
	#
	#  If you are using WiMAX 2.1 (LTE) then un-commenting will allow
	#  the module to handle SQN resyncronisation. Prior to calling the
	#  module it is necessary to populate the following attributes
	#  with the relevant keys:
	#    control:WiMAX-SIM-Ki
	#    control:WiMAX-SIM-OPc
	#
	#  If WiMAX-Re-synchronization-Info is found in the request then
	#  the module will attempt to extract SQN and store it in
	#  control:WiMAX-SIM-SQN. Also a copy of RAND is extracted to
	#  control:WiMAX-SIM-RAND.
	#
	#  If the SIM cannot be authenticated using Ki and OPc then reject
	#  will be returned.
#	wimax

	#
	#  Look for IPASS style 'realm/', and if not found, look for
	#  '@realm', and decide whether or not to proxy, based on
	#  that.
#	IPASS

	#
	# Look for realms in user@domain format
	suffix
#	ntdomain

	#
	#  This module takes care of EAP-MD5, EAP-TLS, and EAP-LEAP
	#  authentication.
	#
	#  It also sets the EAP-Type attribute in the request
	#  attribute list to the EAP type from the packet.
	#
	#  The EAP module returns "ok" or "updated" if it is not yet ready
	#  to authenticate the user.  The configuration below checks for
	#  "ok", and stops processing the "authorize" section if so.
	#
	#  Any LDAP and/or SQL servers will not be queried for the
	#  initial set of packets that go back and forth to set up
	#  TTLS or PEAP.
	#
	#  The "updated" check is commented out for compatibility with
	#  previous versions of this configuration, but you may wish to
	#  uncomment it as well; this will further reduce the number of
	#  LDAP and/or SQL queries for TTLS or PEAP.
	#
	eap {
		ok = return
#		updated = return
	}

	#
	#  Pull crypt'd passwords from /etc/passwd or /etc/shadow,
	#  using the system API's to get the password.  If you want
	#  to read /etc/passwd or /etc/shadow directly, see the
	#  mods-available/passwd module.
	#
#	unix

	#
	#  Read the 'users' file.  In v3, this is located in
	#  raddb/mods-config/files/authorize
	files

	#
	#  Look in an SQL database.  The schema of the database
	#  is meant to mirror the "users" file.
	#
	#  See "Authorization Queries" in mods-available/sql
	-sql

	#
	#  If you are using /etc/smbpasswd, and are also doing
	#  mschap authentication, the un-comment this line, and
	#  configure the 'smbpasswd' module.
#	smbpasswd

	#
	#  The ldap module reads passwords from the LDAP database.
	-ldap

	#
	#  Enforce daily limits on time spent logged in.
#	daily

	#
	expiration
	logintime

	#
	#  If no other module has claimed responsibility for
	#  authentication, then try to use PAP.  This allows the
	#  other modules listed above to add a "known good" password
	#  to the request, and to do nothing else.  The PAP module
	#  will then see that password, and use it to do PAP
	#  authentication.
	#
	#  This module should be listed last, so that the other modules
	#  get a chance to set Auth-Type for themselves.
	#
	pap

	#
	#  If "status_server = yes", then Status-Server messages are passed
	#  through the following section, and ONLY the following section.
	#  This permits you to do DB queries, for example.  If the modules
	#  listed here return "fail", then NO response is sent.
	#
#	Autz-Type Status-Server {
#
#	}

	#
	#  RADIUS/TLS (or RadSec) connections are processed through
	#  this section.  See sites-available/tls, and the configuration
	#  item "check_client_connections" for more information.
	#
	#  The request contains TLS client certificate attributes,
	#  and nothing else.  The debug output will print which
	#  attributes are available on your system.
	#
	#  If the section returns "ok" or "updated", then the
	#  connection is accepted.  Otherwise the connection is
	#  terminated.
	#
	Autz-Type New-TLS-Connection {
		  ok
	}
}

#  Authentication.
#
#
#  This section lists which modules are available for authentication.
#  Note that it does NOT mean 'try each module in order'.  It means
#  that a module from the 'authorize' section adds a configuration
#  attribute 'Auth-Type := FOO'.  That authentication type is then
#  used to pick the appropriate module from the list below.
#

#  In general, you SHOULD NOT set the Auth-Type attribute.  The server
#  will figure it out on its own, and will do the right thing.  The
#  most common side effect of erroneously setting the Auth-Type
#  attribute is that one authentication method will work, but the
#  others will not.
#
#  The common reasons to set the Auth-Type attribute by hand
#  is to either forcibly reject the user (Auth-Type := Reject),
#  or to or forcibly accept the user (Auth-Type := Accept).
#
#  Note that Auth-Type := Accept will NOT work with EAP.
#
#  Please do not put "unlang" configurations into the "authenticate"
#  section.  Put them in the "post-auth" section instead.  That's what
#  the post-auth section is for.
#
authenticate {
	#
	#  PAP authentication, when a back-end database listed
	#  in the 'authorize' section supplies a password.  The
	#  password can be clear-text, or encrypted.
	Auth-Type PAP {
		pap
	}

	#
	#  Most people want CHAP authentication
	#  A back-end database listed in the 'authorize' section
	#  MUST supply a CLEAR TEXT password.  Encrypted passwords
	#  won't work.
	Auth-Type CHAP {
		chap
	}

	#
	#  MSCHAP authentication.
	Auth-Type MS-CHAP {
		mschap
	}

	#
	#  For old names, too.
	#
	mschap

	#
	#  If you have a Cisco SIP server authenticating against
	#  FreeRADIUS, uncomment the following line, and the 'digest'
	#  line in the 'authorize' section.
	digest

	#
	#  Pluggable Authentication Modules.
#	pam

	#  Uncomment it if you want to use ldap for authentication
	#
	#  Note that this means "check plain-text password against
	#  the ldap database", which means that EAP won't work,
	#  as it does not supply a plain-text password.
	#
	#  We do NOT recommend using this.  LDAP servers are databases.
	#  They are NOT authentication servers.  FreeRADIUS is an
	#  authentication server, and knows what to do with authentication.
	#  LDAP servers do not.
	#
#	Auth-Type LDAP {
#		ldap
#	}

	#
	#  Allow EAP authentication.
	eap

	#
	#  The older configurations sent a number of attributes in
	#  Access-Challenge packets, which wasn't strictly correct.
	#  If you want to filter out these attributes, uncomment
	#  the following lines.
	#
#	Auth-Type eap {
#		eap {
#			handled = 1
#		}
#		if (handled && (Response-Packet-Type == Access-Challenge)) {
#			attr_filter.access_challenge.post-auth
#			handled  # override the "updated" code from attr_filter
#		}
#	}
}

#
#  Pre-accounting.  Decide which accounting type to use.
#
preacct {
	preprocess

	#
	#  Merge Acct-[Input|Output]-Gigawords and Acct-[Input-Output]-Octets
	#  into a single 64bit counter Acct-[Input|Output]-Octets64.
	#
#	acct_counters64

	#
	#  Session start times are *implied* in RADIUS.
	#  The NAS never sends a "start time".  Instead, it sends
	#  a start packet, *possibly* with an Acct-Delay-Time.
	#  The server is supposed to conclude that the start time
	#  was "Acct-Delay-Time" seconds in the past.
	#
	#  The code below creates an explicit start time, which can
	#  then be used in other modules.  It will be *mostly* correct.
	#  Any errors are due to the 1-second resolution of RADIUS,
	#  and the possibility that the time on the NAS may be off.
	#
	#  The start time is: NOW - delay - session_length
	#

#	update request {
#	  	&FreeRADIUS-Acct-Session-Start-Time = "%{expr: %l - %{%{Acct-Session-Time}:-0} - %{%{Acct-Delay-Time}:-0}}"
#	}


	#
	#  Ensure that we have a semi-unique identifier for every
	#  request, and many NAS boxes are broken.
	acct_unique

	#
	#  Look for IPASS-style 'realm/', and if not found, look for
	#  '@realm', and decide whether or not to proxy, based on
	#  that.
	#
	#  Accounting requests are generally proxied to the same
	#  home server as authentication requests.
#	IPASS
	suffix
#	ntdomain

	#
	#  Read the 'acct_users' file
	files
}

#
#  Accounting.  Log the accounting data.
#
accounting {
	#  Update accounting packet by adding the CUI attribute
	#  recorded from the corresponding Access-Accept
	#  use it only if your NAS boxes do not support CUI themselves
#	cui
	#
	#  Create a 'detail'ed log of the packets.
	#  Note that accounting requests which are proxied
	#  are also logged in the detail file.
	detail
#	daily

	#  Update the wtmp file
	#
	#  If you don't use "radlast", you can delete this line.
	unix

	#
	#  For Simultaneous-Use tracking.
	#
	#  Due to packet losses in the network, the data here
	#  may be incorrect.  There is little we can do about it.
#	radutmp
#	sradutmp

	#
	#  Return an address to the IP Pool when we see a stop record.
	#
	#  Ensure that &control:Pool-Name is set to determine which
	#  pool of IPs are used.
#	sqlippool

	#
	#  Log traffic to an SQL database.
	#
	#  See "Accounting queries" in mods-available/sql
	-sql

	#
	#  If you receive stop packets with zero session length,
	#  they will NOT be logged in the database.  The SQL module
	#  will print a message (only in debugging mode), and will
	#  return "noop".
	#
	#  You can ignore these packets by uncommenting the following
	#  three lines.  Otherwise, the server will not respond to the
	#  accounting request, and the NAS will retransmit.
	#
#	if (noop) {
#		ok
#	}

	#  Cisco VoIP specific bulk accounting
#	pgsql-voip

	# For Exec-Program and Exec-Program-Wait
	exec

	#  Filter attributes from the accounting response.
	attr_filter.accounting_response

	#
	#  See "Autz-Type Status-Server" for how this works.
	#
#	Acct-Type Status-Server {
#
#	}
}

#  Session database, used for checking Simultaneous-Use. Either the radutmp
#  or rlm_sql module can handle this.
#  The rlm_sql module is *much* faster
session {
#	radutmp

	#
	#  See "Simultaneous Use Checking Queries" in mods-available/sql
#	sql
}

#  Post-Authentication
#  Once we KNOW that the user has been authenticated, there are
#  additional steps we can take.
post-auth {
	#
	#  If you need to have a State attribute, you can
	#  add it here.  e.g. for later CoA-Request with
	#  State, and Service-Type = Authorize-Only.
	#
#	if (!&reply:State) {
#		update reply {
#			State := "0x%{randstr:16h}"
#		}
#	}

	#
	#  Reject packets where User-Name != TLS-Client-Cert-Common-Name
	#  There is no reason for users to lie about their names.
	#
	#  In general, User-Name == EAP Identity == TLS-Client-Cert-Common-Name
	#
#	verify_tls_client_common_name

	#
	#  If there is no Stripped-User-Name in the request, AND we have a client cert,
	#  then create a Stripped-User-Name from the TLS client certificate information.
	#
	#  Note that this policy MUST be edited for your local system!
	#  We do not know which fields exist in which certificate, as
	#  there is no standard here.  There is no way for us to have
	#  a default configuration which "just works" everywhere.  We
	#  can only make recommendations.
	#
	#  The Stripped-User-Name is updated so that it is logged in
	#  the various "username" fields.  This logging means that you
	#  can associate a particular session with a particular client
	#  certificate.
	#
#	if (&EAP-Message && !&Stripped-User-Name && &TLS-Client-Cert-Serial) {
#		update request {
#			&Stripped-User-Name := "%{%{TLS-Client-Cert-Subject-Alt-Name-Email}:-%{%{TLS-Client-Cert-Common-Name}:-%{TLS-Client-Cert-Serial}}}"
#		}
#
		#
		#  Create a Class attribute which is a hash of a bunch
		#  of information which we hope exists.  This
		#  attribute should be echoed back in
		#  Accounting-Request packets, which will let the
		#  administrator correlate authentication and
		#  accounting.
		#
#		update reply {
#			Class += "%{md5:%{Calling-Station-Id}%{Called-Station-Id}%{TLS-Client-Cert-Subject-Alt-Name-Email}%{TLS-Client-Cert-Common-Name}%{TLS-Client-Cert-Serial}%{NAS-IPv6-Address}%{NAS-IP-Address}%{NAS-Identifier}%{NAS-Port}"
#		}
#
#	}

	#
	#  For EAP-TTLS and PEAP, add the cached attributes to the reply.
	#  The "session-state" attributes are automatically cached when
	#  an Access-Challenge is sent, and automatically retrieved
	#  when an Access-Request is received.
	#
	#  The session-state attributes are automatically deleted after
	#  an Access-Reject or Access-Accept is sent.
	#
	#  If both session-state and reply contain a User-Name attribute, remove
	#  the one in the reply if it is just a copy of the one in the request, so
	#  we don't end up with two User-Name attributes.

	if (session-state:User-Name && reply:User-Name && request:User-Name && (reply:User-Name == request:User-Name)) {
		update reply {
			&User-Name !* ANY
		}
	}
	update {
		&reply: += &session-state:
	}

	#
	#  Refresh leases when we see a start or alive. Return an address to
	#  the IP Pool when we see a stop record.
	#
	#  Ensure that &control:Pool-Name is set to determine which
	#  pool of IPs are used.
#	sqlippool


	#  Create the CUI value and add the attribute to Access-Accept.
	#  Uncomment the line below if *returning* the CUI.
#	cui

	#  Create empty accounting session to make simultaneous check
	#  more robust. See the accounting queries configuration in
	#  raddb/mods-config/sql/main/*/queries.conf for details.
	#
	#  The "sql_session_start" policy is defined in
	#  raddb/policy.d/accounting.  See that file for more details.
#	sql_session_start

	#
	#  If you want to have a log of authentication replies,
	#  un-comment the following line, and enable the
	#  'detail reply_log' module.
#	reply_log

	#
	#  After authenticating the user, do another SQL query.
	#
	#  See "Authentication Logging Queries" in mods-available/sql
	-sql

	#
	#  Un-comment the following if you want to modify the user's object
	#  in LDAP after a successful login.
	#
#	ldap

	# For Exec-Program and Exec-Program-Wait
	exec

	#
	#  In order to calcualate the various keys for old style WiMAX
	#  (non LTE) you will need to define the WiMAX NAI, usually via
	#
	#	update request {
	#	       &WiMAX-MN-NAI = "%{User-Name}"
	#	}
	#
	#  If you want various keys to be calculated, you will need to
	#  update the reply with "template" values.  The module will see
	#  this, and replace the template values with the correct ones
	#  taken from the cryptographic calculations.  e.g.
	#
	# 	update reply {
	#		&WiMAX-FA-RK-Key = 0x00
	#		&WiMAX-MSK = "%{reply:EAP-MSK}"
	#	}
	#
	#  You may want to delete the MS-MPPE-*-Keys from the reply,
	#  as some WiMAX clients behave badly when those attributes
	#  are included.  See "raddb/modules/wimax", configuration
	#  entry "delete_mppe_keys" for more information.
	#
	#  For LTE style WiMAX you need to populate the following with the
	#  relevant values:
	#    control:WiMAX-SIM-Ki
	#    control:WiMAX-SIM-OPc
	#    control:WiMAX-SIM-AMF
	#    control:WiMAX-SIM-SQN
	#
#	wimax

	#  If there is a client certificate (EAP-TLS, sometimes PEAP
	#  and TTLS), then some attributes are filled out after the
	#  certificate verification has been performed.  These fields
	#  MAY be available during the authentication, or they may be
	#  available only in the "post-auth" section.
	#
	#  The first set of attributes contains information about the
	#  issuing certificate which is being used.  The second
	#  contains information about the client certificate (if
	#  available).
#
#	update reply {
#	       Reply-Message += "%{TLS-Cert-Serial}"
#	       Reply-Message += "%{TLS-Cert-Expiration}"
#	       Reply-Message += "%{TLS-Cert-Subject}"
#	       Reply-Message += "%{TLS-Cert-Issuer}"
#	       Reply-Message += "%{TLS-Cert-Common-Name}"
#	       Reply-Message += "%{TLS-Cert-Subject-Alt-Name-Email}"
#
#	       Reply-Message += "%{TLS-Client-Cert-Serial}"
#	       Reply-Message += "%{TLS-Client-Cert-Expiration}"
#	       Reply-Message += "%{TLS-Client-Cert-Subject}"
#	       Reply-Message += "%{TLS-Client-Cert-Issuer}"
#	       Reply-Message += "%{TLS-Client-Cert-Common-Name}"
#	       Reply-Message += "%{TLS-Client-Cert-Subject-Alt-Name-Email}"
#	}

	#  Insert class attribute (with unique value) into response,
	#  aids matching auth and acct records, and protects against duplicate
	#  Acct-Session-Id. Note: Only works if the NAS has implemented
	#  RFC 2865 behaviour for the class attribute, AND if the NAS
	#  supports long Class attributes.  Many older or cheap NASes
	#  only support 16-octet Class attributes.
#	insert_acct_class

	#  MacSEC requires the use of EAP-Key-Name.  However, we don't
	#  want to send it for all EAP sessions.  Therefore, the EAP
	#  modules put required data into the EAP-Session-Id attribute.
	#  This attribute is never put into a request or reply packet.
	#
	#  Uncomment the next few lines to copy the required data into
	#  the EAP-Key-Name attribute
#	if (&reply:EAP-Session-Id) {
#		update reply {
#			EAP-Key-Name := &reply:EAP-Session-Id
#		}
#	}

	#  Remove reply message if the response contains an EAP-Message
	remove_reply_message_if_eap

	#
	#  Access-Reject packets are sent through the REJECT sub-section of the
	#  post-auth section.
	#
	#  Add the ldap module name (or instance) if you have set
	#  'edir = yes' in the ldap module configuration
	#
	#  The "session-state" attributes are not available here.
	#
	Post-Auth-Type REJECT {
		# log failed authentications in SQL, too.
		-sql
		attr_filter.access_reject

		# Insert EAP-Failure message if the request was
		# rejected by policy instead of because of an
		# authentication failure
		eap

		#  Remove reply message if the response contains an EAP-Message
		remove_reply_message_if_eap
	}

	#
	#  Filter access challenges.
	#
	Post-Auth-Type Challenge {
#		remove_reply_message_if_eap
#		attr_filter.access_challenge.post-auth
	}

	#
	#  The Client-Lost section will be run for a request when
	#  FreeRADIUS has given up waiting for an end-users client to
	#  respond. This is most useful for logging EAP sessions where
	#  the client stopped responding (likely because the
	#  certificate was not acceptable.)  i.e. this is not for
	#  RADIUS clients, but for end-user systems.
	#
	#  This will only be triggered by new packets arriving,
	#  and will be run at some point in the future *after* the
	#  original request has been discarded.
	#
	#  Therefore the *ONLY* attributes that are available here
	#  are those in the session-state list. If you want data
	#  to log, make sure it is copied to &session-state:
	#  before the client stops responding. NONE of the other
	#  original attributes (request, reply, etc) will be
	#  available.
	#
	#  This section will only be run if `postauth_client_lost`
	#  is enabled in the main configuration in `radiusd.conf`.
	#
	#  Note that there are MANY reasons why an end users system
	#  might not respond:
	#
	#    * it could not get the packet due to firewall issues
	#    * it could not get the packet due to a lossy network
	#    * the users system might not like the servers cert
	#    * the users system might not like something else...
	#
	#  In some cases, the client is helpful enough to send us a
	#  TLS Alert message, saying what it doesn't like about the
	#  certificate.  In other cases, no such message is available.
	#
	#  All that we can know on the FreeRADIUS side is that we sent
	#  an Access-Challenge, and the client never sent anything
	#  else.  The reasons WHY this happens are buried inside of
	#  the logs on the client system.  No amount of looking at the
	#  FreeRADIUS logs, or poking the FreeRADIUS configuration
	#  will tell you why the client gave up.  The answers are in
	#  the logs on the client side.  And no, the FreeRADIUS team
	#  didn't write the client, so we don't know where those logs
	#  are, or how to get at them.
	#
	#  Information about the TLS state changes is in the
	#  &session-state:TLS-Session-Information attribute.
	#
	Post-Auth-Type Client-Lost {
		#
		#  Debug ALL of the TLS state changes done during the
		#  EAP negotiation.
		#
#		%{debug_attr:&session-state:TLS-Session-Information[*]}

		#
		#  Debug the LAST TLS state change done during the EAP
		#  negotiation.  For errors, this is usually a TLS
		#  alert from the client saying something like
		#  "unknown CA".
		#
#		%{debug_attr:&session-state:TLS-Session-Information[n]}

		#
		#  Debug the last module failure message.  This may be
		#  useful, or it may refer to a server-side failure
		#  which did not cause the client to stop talking to the server.
		#
#		%{debug_attr:&session-state:Module-Failure-Message}
	}

	#
	#  If the client sends EAP-Key-Name in the request,
	#  then echo the real value back in the reply.
	#
	if (EAP-Key-Name && &reply:EAP-Session-Id) {
		update reply {
			&EAP-Key-Name := &reply:EAP-Session-Id
		}
	}
}

#
#  When the server decides to proxy a request to a home server,
#  the proxied request is first passed through the pre-proxy
#  stage.  This stage can re-write the request, or decide to
#  cancel the proxy.
#
#  Only a few modules currently have this method.
#
pre-proxy {
	# Before proxing the request add an Operator-Name attribute identifying
	# if the operator-name is found for this client.
	# No need to uncomment this if you have already enabled this in
	# the authorize section.
#	operator-name

	#  The client requests the CUI by sending a CUI attribute
	#  containing one zero byte.
	#  Uncomment the line below if *requesting* the CUI.
#	cui

	#  Uncomment the following line if you want to change attributes
	#  as defined in the preproxy_users file.
#	files

	#  Uncomment the following line if you want to filter requests
	#  sent to remote servers based on the rules defined in the
	#  'attrs.pre-proxy' file.
#	attr_filter.pre-proxy

	#  If you want to have a log of packets proxied to a home
	#  server, un-comment the following line, and the
	#  'detail pre_proxy_log' section, above.
#	pre_proxy_log
}

#
#  When the server receives a reply to a request it proxied
#  to a home server, the request may be massaged here, in the
#  post-proxy stage.
#
post-proxy {

	#  If you want to have a log of replies from a home server,
	#  un-comment the following line, and the 'detail post_proxy_log'
	#  section, above.
#	post_proxy_log

	#  Uncomment the following line if you want to filter replies from
	#  remote proxies based on the rules defined in the 'attrs' file.
#	attr_filter.post-proxy

	#
	#  If you are proxying LEAP, you MUST configure the EAP
	#  module, and you MUST list it here, in the post-proxy
	#  stage.
	#
	#  You MUST also use the 'nostrip' option in the 'realm'
	#  configuration.  Otherwise, the User-Name attribute
	#  in the proxied request will not match the user name
	#  hidden inside of the EAP packet, and the end server will
	#  reject the EAP request.
	#
	eap

	#
	#  If the server tries to proxy a request and fails, then the
	#  request is processed through the modules in this section.
	#
	#  The main use of this section is to permit robust proxying
	#  of accounting packets.  The server can be configured to
	#  proxy accounting packets as part of normal processing.
	#  Then, if the home server goes down, accounting packets can
	#  be logged to a local "detail" file, for processing with
	#  radrelay.  When the home server comes back up, radrelay
	#  will read the detail file, and send the packets to the
	#  home server.
	#
	#  See the "mods-available/detail.example.com" file for more
	#  details on writing a detail file specifically for one
	#  destination.
	#
	#  See the "sites-available/robust-proxy-accounting" virtual
	#  server for more details on reading this "detail" file.
	#
	#  With this configuration, the server always responds to
	#  Accounting-Requests from the NAS, but only writes
	#  accounting packets to disk if the home server is down.
	#
#	Post-Proxy-Type Fail-Accounting {
#			detail.example.com
#	}
}
}
Pour l'intance VLAN3 :
fichier users
greleve2 Cleartext-Password := "mdp123"
Tunnel-Type = VLAN,
Tunnel-Medium-Type = IEEE-802,
Tunnel-Private-Group-Id = "3"
#
# Configuration file for the rlm_files module.
# Please see rlm_files(5) manpage for more information.
#
# This file contains authentication security and configuration
# information for each user. Accounting requests are NOT processed
# through this file. Instead, see 'accounting', in this directory.
#
# The first field is the user's name and can be up to
# 253 characters in length. This is followed (on the same line) with
# the list of authentication requirements for that user. This can
# include password, comm server name, comm server port number, protocol
# type (perhaps set by the "hints" file), and huntgroup name (set by
# the "huntgroups" file).
#
# If you are not sure why a particular reply is being sent by the
# server, then run the server in debugging mode (radiusd -X), and
# you will see which entries in this file are matched.
#
# When an authentication request is received from the comm server,
# these values are tested. Only the first match is used unless the
# "Fall-Through" variable is set to "Yes".
#
# A special user named "DEFAULT" matches on all usernames.
# You can have several DEFAULT entries. All entries are processed
# in the order they appear in this file. The first entry that
# matches the login-request will stop processing unless you use
# the Fall-Through variable.
#
# Indented (with the tab character) lines following the first
# line indicate the configuration values to be passed back to
# the comm server to allow the initiation of a user session.
# This can include things like the PPP configuration values
# or the host to log the user onto.
#
# You can include another `users' file with `$INCLUDE users.other'
#
# For a list of RADIUS attributes, and links to their definitions,
# see: http://www.freeradius.org/rfc/attributes.html
#
# Entries below this point are examples included in the server for
# educational purposes. They may be deleted from the deployed
# configuration without impacting the operation of the server.
#
#
# Deny access for a specific user. Note that this entry MUST
# be before any other 'Auth-Type' attribute which results in the user
# being authenticated.
#
# Note that there is NO 'Fall-Through' attribute, so the user will not
# be given any additional resources.
#
#lameuser Auth-Type := Reject
# Reply-Message = "Your account has been disabled."
#
# Deny access for a group of users.
#
# Note that there is NO 'Fall-Through' attribute, so the user will not
# be given any additional resources.
#
#DEFAULT Group == "disabled", Auth-Type := Reject
# Reply-Message = "Your account has been disabled."
#
#
# This is a complete entry for "steve". Note that there is no Fall-Through
# entry so that no DEFAULT entry will be used, and the user will NOT
# get any attributes in addition to the ones listed here.
#
#steve Cleartext-Password := "testing"
# Service-Type = Framed-User,
# Framed-Protocol = PPP,
# Framed-IP-Address = 172.16.3.33,
# Framed-IP-Netmask = 255.255.255.0,
# Framed-Routing = Broadcast-Listen,
# Framed-Filter-Id = "std.ppp",
# Framed-MTU = 1500,
# Framed-Compression = Van-Jacobsen-TCP-IP
#
# The canonical testing user which is in most of the
# examples.
#
bob Cleartext-Password := "hello"
Reply-Message := "Hello, %{User-Name}"
#
#
# This is an entry for a user with a space in their name.
# Note the double quotes surrounding the name. If you have
# users with spaces in their names, you must also change
# the "filter_username" policy to allow spaces.
#
# See raddb/policy.d/filter, filter_username {} section.
#
#"John Doe" Cleartext-Password := "hello"
# Reply-Message = "Hello, %{User-Name}"
#
# Dial user back and telnet to the default host for that port
#
#Deg Cleartext-Password := "ge55ged"
# Service-Type = Callback-Login-User,
# Login-IP-Host = 0.0.0.0,
# Callback-Number = "9,5551212",
# Login-Service = Telnet,
# Login-TCP-Port = Telnet
#
# Another complete entry. After the user "dialbk" has logged in, the
# connection will be broken and the user will be dialed back after which
# he will get a connection to the host "timeshare1".
#
#dialbk Cleartext-Password := "callme"
# Service-Type = Callback-Login-User,
# Login-IP-Host = timeshare1,
# Login-Service = PortMaster,
# Callback-Number = "9,1-800-555-1212"
#
# user "swilson" will only get a static IP number if he logs in with
# a framed protocol on a terminal server in Alphen (see the huntgroups file).
#
# Note that by setting "Fall-Through", other attributes will be added from
# the following DEFAULT entries
#
#swilson Service-Type == Framed-User, Huntgroup-Name == "alphen"
# Framed-IP-Address = 192.0.2.65,
# Fall-Through = Yes
#
# If the user logs in as 'username.shell', then authenticate them
# using the default method, give them shell access, and stop processing
# the rest of the file.
#
#DEFAULT Suffix == ".shell"
# Service-Type = Login-User,
# Login-Service = Telnet,
# Login-IP-Host = your.shell.machine
#
# The rest of this file contains the several DEFAULT entries.
# DEFAULT entries match with all login names.
# Note that DEFAULT entries can also Fall-Through (see first entry).
# A name-value pair from a DEFAULT entry will _NEVER_ override
# an already existing name-value pair.
#
# Sample defaults for all framed connections.
#
#DEFAULT Service-Type == Framed-User
# Framed-IP-Address = 255.255.255.254,
# Framed-MTU = 576,
# Service-Type = Framed-User,
# Fall-Through = Yes
#
# Default for PPP: dynamic IP address, PPP mode, VJ-compression.
# NOTE: we do not use Hint = "PPP", since PPP might also be auto-detected
# by the terminal server in which case there may not be a "P" suffix.
# The terminal server sends "Framed-Protocol = PPP" for auto PPP.
#
DEFAULT Framed-Protocol == PPP
Framed-Protocol = PPP,
Framed-Compression = Van-Jacobson-TCP-IP
#
# Default for CSLIP: dynamic IP address, SLIP mode, VJ-compression.
#
DEFAULT Hint == "CSLIP"
Framed-Protocol = SLIP,
Framed-Compression = Van-Jacobson-TCP-IP
#
# Default for SLIP: dynamic IP address, SLIP mode.
#
DEFAULT Hint == "SLIP"
Framed-Protocol = SLIP
#
# Last default: rlogin to our main server.
#
#DEFAULT
# Service-Type = Login-User,
# Login-Service = Rlogin,
# Login-IP-Host = shellbox.ispdomain.com
# #
# # Last default: shell on the local terminal server.
# #
# DEFAULT
# Service-Type = Administrative-User
# On no match, the user is denied access.
#########################################################
# You should add test accounts to the TOP of this file! #
# See the example user "bob" above. #
#########################################################
fichier clients.conf
## clients.conf -- client configuration directives
##
## $Id$
#######################################################################
#
# Define RADIUS clients (usually a NAS, Access Point, etc.).
#
# Defines a RADIUS client.
#
# '127.0.0.1' is another name for 'localhost'. It is enabled by default,
# to allow testing of the server after an initial installation. If you
# are not going to be permitting RADIUS queries from localhost, we suggest
# that you delete, or comment out, this entry.
#
#
#
# Each client has a "short name" that is used to distinguish it from
# other clients.
#
# In version 1.x, the string after the word "client" was the IP
# address of the client. In 2.0, the IP address is configured via
# the "ipaddr" or "ipv6addr" fields. For compatibility, the 1.x
# format is still accepted.
#
client tplink {
ipaddr = 192.168.3.2
secret = passwordSecret
}
client localhost {
# Only *one* of ipaddr, ipv4addr, ipv6addr may be specified for
# a client.
#
# ipaddr will accept IPv4 or IPv6 addresses with optional CIDR
# notation '/<mask>' to specify ranges.
#
# ipaddr will accept domain names e.g. example.org resolving
# them via DNS.
#
# If both A and AAAA records are found, A records will be
# used in preference to AAAA.
ipaddr = 127.0.0.1
# Same as ipaddr but allows v4 addresses only. Requires A
# record for domain names.
# ipv4addr = * # any. 127.0.0.1 == localhost
# Same as ipaddr but allows v6 addresses only. Requires AAAA
# record for domain names.
# ipv6addr = :: # any. ::1 == localhost
#
# A note on DNS: We STRONGLY recommend using IP addresses
# rather than host names. Using host names means that the
# server will do DNS lookups when it starts, making it
# dependent on DNS. i.e. If anything goes wrong with DNS,
# the server won't start!
#
# The server also looks up the IP address from DNS once, and
# only once, when it starts. If the DNS record is later
# updated, the server WILL NOT see that update.
#
#
# The transport protocol.
#
# If unspecified, defaults to "udp", which is the traditional
# RADIUS transport. It may also be "tcp", in which case the
# server will accept connections from this client ONLY over TCP.
#
proto = *
#
# The shared secret use to "encrypt" and "sign" packets between
# the NAS and FreeRADIUS. You MUST change this secret from the
# default, otherwise it's not a secret any more!
#
# The secret can be any string, up to 8k characters in length.
#
# Control codes can be entered vi octal encoding,
# e.g. "\101\102" == "AB"
# Quotation marks can be entered by escaping them,
# e.g. "foo\"bar"
#
# A note on security: The security of the RADIUS protocol
# depends COMPLETELY on this secret! We recommend using a
# shared secret that is composed of:
#
# upper case letters
# lower case letters
# numbers
#
# And is at LEAST 8 characters long, preferably 16 characters in
# length. The secret MUST be random, and should not be words,
# phrase, or anything else that is recognisable.
#
# The default secret below is only for testing, and should
# not be used in any real environment.
#
secret = testing123
#
# Old-style clients do not send a Message-Authenticator
# in an Access-Request. RFC 5080 suggests that all clients
# SHOULD include it in an Access-Request. The configuration
# item below allows the server to require it. If a client
# is required to include a Message-Authenticator and it does
# not, then the packet will be silently discarded.
#
# allowed values: yes, no
require_message_authenticator = no
#
# The short name is used as an alias for the fully qualified
# domain name, or the IP address.
#
# It is accepted for compatibility with 1.x, but it is no
# longer necessary in >= 2.0
#
# shortname = localhost
#
# the following three fields are optional, but may be used by
# checkrad.pl for simultaneous use checks
#
#
# The nas_type tells 'checkrad.pl' which NAS-specific method to
# use to query the NAS for simultaneous use.
#
# Permitted NAS types are:
#
# cisco
# computone
# livingston
# juniper
# max40xx
# multitech
# netserver
# pathras
# patton
# portslave
# tc
# usrhiper
# other # for all other types
#
nas_type = other # localhost isn't usually a NAS...
#
# The following two configurations are for future use.
# The 'naspasswd' file is currently used to store the NAS
# login name and password, which is used by checkrad.pl
# when querying the NAS for simultaneous use.
#
# login = !root
# password = someadminpas
#
# As of 2.0, clients can also be tied to a virtual server.
# This is done by setting the "virtual_server" configuration
# item, as in the example below.
#
# virtual_server = home1
#
# A pointer to the "home_server_pool" OR a "home_server"
# section that contains the CoA configuration for this
# client. For an example of a coa home server or pool,
# see raddb/sites-available/originate-coa
# coa_server = coa
#
# Response window for proxied packets. If non-zero,
# then the lower of (home, client) response_window
# will be used.
#
# i.e. it can be used to lower the response_window
# packets from one client to a home server. It cannot
# be used to raise the response_window.
#
# response_window = 10.0
#
# Connection limiting for clients using "proto = tcp".
#
# This section is ignored for clients sending UDP traffic
#
limit {
#
# Limit the number of simultaneous TCP connections from a client
#
# The default is 16.
# Setting this to 0 means "no limit"
max_connections = 16
# The per-socket "max_requests" option does not exist.
#
# The lifetime, in seconds, of a TCP connection. After
# this lifetime, the connection will be closed.
#
# Setting this to 0 means "forever".
lifetime = 0
#
# The idle timeout, in seconds, of a TCP connection.
# If no packets have been received over the connection for
# this time, the connection will be closed.
#
# Setting this to 0 means "no timeout".
#
# We STRONGLY RECOMMEND that you set an idle timeout.
#
idle_timeout = 30
}
}
# IPv6 Client
client localhost_ipv6 {
ipv6addr = ::1
secret = testing123
}
# All IPv6 Site-local clients
#client sitelocal_ipv6 {
# ipv6addr = fe80::/16
# secret = testing123
#}
#client example.org {
# ipaddr = radius.example.org
# secret = testing123
#}
#
# You can now specify one secret for a network of clients.
# When a client request comes in, the BEST match is chosen.
# i.e. The entry from the smallest possible network.
#
#client private-network-1 {
# ipaddr = 192.0.2.0/24
# secret = testing123-1
#}
#client private-network-2 {
# ipaddr = 198.51.100.0/24
# secret = testing123-2
#}
#######################################################################
#
# Per-socket client lists. The configuration entries are exactly
# the same as above, but they are nested inside of a section.
#
# You can have as many per-socket client lists as you have "listen"
# sections, or you can re-use a list among multiple "listen" sections.
#
# Un-comment this section, and edit a "listen" section to add:
# "clients = per_socket_clients". That IP address/port combination
# will then accept ONLY the clients listed in this section.
#
# There are additional considerations when using clients from SQL.
#
# A client can be link to a virtual server via modules such as SQL.
# This link is done via the following process:
#
# If there is no listener in a virtual server, SQL clients are added
# to the global list for that virtual server.
#
# If there is a listener, and the first listener does not have a
# "clients=..." configuration item, SQL clients are added to the
# global list.
#
# If there is a listener, and the first one does have a "clients=..."
# configuration item, SQL clients are added to that list. The client
# { ...} ` configured in that list are also added for that listener.
#
# The only issue is if you have multiple listeners in a virtual
# server, each with a different client list, then the SQL clients are
# added only to the first listener.
#
#clients per_socket_clients {
# client socket_client {
# ipaddr = 192.0.2.4
# secret = testing123
# }
#}
fichier /mods-enabled/eap
## eap.conf -- Configuration for EAP types (PEAP, TTLS, etc.)
##
## $Id$
#######################################################################
#
# Whatever you do, do NOT set 'Auth-Type := EAP'. The server
# is smart enough to figure this out on its own. The most
# common side effect of setting 'Auth-Type := EAP' is that the
# users then cannot use ANY other authentication method.
#
eap {
# Invoke the default supported EAP type when
# EAP-Identity response is received.
#
# The incoming EAP messages DO NOT specify which EAP
# type they will be using, so it MUST be set here.
#
# For now, only one default EAP type may be used at a time.
#
# If the EAP-Type attribute is set by another module,
# then that EAP type takes precedence over the
# default type configured here.
#
default_eap_type = peap
# A list is maintained to correlate EAP-Response
# packets with EAP-Request packets. After a
# configurable length of time, entries in the list
# expire, and are deleted.
#
timer_expire = 60
# There are many EAP types, but the server has support
# for only a limited subset. If the server receives
# a request for an EAP type it does not support, then
# it normally rejects the request. By setting this
# configuration to "yes", you can tell the server to
# instead keep processing the request. Another module
# MUST then be configured to proxy the request to
# another RADIUS server which supports that EAP type.
#
# If another module is NOT configured to handle the
# request, then the request will still end up being
# rejected.
#
ignore_unknown_eap_types = no
# Cisco AP1230B firmware 12.2(13)JA1 has a bug. When given
# a User-Name attribute in an Access-Accept, it copies one
# more byte than it should.
#
# We can work around it by configurably adding an extra
# zero byte.
#
cisco_accounting_username_bug = no
# Help prevent DoS attacks by limiting the number of
# sessions that the server is tracking. For simplicity,
# this is taken from the "max_requests" directive in
# radiusd.conf.
#
max_sessions = ${max_requests}
############################################################
#
# Supported EAP-types
#
# EAP-MD5
#
# We do NOT recommend using EAP-MD5 authentication
# for wireless connections. It is insecure, and does
# not provide for dynamic WEP keys.
#
md5 {
}
# EAP-pwd -- secure password-based authentication
#
#pwd {
# group = 19
# server_id = theserver@example.com
# This has the same meaning as for TLS.
#
# fragment_size = 1020
# The virtual server which determines the
# "known good" password for the user.
# Note that unlike TLS, only the "authorize"
# section is processed. EAP-PWD requests can be
# distinguished by having a User-Name, but
# no User-Password, CHAP-Password, EAP-Message, etc.
#
# virtual_server = "inner-tunnel"
#}
# Cisco LEAP
#
# We do not recommend using LEAP in new deployments. See:
# http://www.securiteam.com/tools/5TP012ACKE.html
#
# As of 3.0.22, LEAP has been removed from the server.
# It is insecure, and no one should be using it.
#
# EAP-GTC -- Generic Token Card
#
# Currently, this is only permitted inside of EAP-TTLS,
# or EAP-PEAP. The module "challenges" the user with
# text, and the response from the user is taken to be
# the User-Password.
#
# Proxying the tunneled EAP-GTC session is a bad idea,
# the users password will go over the wire in plain-text,
# for anyone to see.
#
gtc {
# The default challenge, which many clients
# ignore..
#
# challenge = "Password: "
# The plain-text response which comes back
# is put into a User-Password attribute,
# and passed to another module for
# authentication. This allows the EAP-GTC
# response to be checked against plain-text,
# or crypt'd passwords.
#
# If you say "Local" instead of "PAP", then
# the module will look for a User-Password
# configured for the request, and do the
# authentication itself.
#
auth_type = PAP
}
# Common TLS configuration for TLS-based EAP types
# ------------------------------------------------
#
# See raddb/certs/README.md for additional comments
# on certificates.
#
# If OpenSSL was not found at the time the server was
# built, the "tls", "ttls", and "peap" sections will
# be ignored.
#
# If you do not currently have certificates signed by
# a trusted CA you may use the 'snakeoil' certificates.
# Included with the server in raddb/certs.
#
# If these certificates have not been auto-generated:
# cd raddb/certs
# make
#
# These test certificates SHOULD NOT be used in a normal
# deployment. They are created only to make it easier
# to install the server, and to perform some simple
# tests with EAP-TLS, TTLS, or PEAP.
#
# Note that you should NOT use a globally known CA here!
# e.g. using a Verisign cert as a "known CA" means that
# ANYONE who has a certificate signed by them can
# authenticate via EAP-TLS! This is likely not what you want.
#
tls-config tls-common {
private_key_password = whatever
private_key_file = /etc/ssl/private/ssl-cert-snakeoil.key
# If Private key & Certificate are located in
# the same file, then private_key_file &
# certificate_file must contain the same file
# name.
#
# If ca_file (below) is not used, then the
# certificate_file below SHOULD also include all of
# the intermediate CA certificates used to sign the
# server certificate, but NOT the root CA.
#
# Including the ROOT CA certificate is not useful and
# merely inflates the exchanged data volume during
# the TLS negotiation.
#
# This file should contain the server certificate,
# followed by intermediate certificates, in order.
# i.e. If we have a server certificate signed by CA1,
# which is signed by CA2, which is signed by a root
# CA, then the "certificate_file" should contain
# server.pem, followed by CA1.pem, followed by
# CA2.pem.
#
# When using "ca_file" or "ca_dir", the
# "certificate_file" should contain only
# "server.pem". And then you may (or may not) need
# to set "auto_chain", depending on your version of
# OpenSSL.
#
# In short, SSL / TLS certificates are complex.
# There are many versions of software, each of which
# behave slightly differently. It is impossible to
# give advice which will work everywhere. Instead,
# we give general guidelines.
#
certificate_file = /etc/ssl/certs/ssl-cert-snakeoil.pem
# Trusted Root CA list
#
# This file can contain multiple CA certificates.
# ALL of the CA's in this list will be trusted to
# issue client certificates for authentication.
#
# In general, you should use self-signed
# certificates for 802.1x (EAP) authentication.
# In that case, this CA file should contain
# *one* CA certificate.
#
ca_file = /etc/ssl/certs/ca-certificates.crt
# OpenSSL will automatically create certificate chains,
# unless we tell it to not do that. The problem is that
# it sometimes gets the chains right from a certificate
# signature view, but wrong from the clients view.
#
# When setting "auto_chain = no", the server certificate
# file MUST include the full certificate chain.
#
# auto_chain = yes
# If OpenSSL supports TLS-PSK, then we can use a
# fixed PSK identity and (hex) password. As of
# 3.0.18, these can be used at the same time as the
# certificate configuration, but only for TLS 1.0
# through 1.2.
#
# If PSK and certificates are configured at the same
# time for TLS 1.3, then the server will warn you,
# and will disable TLS 1.3, as it will not work.
#
# The work around is to have two modules (or for
# RadSec, two listen sections). One will have PSK
# configured, and the other will have certificates
# configured.
#
# psk_identity = "test"
# psk_hexphrase = "036363823"
# Dynamic queries for the PSK. If TLS-PSK is used,
# and psk_query is set, then you MUST NOT use
# psk_identity or psk_hexphrase.
#
# Instead, use a dynamic expansion similar to the one
# below. It keys off of TLS-PSK-Identity. It should
# return a of string no more than 512 hex characters.
# That string will be converted to binary, and will
# be used as the dynamic PSK hexphrase.
#
# Note that this query is just an example. You will
# need to customize it for your installation.
#
# psk_query = "%{sql:select hex(key) from psk_keys where keyid = '%{TLS-PSK-Identity}'}"
# For DH cipher suites to work in OpenSSL < 1.1.0,
# you have to run OpenSSL to create the DH file
# first:
#
# openssl dhparam -out certs/dh 2048
#
# For OpenSSL >= 1.1.0, just leave this commented
# out, and OpenSSL will do the right thing.
#
# dh_file = ${certdir}/dh
# If your system doesn't have /dev/urandom,
# you will need to create this file, and
# periodically change its contents.
#
# For security reasons, FreeRADIUS doesn't
# write to files in its configuration
# directory.
#
# random_file = /dev/urandom
# This can never exceed the size of a RADIUS
# packet (4096 bytes), and is preferably half
# that, to accommodate other attributes in
# RADIUS packet. On most APs the MAX packet
# length is configured between 1500 - 1600
# In these cases, fragment size should be
# 1024 or less.
#
# fragment_size = 1024
# include_length is a flag which is
# by default set to yes If set to
# yes, Total Length of the message is
# included in EVERY packet we send.
# If set to no, Total Length of the
# message is included ONLY in the
# First packet of a fragment series.
#
# include_length = yes
# Check the Certificate Revocation List
#
# 1) Copy CA certificates and CRLs to same directory.
# 2) Execute 'c_rehash <CA certs&CRLs Directory>'.
# 'c_rehash' is OpenSSL's command.
# 3) uncomment the lines below.
# 5) Restart radiusd
# check_crl = yes
# Check if intermediate CAs have been revoked.
# check_all_crl = yes
ca_path = ${cadir}
# OpenSSL does not reload contents of ca_path dir over time.
# That means that if check_crl is enabled and CRLs are loaded
# from ca_path dir, at some point CRLs will expire and
# RADIUSd will stop authenticating users.
# If ca_path_reload_interval is non-zero, it will force OpenSSL
# to reload all data from ca_path periodically
#
# Flush ca_path each hour
# ca_path_reload_interval = 3600
# Accept an expired Certificate Revocation List
#
# allow_expired_crl = no
# If check_cert_issuer is set, the value will
# be checked against the DN of the issuer in
# the client certificate. If the values do not
# match, the certificate verification will fail,
# rejecting the user.
#
# This check can be done more generally by checking
# the value of the TLS-Client-Cert-Issuer attribute.
# This check can be done via any mechanism you
# choose.
#
# check_cert_issuer = "/C=GB/ST=Berkshire/L=Newbury/O=My Company Ltd"
# If check_cert_cn is set, the value will
# be xlat'ed and checked against the CN
# in the client certificate. If the values
# do not match, the certificate verification
# will fail rejecting the user.
#
# This check is done only if the previous
# "check_cert_issuer" is not set, or if
# the check succeeds.
#
# This check can be done more generally by writing
# "unlang" statements to examine the value of the
# TLS-Client-Cert-Common-Name attribute.
#
# check_cert_cn = %{User-Name}
#
# This configuration item only applies when there is
# an intermediate CA between the "root" CA, and the
# client certificate. If we trust the root CA, then
# by definition we also trust ANY intermediate CA
# which is signed by that root. This means ANOTHER
# intermediate CA can issue client certificates, and
# have them accepted by the EAP module.
#
# The solution is to list ONLY the trusted CAs in the
# FreeRADIUS configuration, and then set this
# configuration item to "yes".
#
# Then, when the server receives a client certificate
# from an untrusted CA, that authentication request
# can be rejected.
#
# It is possible to do these checks in "unlang", by
# checking for unknown names in the
# TLS-Cert-Common-Name attribute, but that is
# more complex. So we add a configuration option
# which can be set once, and which works for all
# possible intermediate CAs, no matter what their
# value.
#
# reject_unknown_intermediate_ca = no
# Set this option to specify the allowed
# TLS cipher suites. The format is listed
# in "man 1 ciphers".
#
cipher_list = "DEFAULT"
# If enabled, OpenSSL will use server cipher list
# (possibly defined by cipher_list option above)
# for choosing right cipher suite rather than
# using client-specified list which is OpenSSl default
# behavior. Setting this to "yes" means that OpenSSL
# will choose the servers ciphers, even if they do not
# best match what the client sends.
#
# TLS negotiation is usually good, but can be imperfect.
# This setting allows administrators to "fine tune" it
# if necessary.
#
cipher_server_preference = no
# You can selectively disable TLS versions for
# compatability with old client devices.
#
# If your system has OpenSSL 1.1.0 or greater, do NOT
# use these. Instead, set tls_min_version and
# tls_max_version.
#
# disable_tlsv1_2 = yes
# disable_tlsv1_1 = yes
# disable_tlsv1 = yes
# Set min / max TLS version.
#
# Generally speaking you should NOT use TLS 1.0 or
# TLS 1.1. They are old, possibly insecure, and
# deprecated. However, it is sometimes necessary to
# enable it for compatibility with legact systems.
# We recommend replacing those legacy systems, and
# using at least TLS 1.2.
#
# Some Debian versions disable older versions of TLS,
# and requires the application to manually enable
# them.
#
# If you are running such a distribution, you should
# set these options, otherwise older clients will not
# be able to connect.
#
# Allowed values are "1.0", "1.1", "1.2", and "1.3".
#
# As of 2021, it is STRONGLY RECOMMENDED to set
#
# tls_min_version = "1.2"
#
# Older TLS versions are insecure and deprecated.
#
# In order to enable TLS 1.0 and TLS 1.1, you may
# also need to update cipher_list below to:
#
# * OpenSSL >= 3.x
#
# cipher_list = "DEFAULT@SECLEVEL=0"
#
# * OpenSSL < 3.x
#
# cipher_list = "DEFAULT@SECLEVEL=1"
#
# The values must be in quotes.
#
# We also STRONGLY RECOMMEND to set
#
# tls_max_version = "1.2"
#
# While the server will accept "1.3" as a value,
# most EAP supplicants WILL NOT DO TLS 1.3 PROPERLY.
#
# i.e. they WILL NOT WORK, SO DO NOT ASK QUESTIONS ON
# THE LIST ABOUT WHY IT DOES NOT WORK.
#
# The TLS 1.3 support is here for future
# compatibility, as clients get upgraded, and people
# don't upgrade their copies of FreeRADIUS.
#
# Also note that we only support TLS 1.3 for EAP-TLS.
# Other versions of EAP (PEAP, TTLS, FAST) DO NOT
# SUPPORT TLS 1.3.
#
tls_min_version = "1.2"
tls_max_version = "1.2"
# Elliptical cryptography configuration
#
# This configuration should be one of the following:
#
# * a name of the curve to use, e.g. "prime256v1".
#
# * a colon separated list of curve NIDs or names.
#
# * an empty string, in which case OpenSSL will choose
# the "best" curve for the situation.
#
# For supported curve names, please run
#
# openssl ecparam -list_curves
#
ecdh_curve = ""
# Session resumption / fast reauthentication
# cache.
#
# The cache contains the following information:
#
# session Id - unique identifier, managed by SSL
# User-Name - from the Access-Accept
# Stripped-User-Name - from the Access-Request
# Cached-Session-Policy - from the Access-Accept
#
# See also the "store" subsection below for
# additional attributes which can be cached.
#
# The "Cached-Session-Policy" is the name of a
# policy which should be applied to the cached
# session. This policy can be used to assign
# VLANs, IP addresses, etc. It serves as a useful
# way to re-apply the policy from the original
# Access-Accept to the subsequent Access-Accept
# for the cached session.
#
# On session resumption, these attributes are
# copied from the cache, and placed into the
# reply list.
#
# You probably also want "use_tunneled_reply = yes"
# when using fast session resumption.
#
# You can check if a session has been resumed by
# looking for the existence of the EAP-Session-Resumed
# attribute. Note that this attribute will *only*
# exist in the "post-auth" section.
#
# CAVEATS: The cache is stored and reloaded BEFORE
# the "post-auth" section is run. This limitation
# makes caching more difficult than it should be. In
# practice, it means that the first authentication
# session must set the reply attributes before the
# post-auth section is run.
#
# When the session is resumed, the attributes are
# restored and placed into the session-state list.
#
cache {
# Enable it. The default is "no". Deleting the entire "cache"
# subsection also disables caching.
#
# The session cache requires the use of the
# "name" and "persist_dir" configuration
# items, below.
#
# The internal OpenSSL session cache has been permanently
# disabled.
#
# You can disallow resumption for a particular user by adding the
# following attribute to the control item list:
#
# Allow-Session-Resumption = No
#
# If "enable = no" below, you CANNOT enable resumption for just one
# user by setting the above attribute to "yes".
#
enable = no
# Lifetime of the cached entries, in hours. The sessions will be
# deleted/invalidated after this time.
#
lifetime = 24 # hours
# Internal "name" of the session cache. Used to
# distinguish which TLS context sessions belong to.
#
# The server will generate a random value if unset.
# This will change across server restart so you MUST
# set the "name" if you want to persist sessions (see
# below).
#
# name = "EAP module"
# Simple directory-based storage of sessions.
# Two files per session will be written, the SSL
# state and the cached VPs. This will persist session
# across server restarts.
#
# The default directory is ${logdir}, for historical
# reasons. You should ${db_dir} instead. And check
# the value of db_dir in the main radiusd.conf file.
# It should not point to ${raddb}
#
# The server will need write perms, and the directory
# should be secured from anyone else. You might want
# a script to remove old files from here periodically:
#
# find ${logdir}/tlscache -mtime +2 -exec rm -f {} \;
#
# This feature REQUIRES "name" option be set above.
#
# persist_dir = "${logdir}/tlscache"
#
# As of 3.0.20, it is possible to partially
# control which attributes exist in the
# session cache. This subsection lists
# attributes which are taken from the reply,
# and saved to the on-disk cache. When the
# session is resumed, these attributes are
# added to the "session-state" list. The
# default configuration will then take care
# of copying them to the reply.
#
store {
Tunnel-Private-Group-Id
}
}
# Client certificates can be validated via an
# external command. This allows dynamic CRLs or OCSP
# to be used.
#
# This configuration is commented out in the
# default configuration. Uncomment it, and configure
# the correct paths below to enable it.
#
# If OCSP checking is enabled, and the OCSP checks fail,
# the verify section is not run.
#
# If OCSP checking is disabled, the verify section is
# run on successful certificate validation.
#
verify {
# If the OCSP checks succeed, the verify section
# is run to allow additional checks.
#
# If you want to skip verify on OCSP success,
# uncomment this configuration item, and set it
# to "yes".
#
# skip_if_ocsp_ok = no
# A temporary directory where the client
# certificates are stored. This directory
# MUST be owned by the UID of the server,
# and MUST not be accessible by any other
# users. When the server starts, it will do
# "chmod go-rwx" on the directory, for
# security reasons. The directory MUST
# exist when the server starts.
#
# You should also delete all of the files
# in the directory when the server starts.
#
# tmpdir = /tmp/radiusd
# The command used to verify the client cert.
# We recommend using the OpenSSL command-line
# tool.
#
# The ${..ca_path} text is a reference to
# the ca_path variable defined above.
#
# The %{TLS-Client-Cert-Filename} is the name
# of the temporary file containing the cert
# in PEM format. This file is automatically
# deleted by the server when the command
# returns.
#
# client = "/path/to/openssl verify -CApath ${..ca_path} %{TLS-Client-Cert-Filename}"
}
# OCSP Configuration
#
# Certificates can be verified against an OCSP
# Responder. This makes it possible to immediately
# revoke certificates without the distribution of
# new Certificate Revocation Lists (CRLs).
#
ocsp {
# Enable it. The default is "no".
# Deleting the entire "ocsp" subsection
# also disables ocsp checking
#
enable = no
# The OCSP Responder URL can be automatically
# extracted from the certificate in question.
# To override the OCSP Responder URL set
# "override_cert_url = yes".
#
override_cert_url = yes
# If the OCSP Responder address is not extracted from
# the certificate, the URL can be defined here.
#
url = "http://127.0.0.1/ocsp/"
# If the OCSP Responder can not cope with nonce
# in the request, then it can be disabled here.
#
# For security reasons, disabling this option
# is not recommended as nonce protects against
# replay attacks.
#
# Note that Microsoft AD Certificate Services OCSP
# Responder does not enable nonce by default. It is
# more secure to enable nonce on the responder than
# to disable it in the query here.
# See http://technet.microsoft.com/en-us/library/cc770413%28WS.10%29.aspx
#
# use_nonce = yes
# Number of seconds before giving up waiting
# for OCSP response. 0 uses system default.
#
# timeout = 0
# Normally an error in querying the OCSP
# responder (no response from server, server did
# not understand the request, etc) will result in
# a validation failure.
#
# To treat these errors as 'soft' failures and
# still accept the certificate, enable this
# option.
#
# Warning: this may enable clients with revoked
# certificates to connect if the OCSP responder
# is not available. Use with caution.
#
# softfail = no
}
#
# The server can present different certificates based
# on the realm presented in EAP. See
# raddb/certs/realms/README.md for examples of how to
# configure this.
#
# Note that the default is to use the same set of
# realm certificates for both EAP and RadSec! If
# this is not what you want, you should use different
# subdirectories or each, e.g. ${certdir}/realms/radsec/,
# and ${certdir}/realms/eap/
#
# realm_dir = ${certdir}/realms/
}
# EAP-TLS
#
# The TLS configuration for TLS-based EAP types is held in
# the "tls-config" section, above.
#
tls {
# Point to the common TLS configuration
#
tls = tls-common
# As part of checking a client certificate, the EAP-TLS
# sets some attributes such as TLS-Client-Cert-Common-Name. This
# virtual server has access to these attributes, and can
# be used to accept or reject the request.
#
# virtual_server = check-eap-tls
# You can control whether or not EAP-TLS requires a
# client certificate by setting
#
# configurable_client_cert = yes
#
# Once that setting has been changed, you can then set
#
# EAP-TLS-Require-Client-Cert = No
#
# in the control items for a request, and the EAP-TLS
# module will not require a client certificate from
# the supplicant.
#
# WARNING: This configuration should only be used
# when the users are placed into a "captive portal"
# or "walled garden", where they have limited network
# access. Otherwise the configuraton will allow
# anyone on the network, without authenticating them!
#
# configurable_client_cert = no
}
# EAP-TTLS -- Tunneled TLS
#
# The TTLS module implements the EAP-TTLS protocol,
# which can be described as EAP inside of Diameter,
# inside of TLS, inside of EAP, inside of RADIUS...
#
# Surprisingly, it works quite well.
#
ttls {
# Which tls-config section the TLS negotiation parameters
# are in - see EAP-TLS above for an explanation.
#
# In the case that an old configuration from FreeRADIUS
# v2.x is being used, all the options of the tls-config
# section may also appear instead in the 'tls' section
# above. If that is done, the tls= option here (and in
# tls above) MUST be commented out.
#
tls = tls-common
# The tunneled EAP session needs a default EAP type
# which is separate from the one for the non-tunneled
# EAP module. Inside of the TTLS tunnel, we recommend
# using EAP-MD5. If the request does not contain an
# EAP conversation, then this configuration entry is
# ignored.
#
default_eap_type = md5
# The tunneled authentication request does not usually
# contain useful attributes like 'Calling-Station-Id',
# etc. These attributes are outside of the tunnel,
# and normally unavailable to the tunneled
# authentication request.
#
# By setting this configuration entry to 'yes',
# any attribute which is NOT in the tunneled
# authentication request, but which IS available
# outside of the tunnel, is copied to the tunneled
# request.
#
# allowed values: {no, yes}
#
copy_request_to_tunnel = no
# This configuration item is deprecated. Instead,
# you should use:
#
# update outer.session-state {
# ...
# }
#
# This will cache attributes for the final Access-Accept.
#
# See "update outer.session-state" in the "post-auth"
# sections of sites-available/default, and of
# sites-available/inner-tunnel
#
# The reply attributes sent to the NAS are usually
# based on the name of the user 'outside' of the
# tunnel (usually 'anonymous'). If you want to send
# the reply attributes based on the user name inside
# of the tunnel, then set this configuration entry to
# 'yes', and the reply to the NAS will be taken from
# the reply to the tunneled request.
#
# allowed values: {no, yes}
#
use_tunneled_reply = no
# The inner tunneled request can be sent
# through a virtual server constructed
# specifically for this purpose.
#
# A virtual server MUST be specified.
#
virtual_server = "inner-tunnel"
# This has the same meaning, and overwrites, the
# same field in the "tls" configuration, above.
# The default value here is "yes".
#
# include_length = yes
# Unlike EAP-TLS, EAP-TTLS does not require a client
# certificate. However, you can require one by setting the
# following option. You can also override this option by
# setting
#
# EAP-TLS-Require-Client-Cert = Yes
#
# in the control items for a request.
#
# Note that the majority of supplicants do not support using a
# client certificate with EAP-TTLS, so this option is unlikely
# to be usable for most people.
#
# require_client_cert = yes
}
# EAP-PEAP
#
##################################################
#
# !!!!! WARNINGS for Windows compatibility !!!!!
#
##################################################
#
# If you see the server send an Access-Challenge,
# and the client never sends another Access-Request,
# then
#
# STOP!
#
# The server certificate has to have special OID's
# in it, or else the Microsoft clients will silently
# fail. See the "scripts/xpextensions" file for
# details, and the following page:
#
# https://support.microsoft.com/en-us/help/814394/
#
# If is still doesn't work, and you're using Samba,
# you may be encountering a Samba bug. See:
#
# https://bugzilla.samba.org/show_bug.cgi?id=6563
#
# Note that we do not necessarily agree with their
# explanation... but the fix does appear to work.
#
##################################################
# The tunneled EAP session needs a default EAP type
# which is separate from the one for the non-tunneled
# EAP module. Inside of the TLS/PEAP tunnel, we
# recommend using EAP-MS-CHAPv2.
#
peap {
# Which tls-config section the TLS negotiation parameters
# are in - see EAP-TLS above for an explanation.
#
# In the case that an old configuration from FreeRADIUS
# v2.x is being used, all the options of the tls-config
# section may also appear instead in the 'tls' section
# above. If that is done, the tls= option here (and in
# tls above) MUST be commented out.
#
tls = tls-common
# The tunneled EAP session needs a default
# EAP type which is separate from the one for
# the non-tunneled EAP module. Inside of the
# PEAP tunnel, we recommend using MS-CHAPv2,
# as that is the default type supported by
# Windows clients.
#
default_eap_type = mschapv2
# The PEAP module also has these configuration
# items, which are the same as for TTLS.
#
copy_request_to_tunnel = no
# This configuration item is deprecated. Instead,
# you should use:
#
# update outer.session-state {
# ...
# }
#
# This will cache attributes for the final Access-Accept.
#
# See "update outer.session-state" in the "post-auth"
# sections of sites-available/default, and of
# sites-available/inner-tunnel
#
use_tunneled_reply = no
# When the tunneled session is proxied, the
# home server may not understand EAP-MSCHAP-V2.
# Set this entry to "no" to proxy the tunneled
# EAP-MSCHAP-V2 as normal MSCHAPv2.
#
# This setting can be over-ridden on a packet by
# packet basis by setting
#
# &control:Proxy-Tunneled-Request-As-EAP = yes
#
# proxy_tunneled_request_as_eap = yes
# The inner tunneled request can be sent
# through a virtual server constructed
# specifically for this purpose.
#
# A virtual server MUST be specified.
#
virtual_server = "inner-tunnel"
# This option enables support for MS-SoH
# see doc/SoH.txt for more info.
# It is disabled by default.
#
# soh = yes
# The SoH reply will be turned into a request which
# can be sent to a specific virtual server:
#
# soh_virtual_server = "soh-server"
# Unlike EAP-TLS, PEAP does not require a client certificate.
# However, you can require one by setting the following
# option. You can also override this option by setting
#
# EAP-TLS-Require-Client-Cert = Yes
#
# in the control items for a request.
#
# Note that the majority of supplicants do not support using a
# client certificate with PEAP, so this option is unlikely to
# be usable for most people.
#
# require_client_cert = yes
}
# EAP-MSCHAPv2
#
# Note that it is the EAP MS-CHAPv2 sub-module, not
# the main 'mschap' module.
#
# Note also that in order for this sub-module to work,
# the main 'mschap' module MUST ALSO be configured.
#
# This module is the *Microsoft* implementation of MS-CHAPv2
# in EAP. There is another (incompatible) implementation
# of MS-CHAPv2 in EAP by Cisco, which FreeRADIUS does not
# currently support.
#
mschapv2 {
# In earlier versions of the server, this module
# never sent the MS-CHAP-Error message to the client.
# This worked, but it had issues when the cached
# password was wrong. The server *should* send
# "E=691 R=0" to the client, which tells it to prompt
# the user for a new password.
#
# The default is to use that functionality. which is
# known to work. If you set "send_error = yes", then
# the error message will be sent back to the client.
# This *may* help some clients work better, but *may*
# also cause other clients to stop working.
#
# send_error = no
# Server identifier to send back in the challenge.
# This should generally be the host name of the
# RADIUS server. Or, some information to uniquely
# identify it.
#
# identity = "FreeRADIUS"
}
# EAP-FAST
#
# The FAST module implements the EAP-FAST protocol
#
#fast {
# Point to the common TLS configuration
#
# tls = tls-common
# If 'cipher_list' is set here, it will over-ride the
# 'cipher_list' configuration from the 'tls-common'
# configuration. The EAP-FAST module has it's own
# over-ride for 'cipher_list' because the
# specifications mandata a different set of ciphers
# than are used by the other EAP methods.
#
# cipher_list though must include "ADH" for anonymous provisioning.
# This is not as straight forward as appending "ADH" alongside
# "DEFAULT" as "DEFAULT" contains "!aNULL" so instead it is
# recommended "ALL:!EXPORT:!eNULL:!SSLv2" is used
#
# cipher_list = "ALL:!EXPORT:!eNULL:!SSLv2"
# PAC lifetime in seconds (default: seven days)
#
# pac_lifetime = 604800
# Authority ID of the server
#
# If you are running a cluster of RADIUS servers, you should make
# the value chosen here (and for "pac_opaque_key") the same on all
# your RADIUS servers. This value should be unique to your
# installation. We suggest using a domain name.
#
# authority_identity = "1234"
# PAC Opaque encryption key (must be exactly 32 bytes in size)
#
# This value MUST be secret, and MUST be generated using
# a secure method, such as via 'openssl rand -hex 32'
#
# pac_opaque_key = "0123456789abcdef0123456789ABCDEF"
# Same as for TTLS, PEAP, etc.
#
# virtual_server = inner-tunnel
#}
}
fichier /sites-enabled/default
######################################################################
#
# As of 2.0.0, FreeRADIUS supports virtual hosts using the
# "server" section, and configuration directives.
#
# Virtual hosts should be put into the "sites-available"
# directory. Soft links should be created in the "sites-enabled"
# directory to these files. This is done in a normal installation.
#
# If you are using 802.1X (EAP) authentication, please see also
# the "inner-tunnel" virtual server. You will likely have to edit
# that, too, for authentication to work.
#
# $Id$
#
######################################################################
#
# Read "man radiusd" before editing this file. See the section
# titled DEBUGGING. It outlines a method where you can quickly
# obtain the configuration you want, without running into
# trouble. See also "man unlang", which documents the format
# of this file.
#
# This configuration is designed to work in the widest possible
# set of circumstances, with the widest possible number of
# authentication methods. This means that in general, you should
# need to make very few changes to this file.
#
# The best way to configure the server for your local system
# is to CAREFULLY edit this file. Most attempts to make large
# edits to this file will BREAK THE SERVER. Any edits should
# be small, and tested by running the server with "radiusd -X".
# Once the edits have been verified to work, save a copy of these
# configuration files somewhere. (e.g. as a "tar" file). Then,
# make more edits, and test, as above.
#
# There are many "commented out" references to modules such
# as ldap, sql, etc. These references serve as place-holders.
# If you need the functionality of that module, then configure
# it in radiusd.conf, and un-comment the references to it in
# this file. In most cases, those small changes will result
# in the server being able to connect to the DB, and to
# authenticate users.
#
######################################################################
server default {
#
# If you want the server to listen on additional addresses, or on
# additional ports, you can use multiple "listen" sections.
#
# Each section make the server listen for only one type of packet,
# therefore authentication and accounting have to be configured in
# different sections.
#
# The server ignore all "listen" section if you are using '-i' and '-p'
# on the command line.
#
listen {
# Type of packets to listen for.
# Allowed values are:
# auth listen for authentication packets
# acct listen for accounting packets
# auth+acct listen for both authentication and accounting packets
# proxy IP to use for sending proxied packets
# detail Read from the detail file. For examples, see
# raddb/sites-available/copy-acct-to-home-server
# status listen for Status-Server packets. For examples,
# see raddb/sites-available/status
# coa listen for CoA-Request and Disconnect-Request
# packets. For examples, see the file
# raddb/sites-available/coa
#
type = auth
# Note: "type = proxy" lets you control the source IP used for
# proxying packets, with some limitations:
#
# * A proxy listener CANNOT be used in a virtual server section.
# * You should probably set "port = 0".
# * Any "clients" configuration will be ignored.
#
# See also proxy.conf, and the "src_ipaddr" configuration entry
# in the sample "home_server" section. When you specify the
# source IP address for packets sent to a home server, the
# proxy listeners are automatically created.
# ipaddr/ipv4addr/ipv6addr - IP address on which to listen.
# If multiple ones are listed, only the first one will
# be used, and the others will be ignored.
#
# The configuration options accept the following syntax:
#
# ipv4addr - IPv4 address (e.g.192.0.2.3)
# - wildcard (i.e. *)
# - hostname (radius.example.com)
# Only the A record for the host name is used.
# If there is no A record, an error is returned,
# and the server fails to start.
#
# ipv6addr - IPv6 address (e.g. 2001:db8::1)
# - wildcard (i.e. *)
# - hostname (radius.example.com)
# Only the AAAA record for the host name is used.
# If there is no AAAA record, an error is returned,
# and the server fails to start.
#
# ipaddr - IPv4 address as above
# - IPv6 address as above
# - wildcard (i.e. *), which means IPv4 wildcard.
# - hostname
# If there is only one A or AAAA record returned
# for the host name, it is used.
# If multiple A or AAAA records are returned
# for the host name, only the first one is used.
# If both A and AAAA records are returned
# for the host name, only the A record is used.
#
# ipv4addr = *
# ipv6addr = *
ipaddr = 192.168.3.1
# Port on which to listen.
# Allowed values are:
# integer port number (1812)
# 0 means "use /etc/services for the proper port"
port = 3030
# Some systems support binding to an interface, in addition
# to the IP address. This feature isn't strictly necessary,
# but for sites with many IP addresses on one interface,
# it's useful to say "listen on all addresses for eth0".
#
# If your system does not support this feature, you will
# get an error if you try to use it.
#
# interface = eth0
# Per-socket lists of clients. This is a very useful feature.
#
# The name here is a reference to a section elsewhere in
# radiusd.conf, or clients.conf. Having the name as
# a reference allows multiple sockets to use the same
# set of clients.
#
# If this configuration is used, then the global list of clients
# is IGNORED for this "listen" section. Take care configuring
# this feature, to ensure you don't accidentally disable a
# client you need.
#
# See clients.conf for the configuration of "per_socket_clients".
#
# clients = per_socket_clients
#
# Set the default UDP receive buffer size. In most cases,
# the default values set by the kernel are fine. However, in
# some cases the NASes will send large packets, and many of
# them at a time. It is then possible to overflow the
# buffer, causing the kernel to drop packets before they
# reach FreeRADIUS. Increasing the size of the buffer will
# avoid these packet drops.
#
# recv_buff = 65536
#
# Connection limiting for sockets with "proto = tcp".
#
# This section is ignored for other kinds of sockets.
#
limit {
#
# Limit the number of simultaneous TCP connections to the socket
#
# The default is 16.
# Setting this to 0 means "no limit"
max_connections = 16
# The per-socket "max_requests" option does not exist.
#
# The lifetime, in seconds, of a TCP connection. After
# this lifetime, the connection will be closed.
#
# Setting this to 0 means "forever".
lifetime = 0
#
# The idle timeout, in seconds, of a TCP connection.
# If no packets have been received over the connection for
# this time, the connection will be closed.
#
# Setting this to 0 means "no timeout".
#
# We STRONGLY RECOMMEND that you set an idle timeout.
#
idle_timeout = 30
}
}
#
# This second "listen" section is for listening on the accounting
# port, too.
#
listen {
ipaddr = 192.168.3.1
# ipv6addr = ::
port = 3031
type = acct
# interface = eth0
# clients = per_socket_clients
limit {
# The number of packets received can be rate limited via the
# "max_pps" configuration item. When it is set, the server
# tracks the total number of packets received in the previous
# second. If the count is greater than "max_pps", then the
# new packet is silently discarded. This helps the server
# deal with overload situations.
#
# The packets/s counter is tracked in a sliding window. This
# means that the pps calculation is done for the second
# before the current packet was received. NOT for the current
# wall-clock second, and NOT for the previous wall-clock second.
#
# Useful values are 0 (no limit), or 100 to 10000.
# Values lower than 100 will likely cause the server to ignore
# normal traffic. Few systems are capable of handling more than
# 10K packets/s.
#
# It is most useful for accounting systems. Set it to 50%
# more than the normal accounting load, and you can be sure that
# the server will never get overloaded
#
# max_pps = 0
# Only for "proto = tcp". These are ignored for "udp" sockets.
#
# idle_timeout = 0
# lifetime = 0
# max_connections = 0
}
}
# IPv6 versions of the above - read their full config to understand options
#listen {
# type = auth
# ipv6addr = :: # any. ::1 == localhost
# port = 0
# interface = eth0
# clients = per_socket_clients
# limit {
# max_connections = 16
# lifetime = 0
# idle_timeout = 30
# }
#}
#listen {
# ipv6addr = ::
# port = 0
# type = acct
# interface = eth0
# clients = per_socket_clients
# limit {
# max_pps = 0
# idle_timeout = 0
# lifetime = 0
# max_connections = 0
# }
#}
# Authorization. First preprocess (hints and huntgroups files),
# then realms, and finally look in the "users" file.
#
# Any changes made here should also be made to the "inner-tunnel"
# virtual server.
#
# The order of the realm modules will determine the order that
# we try to find a matching realm.
#
# Make *sure* that 'preprocess' comes before any realm if you
# need to setup hints for the remote radius server
authorize {
#
# Take a User-Name, and perform some checks on it, for spaces and other
# invalid characters. If the User-Name appears invalid, reject the
# request.
#
# See policy.d/filter for the definition of the filter_username policy.
#
filter_username
#
# Some broken equipment sends passwords with embedded zeros.
# i.e. the debug output will show
#
# User-Password = "password\000\000"
#
# This policy will fix it to just be "password".
#
# filter_password
#
# The preprocess module takes care of sanitizing some bizarre
# attributes in the request, and turning them into attributes
# which are more standard.
#
# It takes care of processing the 'raddb/mods-config/preprocess/hints'
# and the 'raddb/mods-config/preprocess/huntgroups' files.
preprocess
# If you intend to use CUI and you require that the Operator-Name
# be set for CUI generation and you want to generate CUI also
# for your local clients then uncomment the operator-name
# below and set the operator-name for your clients in clients.conf
# operator-name
#
# If you want to generate CUI for some clients that do not
# send proper CUI requests, then uncomment the
# cui below and set "add_cui = yes" for these clients in clients.conf
# cui
#
# If you want to have a log of authentication requests,
# un-comment the following line.
# auth_log
#
# The chap module will set 'Auth-Type := CHAP' if we are
# handling a CHAP request and Auth-Type has not already been set
chap
#
# If the users are logging in with an MS-CHAP-Challenge
# attribute for authentication, the mschap module will find
# the MS-CHAP-Challenge attribute, and add 'Auth-Type := MS-CHAP'
# to the request, which will cause the server to then use
# the mschap module for authentication.
mschap
#
# If you have a Cisco SIP server authenticating against
# FreeRADIUS, uncomment the following line, and the 'digest'
# line in the 'authenticate' section.
digest
#
# The WiMAX specification says that the Calling-Station-Id
# is 6 octets of the MAC. This definition conflicts with
# RFC 3580, and all common RADIUS practices. If you are using
# old style WiMAX (non LTE) the un-commenting the "wimax" module
# here means that it will fix the Calling-Station-Id attribute to
# the normal format as specified in RFC 3580 Section 3.21.
#
# If you are using WiMAX 2.1 (LTE) then un-commenting will allow
# the module to handle SQN resyncronisation. Prior to calling the
# module it is necessary to populate the following attributes
# with the relevant keys:
# control:WiMAX-SIM-Ki
# control:WiMAX-SIM-OPc
#
# If WiMAX-Re-synchronization-Info is found in the request then
# the module will attempt to extract SQN and store it in
# control:WiMAX-SIM-SQN. Also a copy of RAND is extracted to
# control:WiMAX-SIM-RAND.
#
# If the SIM cannot be authenticated using Ki and OPc then reject
# will be returned.
# wimax
#
# Look for IPASS style 'realm/', and if not found, look for
# '@realm', and decide whether or not to proxy, based on
# that.
# IPASS
#
# Look for realms in user@domain format
suffix
# ntdomain
#
# This module takes care of EAP-MD5, EAP-TLS, and EAP-LEAP
# authentication.
#
# It also sets the EAP-Type attribute in the request
# attribute list to the EAP type from the packet.
#
# The EAP module returns "ok" or "updated" if it is not yet ready
# to authenticate the user. The configuration below checks for
# "ok", and stops processing the "authorize" section if so.
#
# Any LDAP and/or SQL servers will not be queried for the
# initial set of packets that go back and forth to set up
# TTLS or PEAP.
#
# The "updated" check is commented out for compatibility with
# previous versions of this configuration, but you may wish to
# uncomment it as well; this will further reduce the number of
# LDAP and/or SQL queries for TTLS or PEAP.
#
eap {
ok = return
# updated = return
}
#
# Pull crypt'd passwords from /etc/passwd or /etc/shadow,
# using the system API's to get the password. If you want
# to read /etc/passwd or /etc/shadow directly, see the
# mods-available/passwd module.
#
# unix
#
# Read the 'users' file. In v3, this is located in
# raddb/mods-config/files/authorize
files
#
# Look in an SQL database. The schema of the database
# is meant to mirror the "users" file.
#
# See "Authorization Queries" in mods-available/sql
-sql
#
# If you are using /etc/smbpasswd, and are also doing
# mschap authentication, the un-comment this line, and
# configure the 'smbpasswd' module.
# smbpasswd
#
# The ldap module reads passwords from the LDAP database.
-ldap
#
# Enforce daily limits on time spent logged in.
# daily
#
expiration
logintime
#
# If no other module has claimed responsibility for
# authentication, then try to use PAP. This allows the
# other modules listed above to add a "known good" password
# to the request, and to do nothing else. The PAP module
# will then see that password, and use it to do PAP
# authentication.
#
# This module should be listed last, so that the other modules
# get a chance to set Auth-Type for themselves.
#
pap
#
# If "status_server = yes", then Status-Server messages are passed
# through the following section, and ONLY the following section.
# This permits you to do DB queries, for example. If the modules
# listed here return "fail", then NO response is sent.
#
# Autz-Type Status-Server {
#
# }
#
# RADIUS/TLS (or RadSec) connections are processed through
# this section. See sites-available/tls, and the configuration
# item "check_client_connections" for more information.
#
# The request contains TLS client certificate attributes,
# and nothing else. The debug output will print which
# attributes are available on your system.
#
# If the section returns "ok" or "updated", then the
# connection is accepted. Otherwise the connection is
# terminated.
#
Autz-Type New-TLS-Connection {
ok
}
}
# Authentication.
#
#
# This section lists which modules are available for authentication.
# Note that it does NOT mean 'try each module in order'. It means
# that a module from the 'authorize' section adds a configuration
# attribute 'Auth-Type := FOO'. That authentication type is then
# used to pick the appropriate module from the list below.
#
# In general, you SHOULD NOT set the Auth-Type attribute. The server
# will figure it out on its own, and will do the right thing. The
# most common side effect of erroneously setting the Auth-Type
# attribute is that one authentication method will work, but the
# others will not.
#
# The common reasons to set the Auth-Type attribute by hand
# is to either forcibly reject the user (Auth-Type := Reject),
# or to or forcibly accept the user (Auth-Type := Accept).
#
# Note that Auth-Type := Accept will NOT work with EAP.
#
# Please do not put "unlang" configurations into the "authenticate"
# section. Put them in the "post-auth" section instead. That's what
# the post-auth section is for.
#
authenticate {
#
# PAP authentication, when a back-end database listed
# in the 'authorize' section supplies a password. The
# password can be clear-text, or encrypted.
Auth-Type PAP {
pap
}
#
# Most people want CHAP authentication
# A back-end database listed in the 'authorize' section
# MUST supply a CLEAR TEXT password. Encrypted passwords
# won't work.
Auth-Type CHAP {
chap
}
#
# MSCHAP authentication.
Auth-Type MS-CHAP {
mschap
}
#
# For old names, too.
#
mschap
#
# If you have a Cisco SIP server authenticating against
# FreeRADIUS, uncomment the following line, and the 'digest'
# line in the 'authorize' section.
digest
#
# Pluggable Authentication Modules.
# pam
# Uncomment it if you want to use ldap for authentication
#
# Note that this means "check plain-text password against
# the ldap database", which means that EAP won't work,
# as it does not supply a plain-text password.
#
# We do NOT recommend using this. LDAP servers are databases.
# They are NOT authentication servers. FreeRADIUS is an
# authentication server, and knows what to do with authentication.
# LDAP servers do not.
#
# Auth-Type LDAP {
# ldap
# }
#
# Allow EAP authentication.
eap
#
# The older configurations sent a number of attributes in
# Access-Challenge packets, which wasn't strictly correct.
# If you want to filter out these attributes, uncomment
# the following lines.
#
# Auth-Type eap {
# eap {
# handled = 1
# }
# if (handled && (Response-Packet-Type == Access-Challenge)) {
# attr_filter.access_challenge.post-auth
# handled # override the "updated" code from attr_filter
# }
# }
}
#
# Pre-accounting. Decide which accounting type to use.
#
preacct {
preprocess
#
# Merge Acct-[Input|Output]-Gigawords and Acct-[Input-Output]-Octets
# into a single 64bit counter Acct-[Input|Output]-Octets64.
#
# acct_counters64
#
# Session start times are *implied* in RADIUS.
# The NAS never sends a "start time". Instead, it sends
# a start packet, *possibly* with an Acct-Delay-Time.
# The server is supposed to conclude that the start time
# was "Acct-Delay-Time" seconds in the past.
#
# The code below creates an explicit start time, which can
# then be used in other modules. It will be *mostly* correct.
# Any errors are due to the 1-second resolution of RADIUS,
# and the possibility that the time on the NAS may be off.
#
# The start time is: NOW - delay - session_length
#
# update request {
# &FreeRADIUS-Acct-Session-Start-Time = "%{expr: %l - %{%{Acct-Session-Time}:-0} - %{%{Acct-Delay-Time}:-0}}"
# }
#
# Ensure that we have a semi-unique identifier for every
# request, and many NAS boxes are broken.
acct_unique
#
# Look for IPASS-style 'realm/', and if not found, look for
# '@realm', and decide whether or not to proxy, based on
# that.
#
# Accounting requests are generally proxied to the same
# home server as authentication requests.
# IPASS
suffix
# ntdomain
#
# Read the 'acct_users' file
files
}
#
# Accounting. Log the accounting data.
#
accounting {
# Update accounting packet by adding the CUI attribute
# recorded from the corresponding Access-Accept
# use it only if your NAS boxes do not support CUI themselves
# cui
#
# Create a 'detail'ed log of the packets.
# Note that accounting requests which are proxied
# are also logged in the detail file.
detail
# daily
# Update the wtmp file
#
# If you don't use "radlast", you can delete this line.
unix
#
# For Simultaneous-Use tracking.
#
# Due to packet losses in the network, the data here
# may be incorrect. There is little we can do about it.
# radutmp
# sradutmp
#
# Return an address to the IP Pool when we see a stop record.
#
# Ensure that &control:Pool-Name is set to determine which
# pool of IPs are used.
# sqlippool
#
# Log traffic to an SQL database.
#
# See "Accounting queries" in mods-available/sql
-sql
#
# If you receive stop packets with zero session length,
# they will NOT be logged in the database. The SQL module
# will print a message (only in debugging mode), and will
# return "noop".
#
# You can ignore these packets by uncommenting the following
# three lines. Otherwise, the server will not respond to the
# accounting request, and the NAS will retransmit.
#
# if (noop) {
# ok
# }
# Cisco VoIP specific bulk accounting
# pgsql-voip
# For Exec-Program and Exec-Program-Wait
exec
# Filter attributes from the accounting response.
attr_filter.accounting_response
#
# See "Autz-Type Status-Server" for how this works.
#
# Acct-Type Status-Server {
#
# }
}
# Session database, used for checking Simultaneous-Use. Either the radutmp
# or rlm_sql module can handle this.
# The rlm_sql module is *much* faster
session {
# radutmp
#
# See "Simultaneous Use Checking Queries" in mods-available/sql
# sql
}
# Post-Authentication
# Once we KNOW that the user has been authenticated, there are
# additional steps we can take.
post-auth {
#
# If you need to have a State attribute, you can
# add it here. e.g. for later CoA-Request with
# State, and Service-Type = Authorize-Only.
#
# if (!&reply:State) {
# update reply {
# State := "0x%{randstr:16h}"
# }
# }
#
# Reject packets where User-Name != TLS-Client-Cert-Common-Name
# There is no reason for users to lie about their names.
#
# In general, User-Name == EAP Identity == TLS-Client-Cert-Common-Name
#
# verify_tls_client_common_name
#
# If there is no Stripped-User-Name in the request, AND we have a client cert,
# then create a Stripped-User-Name from the TLS client certificate information.
#
# Note that this policy MUST be edited for your local system!
# We do not know which fields exist in which certificate, as
# there is no standard here. There is no way for us to have
# a default configuration which "just works" everywhere. We
# can only make recommendations.
#
# The Stripped-User-Name is updated so that it is logged in
# the various "username" fields. This logging means that you
# can associate a particular session with a particular client
# certificate.
#
# if (&EAP-Message && !&Stripped-User-Name && &TLS-Client-Cert-Serial) {
# update request {
# &Stripped-User-Name := "%{%{TLS-Client-Cert-Subject-Alt-Name-Email}:-%{%{TLS-Client-Cert-Common-Name}:-%{TLS-Client-Cert-Serial}}}"
# }
#
#
# Create a Class attribute which is a hash of a bunch
# of information which we hope exists. This
# attribute should be echoed back in
# Accounting-Request packets, which will let the
# administrator correlate authentication and
# accounting.
#
# update reply {
# Class += "%{md5:%{Calling-Station-Id}%{Called-Station-Id}%{TLS-Client-Cert-Subject-Alt-Name-Email}%{TLS-Client-Cert-Common-Name}%{TLS-Client-Cert-Serial}%{NAS-IPv6-Address}%{NAS-IP-Address}%{NAS-Identifier}%{NAS-Port}"
# }
#
# }
#
# For EAP-TTLS and PEAP, add the cached attributes to the reply.
# The "session-state" attributes are automatically cached when
# an Access-Challenge is sent, and automatically retrieved
# when an Access-Request is received.
#
# The session-state attributes are automatically deleted after
# an Access-Reject or Access-Accept is sent.
#
# If both session-state and reply contain a User-Name attribute, remove
# the one in the reply if it is just a copy of the one in the request, so
# we don't end up with two User-Name attributes.
if (session-state:User-Name && reply:User-Name && request:User-Name && (reply:User-Name == request:User-Name)) {
update reply {
&User-Name !* ANY
}
}
update {
&reply: += &session-state:
}
#
# Refresh leases when we see a start or alive. Return an address to
# the IP Pool when we see a stop record.
#
# Ensure that &control:Pool-Name is set to determine which
# pool of IPs are used.
# sqlippool
# Create the CUI value and add the attribute to Access-Accept.
# Uncomment the line below if *returning* the CUI.
# cui
# Create empty accounting session to make simultaneous check
# more robust. See the accounting queries configuration in
# raddb/mods-config/sql/main/*/queries.conf for details.
#
# The "sql_session_start" policy is defined in
# raddb/policy.d/accounting. See that file for more details.
# sql_session_start
#
# If you want to have a log of authentication replies,
# un-comment the following line, and enable the
# 'detail reply_log' module.
# reply_log
#
# After authenticating the user, do another SQL query.
#
# See "Authentication Logging Queries" in mods-available/sql
-sql
#
# Un-comment the following if you want to modify the user's object
# in LDAP after a successful login.
#
# ldap
# For Exec-Program and Exec-Program-Wait
exec
#
# In order to calcualate the various keys for old style WiMAX
# (non LTE) you will need to define the WiMAX NAI, usually via
#
# update request {
# &WiMAX-MN-NAI = "%{User-Name}"
# }
#
# If you want various keys to be calculated, you will need to
# update the reply with "template" values. The module will see
# this, and replace the template values with the correct ones
# taken from the cryptographic calculations. e.g.
#
# update reply {
# &WiMAX-FA-RK-Key = 0x00
# &WiMAX-MSK = "%{reply:EAP-MSK}"
# }
#
# You may want to delete the MS-MPPE-*-Keys from the reply,
# as some WiMAX clients behave badly when those attributes
# are included. See "raddb/modules/wimax", configuration
# entry "delete_mppe_keys" for more information.
#
# For LTE style WiMAX you need to populate the following with the
# relevant values:
# control:WiMAX-SIM-Ki
# control:WiMAX-SIM-OPc
# control:WiMAX-SIM-AMF
# control:WiMAX-SIM-SQN
#
# wimax
# If there is a client certificate (EAP-TLS, sometimes PEAP
# and TTLS), then some attributes are filled out after the
# certificate verification has been performed. These fields
# MAY be available during the authentication, or they may be
# available only in the "post-auth" section.
#
# The first set of attributes contains information about the
# issuing certificate which is being used. The second
# contains information about the client certificate (if
# available).
#
# update reply {
# Reply-Message += "%{TLS-Cert-Serial}"
# Reply-Message += "%{TLS-Cert-Expiration}"
# Reply-Message += "%{TLS-Cert-Subject}"
# Reply-Message += "%{TLS-Cert-Issuer}"
# Reply-Message += "%{TLS-Cert-Common-Name}"
# Reply-Message += "%{TLS-Cert-Subject-Alt-Name-Email}"
#
# Reply-Message += "%{TLS-Client-Cert-Serial}"
# Reply-Message += "%{TLS-Client-Cert-Expiration}"
# Reply-Message += "%{TLS-Client-Cert-Subject}"
# Reply-Message += "%{TLS-Client-Cert-Issuer}"
# Reply-Message += "%{TLS-Client-Cert-Common-Name}"
# Reply-Message += "%{TLS-Client-Cert-Subject-Alt-Name-Email}"
# }
# Insert class attribute (with unique value) into response,
# aids matching auth and acct records, and protects against duplicate
# Acct-Session-Id. Note: Only works if the NAS has implemented
# RFC 2865 behaviour for the class attribute, AND if the NAS
# supports long Class attributes. Many older or cheap NASes
# only support 16-octet Class attributes.
# insert_acct_class
# MacSEC requires the use of EAP-Key-Name. However, we don't
# want to send it for all EAP sessions. Therefore, the EAP
# modules put required data into the EAP-Session-Id attribute.
# This attribute is never put into a request or reply packet.
#
# Uncomment the next few lines to copy the required data into
# the EAP-Key-Name attribute
# if (&reply:EAP-Session-Id) {
# update reply {
# EAP-Key-Name := &reply:EAP-Session-Id
# }
# }
# Remove reply message if the response contains an EAP-Message
remove_reply_message_if_eap
#
# Access-Reject packets are sent through the REJECT sub-section of the
# post-auth section.
#
# Add the ldap module name (or instance) if you have set
# 'edir = yes' in the ldap module configuration
#
# The "session-state" attributes are not available here.
#
Post-Auth-Type REJECT {
# log failed authentications in SQL, too.
-sql
attr_filter.access_reject
# Insert EAP-Failure message if the request was
# rejected by policy instead of because of an
# authentication failure
eap
# Remove reply message if the response contains an EAP-Message
remove_reply_message_if_eap
}
#
# Filter access challenges.
#
Post-Auth-Type Challenge {
# remove_reply_message_if_eap
# attr_filter.access_challenge.post-auth
}
#
# The Client-Lost section will be run for a request when
# FreeRADIUS has given up waiting for an end-users client to
# respond. This is most useful for logging EAP sessions where
# the client stopped responding (likely because the
# certificate was not acceptable.) i.e. this is not for
# RADIUS clients, but for end-user systems.
#
# This will only be triggered by new packets arriving,
# and will be run at some point in the future *after* the
# original request has been discarded.
#
# Therefore the *ONLY* attributes that are available here
# are those in the session-state list. If you want data
# to log, make sure it is copied to &session-state:
# before the client stops responding. NONE of the other
# original attributes (request, reply, etc) will be
# available.
#
# This section will only be run if `postauth_client_lost`
# is enabled in the main configuration in `radiusd.conf`.
#
# Note that there are MANY reasons why an end users system
# might not respond:
#
# * it could not get the packet due to firewall issues
# * it could not get the packet due to a lossy network
# * the users system might not like the servers cert
# * the users system might not like something else...
#
# In some cases, the client is helpful enough to send us a
# TLS Alert message, saying what it doesn't like about the
# certificate. In other cases, no such message is available.
#
# All that we can know on the FreeRADIUS side is that we sent
# an Access-Challenge, and the client never sent anything
# else. The reasons WHY this happens are buried inside of
# the logs on the client system. No amount of looking at the
# FreeRADIUS logs, or poking the FreeRADIUS configuration
# will tell you why the client gave up. The answers are in
# the logs on the client side. And no, the FreeRADIUS team
# didn't write the client, so we don't know where those logs
# are, or how to get at them.
#
# Information about the TLS state changes is in the
# &session-state:TLS-Session-Information attribute.
#
Post-Auth-Type Client-Lost {
#
# Debug ALL of the TLS state changes done during the
# EAP negotiation.
#
# %{debug_attr:&session-state:TLS-Session-Information[*]}
#
# Debug the LAST TLS state change done during the EAP
# negotiation. For errors, this is usually a TLS
# alert from the client saying something like
# "unknown CA".
#
# %{debug_attr:&session-state:TLS-Session-Information[n]}
#
# Debug the last module failure message. This may be
# useful, or it may refer to a server-side failure
# which did not cause the client to stop talking to the server.
#
# %{debug_attr:&session-state:Module-Failure-Message}
}
#
# If the client sends EAP-Key-Name in the request,
# then echo the real value back in the reply.
#
if (EAP-Key-Name && &reply:EAP-Session-Id) {
update reply {
&EAP-Key-Name := &reply:EAP-Session-Id
}
}
}
#
# When the server decides to proxy a request to a home server,
# the proxied request is first passed through the pre-proxy
# stage. This stage can re-write the request, or decide to
# cancel the proxy.
#
# Only a few modules currently have this method.
#
pre-proxy {
# Before proxing the request add an Operator-Name attribute identifying
# if the operator-name is found for this client.
# No need to uncomment this if you have already enabled this in
# the authorize section.
# operator-name
# The client requests the CUI by sending a CUI attribute
# containing one zero byte.
# Uncomment the line below if *requesting* the CUI.
# cui
# Uncomment the following line if you want to change attributes
# as defined in the preproxy_users file.
# files
# Uncomment the following line if you want to filter requests
# sent to remote servers based on the rules defined in the
# 'attrs.pre-proxy' file.
# attr_filter.pre-proxy
# If you want to have a log of packets proxied to a home
# server, un-comment the following line, and the
# 'detail pre_proxy_log' section, above.
# pre_proxy_log
}
#
# When the server receives a reply to a request it proxied
# to a home server, the request may be massaged here, in the
# post-proxy stage.
#
post-proxy {
# If you want to have a log of replies from a home server,
# un-comment the following line, and the 'detail post_proxy_log'
# section, above.
# post_proxy_log
# Uncomment the following line if you want to filter replies from
# remote proxies based on the rules defined in the 'attrs' file.
# attr_filter.post-proxy
#
# If you are proxying LEAP, you MUST configure the EAP
# module, and you MUST list it here, in the post-proxy
# stage.
#
# You MUST also use the 'nostrip' option in the 'realm'
# configuration. Otherwise, the User-Name attribute
# in the proxied request will not match the user name
# hidden inside of the EAP packet, and the end server will
# reject the EAP request.
#
eap
#
# If the server tries to proxy a request and fails, then the
# request is processed through the modules in this section.
#
# The main use of this section is to permit robust proxying
# of accounting packets. The server can be configured to
# proxy accounting packets as part of normal processing.
# Then, if the home server goes down, accounting packets can
# be logged to a local "detail" file, for processing with
# radrelay. When the home server comes back up, radrelay
# will read the detail file, and send the packets to the
# home server.
#
# See the "mods-available/detail.example.com" file for more
# details on writing a detail file specifically for one
# destination.
#
# See the "sites-available/robust-proxy-accounting" virtual
# server for more details on reading this "detail" file.
#
# With this configuration, the server always responds to
# Accounting-Requests from the NAS, but only writes
# accounting packets to disk if the home server is down.
#
# Post-Proxy-Type Fail-Accounting {
# detail.example.com
# }
}
}
fichier radiusd.conf
## radiusd.conf -- FreeRADIUS server configuration file - 3.0.26
##
## http://www.freeradius.org/
## $Id$
##
######################################################################
#
# The format of this (and other) configuration file is
# documented in "man unlang". There are also READMEs in many
# subdirectories:
#
# raddb/README.rst
# How to upgrade from v2.
#
# raddb/mods-available/README.rst
# How to use mods-available / mods-enabled.
# All of the modules are in individual files,
# along with configuration items and full documentation.
#
# raddb/sites-available/README
# virtual servers, "listen" sections, clients, etc.
# The "sites-available" directory contains many
# worked examples of common configurations.
#
# raddb/certs/README.md
# How to create certificates for EAP or RadSec.
#
# Every configuration item in the server is documented
# extensively in the comments in the example configuration
# files.
#
# Before editing this (or any other) configuration file, PLEASE
# read "man radiusd". See the section titled DEBUGGING. It
# outlines a method where you can quickly create the
# configuration you want, with minimal effort.
#
# Run the server in debugging mode, and READ the output.
#
# $ radiusd -X
#
# We cannot emphasize this point strongly enough. The vast
# majority of problems can be solved by carefully reading the
# debugging output, which includes warnings about common issues,
# and suggestions for how they may be fixed.
#
# There may be a lot of output, but look carefully for words like:
# "warning", "error", "reject", or "failure". The messages there
# will usually be enough to guide you to a solution.
#
# More documentation on "radiusd -X" is available on the wiki:
# https://wiki.freeradius.org/radiusd-X
#
# If you are going to ask a question on the mailing list, then
# explain what you are trying to do, and include the output from
# debugging mode (radiusd -X). Failure to do so means that all
# of the responses to your question will be people telling you
# to "post the output of radiusd -X".
#
# Guidelines for posting to the mailing list are on the wiki:
# https://wiki.freeradius.org/list-help
#
# Please read those guidelines before posting to the list.
#
# Further documentation is available in the "doc" directory
# of the server distribution, or on the wiki at:
# https://wiki.freeradius.org/
#
# New users to RADIUS should read the Technical Guide. That guide
# explains how RADIUS works, how FreeRADIUS works, and what each
# part of a RADIUS system does. It is not just "configure FreeRADIUS"!
# https://networkradius.com/doc/FreeRADIUS-Technical-Guide.pdf
#
# More documentation on dictionaries, modules, unlang, etc. is also
# available on the Network RADIUS web site:
# https://networkradius.com/freeradius-documentation/
#
######################################################################
prefix = /usr
exec_prefix = /usr
sysconfdir = /etc
localstatedir = /var
sbindir = ${exec_prefix}/sbin
logdir = /var/log/freeradius
raddbdir = /etc/freeradius/vlan3
radacctdir = ${logdir}/radacct
#
# name of the running server. See also the "-n" command-line option.
name = freeradius-vlan3
# Location of config and logfiles.
confdir = ${raddbdir}
modconfdir = ${confdir}/mods-config
certdir = ${confdir}/certs
cadir = ${confdir}/certs
run_dir = ${localstatedir}/run/${name}
# Should likely be ${localstatedir}/lib/radiusd
db_dir = ${raddbdir}
#
# libdir: Where to find the rlm_* modules.
#
# This should be automatically set at configuration time.
#
# If the server builds and installs, but fails at execution time
# with an 'undefined symbol' error, then you can use the libdir
# directive to work around the problem.
#
# The cause is usually that a library has been installed on your
# system in a place where the dynamic linker CANNOT find it. When
# executing as root (or another user), your personal environment MAY
# be set up to allow the dynamic linker to find the library. When
# executing as a daemon, FreeRADIUS MAY NOT have the same
# personalized configuration.
#
# To work around the problem, find out which library contains that symbol,
# and add the directory containing that library to the end of 'libdir',
# with a colon separating the directory names. NO spaces are allowed.
#
# e.g. libdir = /usr/local/lib:/opt/package/lib
#
# You can also try setting the LD_LIBRARY_PATH environment variable
# in a script which starts the server.
#
# If that does not work, then you can re-configure and re-build the
# server to NOT use shared libraries, via:
#
# ./configure --disable-shared
# make
# make install
#
libdir = /usr/lib/freeradius
# pidfile: Where to place the PID of the RADIUS server.
#
# The server may be signalled while it's running by using this
# file.
#
# This file is written when ONLY running in daemon mode.
#
# e.g.: kill -HUP `cat /var/run/radiusd/radiusd.pid`
#
pidfile = ${run_dir}/${name}.pid
#
# correct_escapes: use correct backslash escaping
#
# Prior to version 3.0.5, the handling of backslashes was a little
# awkward, i.e. "wrong". In some cases, to get one backslash into
# a regex, you had to put 4 in the config files.
#
# Version 3.0.5 fixes that. However, for backwards compatibility,
# the new method of escaping is DISABLED BY DEFAULT. This means
# that upgrading to 3.0.5 won't break your configuration.
#
# If you don't have double backslashes (i.e. \\) in your configuration,
# this won't matter to you. If you do have them, fix that to use only
# one backslash, and then set "correct_escapes = true".
#
# You can check for this by doing:
#
# $ grep '\\\\' $(find raddb -type f -print)
#
correct_escapes = true
# panic_action: Command to execute if the server dies unexpectedly.
#
# FOR PRODUCTION SYSTEMS, ACTIONS SHOULD ALWAYS EXIT.
# AN INTERACTIVE ACTION MEANS THE SERVER IS NOT RESPONDING TO REQUESTS.
# AN INTERACTICE ACTION MEANS THE SERVER WILL NOT RESTART.
#
# THE SERVER MUST NOT BE ALLOWED EXECUTE UNTRUSTED PANIC ACTION CODE
# PATTACH CAN BE USED AS AN ATTACK VECTOR.
#
# The panic action is a command which will be executed if the server
# receives a fatal, non user generated signal, i.e. SIGSEGV, SIGBUS,
# SIGABRT or SIGFPE.
#
# This can be used to start an interactive debugging session so
# that information regarding the current state of the server can
# be acquired.
#
# The following string substitutions are available:
# - %e The currently executing program e.g. /sbin/radiusd
# - %p The PID of the currently executing program e.g. 12345
#
# Standard ${} substitutions are also allowed.
#
# An example panic action for opening an interactive session in GDB would be:
#
#panic_action = "gdb %e %p"
#
# Again, don't use that on a production system.
#
# An example panic action for opening an automated session in GDB would be:
#
#panic_action = "gdb -silent -x ${raddbdir}/panic.gdb %e %p 2>&1 | tee ${logdir}/gdb-${name}-%p.log"
#
# That command can be used on a production system.
#
# max_request_time: The maximum time (in seconds) to handle a request.
#
# Requests which take more time than this to process may be killed, and
# a REJECT message is returned.
#
# WARNING: If you notice that requests take a long time to be handled,
# then this MAY INDICATE a bug in the server, in one of the modules
# used to handle a request, OR in your local configuration.
#
# This problem is most often seen when using an SQL database. If it takes
# more than a second or two to receive an answer from the SQL database,
# then it probably means that you haven't indexed the database. See your
# SQL server documentation for more information.
#
# Useful range of values: 5 to 120
#
max_request_time = 30
# cleanup_delay: The time to wait (in seconds) before cleaning up
# a reply which was sent to the NAS.
#
# The RADIUS request is normally cached internally for a short period
# of time, after the reply is sent to the NAS. The reply packet may be
# lost in the network, and the NAS will not see it. The NAS will then
# re-send the request, and the server will respond quickly with the
# cached reply.
#
# If this value is set too low, then duplicate requests from the NAS
# MAY NOT be detected, and will instead be handled as separate requests.
#
# If this value is set too high, then the server will cache too many
# requests, and some new requests may get blocked. (See 'max_requests'.)
#
# Useful range of values: 2 to 30
#
cleanup_delay = 5
# max_requests: The maximum number of requests which the server keeps
# track of. This should be 256 multiplied by the number of clients.
# e.g. With 4 clients, this number should be 1024.
#
# If this number is too low, then when the server becomes busy,
# it will not respond to any new requests, until the 'cleanup_delay'
# time has passed, and it has removed the old requests.
#
# If this number is set too high, then the server will use a bit more
# memory for no real benefit.
#
# If you aren't sure what it should be set to, it's better to set it
# too high than too low. Setting it to 1000 per client is probably
# the highest it should be.
#
# Useful range of values: 256 to infinity
#
max_requests = 16384
# hostname_lookups: Log the names of clients or just their IP addresses
# e.g., www.freeradius.org (on) or 206.47.27.232 (off).
#
# The default is 'off' because it would be overall better for the net
# if people had to knowingly turn this feature on, since enabling it
# means that each client request will result in AT LEAST one lookup
# request to the nameserver. Enabling hostname_lookups will also
# mean that your server may stop randomly for 30 seconds from time
# to time, if the DNS requests take too long.
#
# Turning hostname lookups off also means that the server won't block
# for 30 seconds, if it sees an IP address which has no name associated
# with it.
#
# allowed values: {no, yes}
#
hostname_lookups = no
#
# Run a "Post-Auth-Type Client-Lost" section. This ONLY happens when
# the server sends an Access-Challenge, and then client does not
# respond to it. The goal is to allow administrators to log
# something when the client does not respond.
#
# See sites-available/default, "Post-Auth-Type Client-Lost" for more
# information.
#
#postauth_client_lost = no
#
# Logging section. The various "log_*" configuration items
# will eventually be moved here.
#
log {
#
# Destination for log messages. This can be one of:
#
# files - log to "file", as defined below.
# syslog - to syslog (see also the "syslog_facility", below.
# stdout - standard output
# stderr - standard error.
#
# The command-line option "-X" over-rides this option, and forces
# logging to go to stdout.
#
destination = files
#
# Highlight important messages sent to stderr and stdout.
#
# Option will be ignored (disabled) if output if TERM is not
# an xterm or output is not to a TTY.
#
colourise = yes
#
# The logging messages for the server are appended to the
# tail of this file if destination == "files"
#
# If the server is running in debugging mode, this file is
# NOT used.
#
file = ${logdir}/radius.log
#
# Which syslog facility to use, if ${destination} == "syslog"
#
# The exact values permitted here are OS-dependent. You probably
# don't want to change this.
#
syslog_facility = daemon
# Log the full User-Name attribute, as it was found in the request.
#
# allowed values: {no, yes}
#
stripped_names = no
# Log all (accept and reject) authentication results to the log file.
#
# This is the same as setting "auth_accept = yes" and
# "auth_reject = yes"
#
# allowed values: {no, yes}
#
auth = no
# Log Access-Accept results to the log file.
#
# This is only used if "auth = no"
#
# allowed values: {no, yes}
#
# auth_accept = no
# Log Access-Reject results to the log file.
#
# This is only used if "auth = no"
#
# allowed values: {no, yes}
#
# auth_reject = no
# Log passwords with the authentication requests.
# auth_badpass - logs password if it's rejected
# auth_goodpass - logs password if it's correct
#
# allowed values: {no, yes}
#
auth_badpass = no
auth_goodpass = no
# Log additional text at the end of the "Login OK" messages.
# for these to work, the "auth" and "auth_goodpass" or "auth_badpass"
# configurations above have to be set to "yes".
#
# The strings below are dynamically expanded, which means that
# you can put anything you want in them. However, note that
# this expansion can be slow, and can negatively impact server
# performance.
#
# msg_goodpass = ""
# msg_badpass = ""
# The message when the user exceeds the Simultaneous-Use limit.
#
msg_denied = "You are already logged in - access denied"
# Suppress "secret" attributes when printing them in debug mode.
#
# Secrets are NOT tracked across xlat expansions. If your
# configuration puts secrets into other strings, they will
# still get printed.
#
# Setting this to "yes" means that the server prints
#
# <<< secret >>>
#
# instead of the value, for attriburtes which contain secret
# information. e.g. User-Name, Tunnel-Password, etc.
#
# This configuration is disabled by default. It is extremely
# important for administrators to be able to debug user logins
# by seeing what is actually being sent.
#
# suppress_secrets = no
}
# The program to execute to do concurrency checks.
checkrad = ${sbindir}/checkrad
#
# ENVIRONMENT VARIABLES
#
# You can reference environment variables using an expansion like
# `$ENV{PATH}`. However it is sometimes useful to be able to also set
# environment variables. This section lets you do that.
#
# The main purpose of this section is to allow administrators to keep
# RADIUS-specific configuration in the RADIUS configuration files.
# For example, if you need to set an environment variable which is
# used by a module. You could put that variable into a shell script,
# but that's awkward. Instead, just list it here.
#
# Note that these environment variables are set AFTER the
# configuration file is loaded. So you cannot set FOO here, and
# expect to reference it via `$ENV{FOO}` in another configuration file.
# You should instead just use a normal configuration variable for
# that.
#
ENV {
#
# Set environment varable `FOO` to value '/bar/baz'.
#
# NOTE: Note that you MUST use '='. You CANNOT use '+=' to append
# values.
#
# FOO = '/bar/baz'
#
# Delete environment variable `BAR`.
#
# BAR
#
# `LD_PRELOAD` is special. It is normally set before the
# application runs, and is interpreted by the dynamic linker.
# Which means you cannot set it inside of an application, and
# expect it to load libraries.
#
# Since this functionality is useful, we extend it here.
#
# You can set
#
# LD_PRELOAD = /path/to/library.so
#
# and the server will load the named libraries. Multiple
# libraries can be loaded by specificing multiple individual
# `LD_PRELOAD` entries.
#
#
# LD_PRELOAD = /path/to/library1.so
# LD_PRELOAD = /path/to/library2.so
}
# SECURITY CONFIGURATION
#
# There may be multiple methods of attacking on the server. This
# section holds the configuration items which minimize the impact
# of those attacks
#
security {
# chroot: directory where the server does "chroot".
#
# The chroot is done very early in the process of starting
# the server. After the chroot has been performed it
# switches to the "user" listed below (which MUST be
# specified). If "group" is specified, it switches to that
# group, too. Any other groups listed for the specified
# "user" in "/etc/group" are also added as part of this
# process.
#
# The current working directory (chdir / cd) is left
# *outside* of the chroot until all of the modules have been
# initialized. This allows the "raddb" directory to be left
# outside of the chroot. Once the modules have been
# initialized, it does a "chdir" to ${logdir}. This means
# that it should be impossible to break out of the chroot.
#
# If you are worried about security issues related to this
# use of chdir, then simply ensure that the "raddb" directory
# is inside of the chroot, end be sure to do "cd raddb"
# BEFORE starting the server.
#
# If the server is statically linked, then the only files
# that have to exist in the chroot are ${run_dir} and
# ${logdir}. If you do the "cd raddb" as discussed above,
# then the "raddb" directory has to be inside of the chroot
# directory, too.
#
# chroot = /path/to/chroot/directory
# user/group: The name (or #number) of the user/group to run radiusd as.
#
# If these are commented out, the server will run as the
# user/group that started it. In order to change to a
# different user/group, you MUST be root ( or have root
# privileges ) to start the server.
#
# We STRONGLY recommend that you run the server with as few
# permissions as possible. That is, if you're not using
# shadow passwords, the user and group items below should be
# set to radius'.
#
# NOTE that some kernels refuse to setgid(group) when the
# value of (unsigned)group is above 60000; don't use group
# "nobody" on these systems!
#
# On systems with shadow passwords, you might have to set
# 'group = shadow' for the server to be able to read the
# shadow password file. If you can authenticate users while
# in debug mode, but not in daemon mode, it may be that the
# debugging mode server is running as a user that can read
# the shadow info, and the user listed below can not.
#
# The server will also try to use "initgroups" to read
# /etc/groups. It will join all groups where "user" is a
# member. This can allow for some finer-grained access
# controls.
#
user = freerad
group = freerad
# Core dumps are a bad thing. This should only be set to
# 'yes' if you're debugging a problem with the server.
#
# allowed values: {no, yes}
#
allow_core_dumps = no
#
# max_attributes: The maximum number of attributes
# permitted in a RADIUS packet. Packets which have MORE
# than this number of attributes in them will be dropped.
#
# If this number is set too low, then no RADIUS packets
# will be accepted.
#
# If this number is set too high, then an attacker may be
# able to send a small number of packets which will cause
# the server to use all available memory on the machine.
#
# Setting this number to 0 means "allow any number of attributes"
max_attributes = 200
#
# reject_delay: When sending an Access-Reject, it can be
# delayed for a few seconds. This may help slow down a DoS
# attack. It also helps to slow down people trying to brute-force
# crack a users password.
#
# Setting this number to 0 means "send rejects immediately"
#
# If this number is set higher than 'cleanup_delay', then the
# rejects will be sent at 'cleanup_delay' time, when the request
# is deleted from the internal cache of requests.
#
# This number can be a decimal, e.g. 3.4
#
# Useful ranges: 1 to 5
reject_delay = 1
#
# status_server: Whether or not the server will respond
# to Status-Server requests.
#
# When sent a Status-Server message, the server responds with
# an Access-Accept or Accounting-Response packet.
#
# This is mainly useful for administrators who want to "ping"
# the server, without adding test users, or creating fake
# accounting packets.
#
# It's also useful when a NAS marks a RADIUS server "dead".
# The NAS can periodically "ping" the server with a Status-Server
# packet. If the server responds, it must be alive, and the
# NAS can start using it for real requests.
#
# See also raddb/sites-available/status
#
status_server = yes
}
# PROXY CONFIGURATION
#
# proxy_requests: Turns proxying of RADIUS requests on or off.
#
# The server has proxying turned on by default. If your system is NOT
# set up to proxy requests to another server, then you can turn proxying
# off here. This will save a small amount of resources on the server.
#
# If you have proxying turned off, and your configuration files say
# to proxy a request, then an error message will be logged.
#
# To disable proxying, change the "yes" to "no", and comment the
# $INCLUDE line.
#
# allowed values: {no, yes}
#
proxy_requests = yes
$INCLUDE proxy.conf
# CLIENTS CONFIGURATION
#
# Client configuration is defined in "clients.conf".
#
# The 'clients.conf' file contains all of the information from the old
# 'clients' and 'naslist' configuration files. We recommend that you
# do NOT use 'client's or 'naslist', although they are still
# supported.
#
# Anything listed in 'clients.conf' will take precedence over the
# information from the old-style configuration files.
#
$INCLUDE clients.conf
# THREAD POOL CONFIGURATION
#
# The thread pool is a long-lived group of threads which
# take turns (round-robin) handling any incoming requests.
#
# You probably want to have a few spare threads around,
# so that high-load situations can be handled immediately. If you
# don't have any spare threads, then the request handling will
# be delayed while a new thread is created, and added to the pool.
#
# You probably don't want too many spare threads around,
# otherwise they'll be sitting there taking up resources, and
# not doing anything productive.
#
# The numbers given below should be adequate for most situations.
#
thread pool {
# Number of servers to start initially --- should be a reasonable
# ballpark figure.
start_servers = 5
# Limit on the total number of servers running.
#
# If this limit is ever reached, clients will be LOCKED OUT, so it
# should NOT BE SET TOO LOW. It is intended mainly as a brake to
# keep a runaway server from taking the system with it as it spirals
# down...
#
# You may find that the server is regularly reaching the
# 'max_servers' number of threads, and that increasing
# 'max_servers' doesn't seem to make much difference.
#
# If this is the case, then the problem is MOST LIKELY that
# your back-end databases are taking too long to respond, and
# are preventing the server from responding in a timely manner.
#
# The solution is NOT do keep increasing the 'max_servers'
# value, but instead to fix the underlying cause of the
# problem: slow database, or 'hostname_lookups=yes'.
#
# For more information, see 'max_request_time', above.
#
max_servers = 32
# Server-pool size regulation. Rather than making you guess
# how many servers you need, FreeRADIUS dynamically adapts to
# the load it sees, that is, it tries to maintain enough
# servers to handle the current load, plus a few spare
# servers to handle transient load spikes.
#
# It does this by periodically checking how many servers are
# waiting for a request. If there are fewer than
# min_spare_servers, it creates a new spare. If there are
# more than max_spare_servers, some of the spares die off.
# The default values are probably OK for most sites.
#
min_spare_servers = 3
max_spare_servers = 10
# When the server receives a packet, it places it onto an
# internal queue, where the worker threads (configured above)
# pick it up for processing. The maximum size of that queue
# is given here.
#
# When the queue is full, any new packets will be silently
# discarded.
#
# The most common cause of the queue being full is that the
# server is dependent on a slow database, and it has received
# a large "spike" of traffic. When that happens, there is
# very little you can do other than make sure the server
# receives less traffic, or make sure that the database can
# handle the load.
#
# max_queue_size = 65536
# Clean up old threads periodically. For no reason other than
# it might be useful.
#
# '0' is a special value meaning 'infinity', or 'the servers never
# exit'
max_requests_per_server = 0
# Automatically limit the number of accounting requests.
# This configuration item tracks how many requests per second
# the server can handle. It does this by tracking the
# packets/s received by the server for processing, and
# comparing that to the packets/s handled by the child
# threads.
#
# If the received PPS is larger than the processed PPS, *and*
# the queue is more than half full, then new accounting
# requests are probabilistically discarded. This lowers the
# number of packets that the server needs to process. Over
# time, the server will "catch up" with the traffic.
#
# Throwing away accounting packets is usually safe and low
# impact. The NAS will retransmit them in a few seconds, or
# even a few minutes. Vendors should read RFC 5080 Section 2.2.1
# to see how accounting packets should be retransmitted. Using
# any other method is likely to cause network meltdowns.
#
auto_limit_acct = no
}
######################################################################
#
# SNMP notifications. Uncomment the following line to enable
# snmptraps. Note that you MUST also configure the full path
# to the "snmptrap" command in the "trigger.conf" file.
#
#$INCLUDE trigger.conf
# MODULE CONFIGURATION
#
# The names and configuration of each module is located in this section.
#
# After the modules are defined here, they may be referred to by name,
# in other sections of this configuration file.
#
modules {
#
# Each module has a configuration as follows:
#
# name [ instance ] {
# config_item = value
# ...
# }
#
# The 'name' is used to load the 'rlm_name' library
# which implements the functionality of the module.
#
# The 'instance' is optional. To have two different instances
# of a module, it first must be referred to by 'name'.
# The different copies of the module are then created by
# inventing two 'instance' names, e.g. 'instance1' and 'instance2'
#
# The instance names can then be used in later configuration
# INSTEAD of the original 'name'. See the 'radutmp' configuration
# for an example.
#
#
# Some modules have ordering issues. e.g. "sqlippool" uses
# the configuration from "sql". In that case, the "sql"
# module must be read off of disk before the "sqlippool".
# However, the directory inclusion below just reads the
# directory from start to finish. Which means that the
# modules are read off of disk randomly.
#
# You can list individual modules *before* the directory
# inclusion. Those modules will be loaded first. Then, when
# the directory is read, those modules will be skipped and
# not read twice.
#
# $INCLUDE mods-enabled/sql
#
# All modules are in ther mods-enabled/ directory. Files
# matching the regex /[a-zA-Z0-9_.]+/ are read. The
# modules are initialized ONLY if they are referenced in a
# processing section, such as authorize, authenticate,
# accounting, pre/post-proxy, etc.
#
$INCLUDE mods-enabled/
}
# Instantiation
#
# This section sets the instantiation order of the modules. listed
# here will get started up BEFORE the sections like authorize,
# authenticate, etc. get examined.
#
# This section is not strictly needed. When a section like authorize
# refers to a module, the module is automatically loaded and
# initialized. However, some modules may not be listed in any of the
# processing sections, so they should be listed here.
#
# Also, listing modules here ensures that you have control over
# the order in which they are initialized. If one module needs
# something defined by another module, you can list them in order
# here, and ensure that the configuration will be OK.
#
# After the modules listed here have been loaded, all of the modules
# in the "mods-enabled" directory will be loaded. Loading the
# "mods-enabled" directory means that unlike Version 2, you usually
# don't need to list modules here.
#
instantiate {
#
# We list the counter module here so that it registers
# the check_name attribute before any module which sets
# it
# daily
# subsections here can be thought of as "virtual" modules.
#
# e.g. If you have two redundant SQL servers, and you want to
# use them in the authorize and accounting sections, you could
# place a "redundant" block in each section, containing the
# exact same text. Or, you could uncomment the following
# lines, and list "redundant_sql" in the authorize and
# accounting sections.
#
# The "virtual" module defined here can also be used with
# dynamic expansions, under a few conditions:
#
# * The section is "redundant", or "load-balance", or
# "redundant-load-balance"
# * The section contains modules ONLY, and no sub-sections
# * all modules in the section are using the same rlm_
# driver, e.g. They are all sql, or all ldap, etc.
#
# When those conditions are satisfied, the server will
# automatically register a dynamic expansion, using the
# name of the "virtual" module. In the example below,
# it will be "redundant_sql". You can then use this expansion
# just like any other:
#
# update reply {
# Filter-Id := "%{redundant_sql: ... }"
# }
#
# In this example, the expansion is done via module "sql1",
# and if that expansion fails, using module "sql2".
#
# For best results, configure the "pool" subsection of the
# module so that "retry_delay" is non-zero. That will allow
# the redundant block to quickly ignore all "down" SQL
# databases. If instead we have "retry_delay = 0", then
# every time the redundant block is used, the server will try
# to open a connection to every "down" database, causing
# problems.
#
#redundant redundant_sql {
# sql1
# sql2
#}
}
######################################################################
#
# Policies are virtual modules, similar to those defined in the
# "instantiate" section above.
#
# Defining a policy in one of the policy.d files means that it can be
# referenced in multiple places as a *name*, rather than as a series of
# conditions to match, and actions to take.
#
# Policies are something like subroutines in a normal language, but
# they cannot be called recursively. They MUST be defined in order.
# If policy A calls policy B, then B MUST be defined before A.
#
######################################################################
policy {
$INCLUDE policy.d/
}
######################################################################
#
# Load virtual servers.
#
# This next $INCLUDE line loads files in the directory that
# match the regular expression: /[a-zA-Z0-9_.]+/
#
# It allows you to define new virtual servers simply by placing
# a file into the raddb/sites-enabled/ directory.
#
$INCLUDE sites-enabled/
######################################################################
#
# All of the other configuration sections like "authorize {}",
# "authenticate {}", "accounting {}", have been moved to the
# the file:
#
# raddb/sites-available/default
#
# This is the "default" virtual server that has the same
# configuration as in version 1.0.x and 1.1.x. The default
# installation enables this virtual server. You should
# edit it to create policies for your local site.
#
# For more documentation on virtual servers, see:
#
# raddb/sites-available/README
#
######################################################################
Fichiers de configuration du serveur DHCP
/etc/dhcp/dhcpd.conf

# dhcpd.conf
#
# Sample configuration file for ISC dhcpd
#
# Attention: If /etc/ltsp/dhcpd.conf exists, that will be used as
# configuration file instead of this file.
#

# option definitions common to all supported networks...
option domain-name "example.org";
option domain-name-servers ns1.example.org, ns2.example.org;

default-lease-time 600;
max-lease-time 7200;


subnet 192.168.2.0 netmask 255.255.255.0 {
    range 192.168.2.10 192.168.2.100;
    option routers 192.168.2.1;
    option domain-name-servers 8.8.8.8, 8.8.4.4;
    option domain-name "myLocalDNS.com";
}

subnet 192.168.3.0 netmask 255.255.255.0 {
    range 192.168.3.10 192.168.3.100;
    option routers 192.168.3.1;
    option domain-name-servers 8.8.8.8, 8.8.4.4;
    option domain-name "myLocalDNS.com";
}
Dans /etc/default/isc-dhcp-server , ajouter les vlans dans "INTERFACES4=" " :

# On what interfaces should the DHCP server (dhcpd) serve DHCP requests?
#	Separate multiple interfaces with spaces, e.g. "eth0 eth1".
INTERFACESv4="vlan2 vlan3"
Restart du serveur dhcp pour prendre en compte les modifications :
systemctl restart isc-dhcp-server / systemctl status isc-dhcp-server (pour vérifier les erreurs)
Procédure pour installer OpenWRT
Etape 1 : Installation de OpenWrt sur le Tp-link (méthode via interface en ligne) Aller sur le site d'OpenWrt (download firmware) et trouver le logiciel adapté au tplink eap615-wall : https://openwrt.org/toh/views/toh_fwdownloadTélécharger le "Factory Image", et le renommer "factory.bin" (dossier download du pc)
Brancher le tplink à une box ou routeur et aller sur le site http://tplinkeap.net (login : admin ; password : admin)
Une fois sur la page d'acceuil, aller dans System -> Firmware
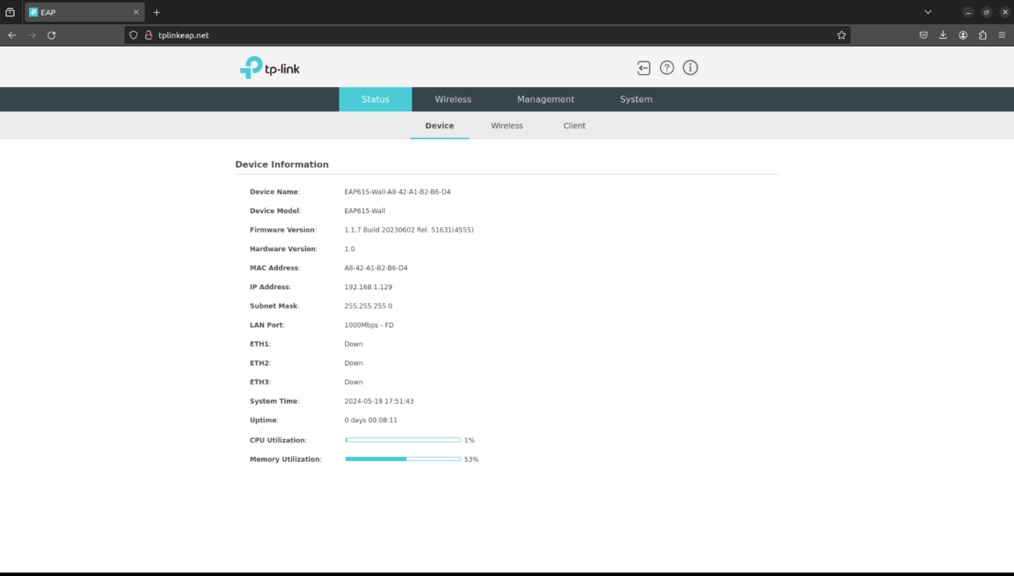
Dans Browse, choisir dans le dossier Download 'factory.bin' et cliquer sur Update. L'installation d'OpwenWrt va forcer l'ip du tplink à 192.168.1.1, il faudra uiliser cette ip pour se connecter sur LuCi (interface web d'OpenWrt). Débrancher le TPlink de la box / routeur, le connecter à l'injecteur de courant et au PC via le convertisseur ethernet -> USB-C. Sur un navigateur, rentrer l'ip 192.168.1.1 .
Test connexion via ssh -> 'ssh root@192.168.1.1'
Etape 2 : Installation des packages nécessaires pour utiliser l'option WPA-EAP lors de la création des ssid Vérification de l'architecture utilisé par le TPlink -> commande cat/etc/os-release
Aller sur la page download de OpenWrt pour télécharger les packages associé à l'architecture 'mipsel_24kc' : https://downloads.openwrt.org/releases/23.05.3/packages/mipsel_24kc/base/ Télécharger les packages suivants :
Dans l'interface LuCi, aller dans l'onglet System -> Software, remove le package pré-installé "wpad-bacics". Upload les nouveaux packages avec l'onglet "Upload Package". Commencer par les "ucode" (le package wpad doit être installé en dernier, étant dépendant des "ucode")
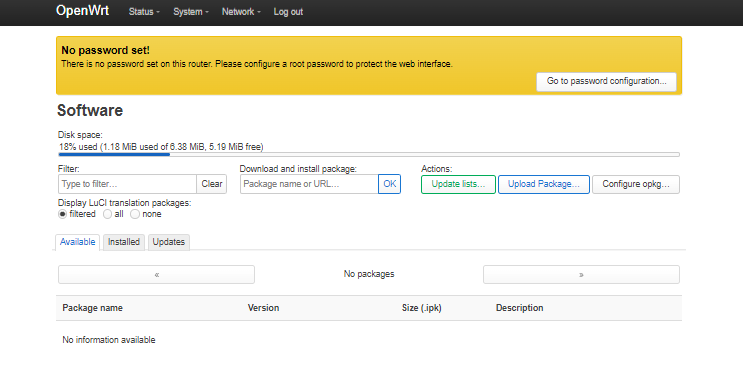


Commandes en ligne pour configurer le point d'accès
Création d'un device vlan :


uci add network device

uci set network.@device[-1].name='br-lan.2'
uci set network.@device[-1].type='8021q'
uci set network.@device[-1].ifname='br-lan'
uci set network.@device[-1].vid='2'
uci set network.@device[-1].macaddr='A8:42:A1:B2:B6:D4'
uci set network.@device[-1].mtu='1500'
uci set network.@device[-1].txqueuelen='1000'
uci set network.@device[-1].ipv6='auto'
uci set network.@device[-1].ipv6mtu='1500'
uci set network.@device[-1].dadtransmits='1'
uci set network.@device[-1].promisc='1'
uci set network.@device[-1].acceptlocal='1'
uci set network.@device[-1].arp_accept='1'
uci set network.@device[-1].drop_gratuitous_arp='0'
uci set network.@device[-1].sendredirects='1'
Création d'une interface wifi1 :


uci set network.wifi1=interface
uci set network.wifi1.proto='static'
uci set network.wifi1.device='br-lan.2'
uci set network.wifi1.ipaddr='192.168.2.2'
uci set network.wifi1.netmask='255.255.255.0'
uci set network.wifi1.gateway='192.168.2.1'
Pour enregistrer les modifications sur le device vlan et l'interface :

uci commit network
/etc/init.d/network restart
Création du ssid Wifi1:

uci set wireless.@wifi-iface[0]=wifi-iface
uci set wireless.@wifi-iface[0].network='wifi1'
uci set wireless.@wifi-iface[0].device='radio0'
uci set wireless.@wifi-iface[0].mode='ap'
uci set wireless.@wifi-iface[0].ssid='Wifi1'
uci set wireless.@wifi-iface[0].encryption='wpa'
uci set wireless.@wifi-iface[0].auth_server='192.168.2.1'
uci set wireless.@wifi-iface[0].auth_port='2020'
uci set wireless.@wifi-iface[0].auth_secret='passwordSecret'
uci set wireless.@wifi-iface[0].auth_type='WPA-EAP'
Pour enregistrer les modifications sur le ssid 'Wifi1':

uci commit wireless
wifi
Procédure pour configurer le point d'accès avec LuCi
Etape 1 : Paramétrage du TP-link pour faire communiquer les utilisateurs connectés aux SSID avec le pc (usiltisé comme routeur "box internet") -> création des interfaces wifi et devices associés
Création des devices :
Br-lan (changement de l'adresse ip et paramétrage pour que l'on puisse dissocier PC routeur et PC pour utiliser l'interface grapgique). IP tplink en 192.168.10.2 et connexion à un PC via l'interface ETH1 de la borne wifi.
Dans onglet NETWORK -> INTERFACES -> DEVICES -> configure br-lan


Création du device br-lan2


Création du device br-lan3


Création des Interfaces (NETWORK -> INTERFACES):
Modification de l'interface Wifi1 pour changement d'IP:


Création de l'interface Wifi1


Création de l'interface Wifi2


Etape 2 : Création du ssid Wifi2 avec méthode WPA-EAP

