« I2L 2022 Groupe4 » : différence entre les versions
Aucun résumé des modifications |
Aucun résumé des modifications |
||
| Ligne 201 : | Ligne 201 : | ||
=== Code === | === Code === | ||
https://github.com/Weamix/shortcut/blob/master/lufa/Demos/Device/LowLevel/Keyboard/Keyboard.c<syntaxhighlight lang="c"> | https://github.com/Weamix/shortcut/blob/master/lufa/Demos/Device/LowLevel/Keyboard/Keyboard.c<syntaxhighlight lang="c"> | ||
void SetupHardware(void) | |||
{ | |||
... | |||
// LEDS : PB7 à PB4 | |||
/* Hardware Initialization */ | |||
USB_Init(); | |||
DDRB |= 0x01; // direction sortie pour PB0 | |||
PORTB &= ~0x01; | |||
PORTD &= ~0x78; // entrees | |||
PORTD |= ~0x78; | |||
} | |||
void CreateKeyboardReport(USB_KeyboardReport_Data_t* const ReportData) | void CreateKeyboardReport(USB_KeyboardReport_Data_t* const ReportData) | ||
{ | { | ||
uint8_t UsedKeyCodes = 0; | |||
/* Clear the report contents */ | |||
memset(ReportData, 0, sizeof(USB_KeyboardReport_Data_t)); | memset(ReportData, 0, sizeof(USB_KeyboardReport_Data_t)); | ||
// Add shortcuts for copy, paste, and delete | |||
// PB3 à PB0 - PD3 à PD6: touches | |||
if (!(PIND & 0x40)) | |||
{ | |||
// Copy shortcut: Ctrl + C | |||
ReportData->Modifier = HID_KEYBOARD_MODIFIER_LEFTGUI; | |||
ReportData->KeyCode[UsedKeyCodes++] = HID_KEYBOARD_SC_C; | |||
} | |||
if (!(PIND & 0x20)) | |||
{ | |||
// Paste shortcut: Ctrl + V | |||
ReportData->Modifier = HID_KEYBOARD_MODIFIER_LEFTGUI; | |||
ReportData->KeyCode[UsedKeyCodes++] = HID_KEYBOARD_SC_V; | |||
} | |||
if (!(PIND & 0x10)) | |||
{ | |||
// letters | |||
ReportData->KeyCode[UsedKeyCodes++] = HID_KEYBOARD_SC_F; | |||
ReportData->KeyCode[UsedKeyCodes++] = HID_KEYBOARD_SC_P; | |||
ReportData->KeyCode[UsedKeyCodes++] = HID_KEYBOARD_SC_D; | |||
} | |||
} | } | ||
</syntaxhighlight> | </syntaxhighlight> | ||
Version du 12 juin 2023 à 14:15
Sujet du projet
Clavier de raccourcis programmables - par Axel Lebas & Wassim Djamaa & Maxime Vitse
Proposition de système
Une carte avec 4 boutons programmables via un fichier de configuration qui est fourni par l'utilisateur. Accompagnée d'une LED.
Contre-proposition
Bonne idée. Votre périphérique USB sera programmé avec une interface comportant un point d'accès OUT pour envoyer les chaînes de caractères à envoyer sur pression des boutons. Il serait intéressant d'écrire ces chaînes dans l'EEPROM de l'ATMega16u2 pour qu'elles persistent une fois le périphérique débranché. Les LED du périphérique doivent permettre d'indiquer quelles touches sont programmées. Le programme de configuration sera écrit avec la bibliothèque libusb-1.0.
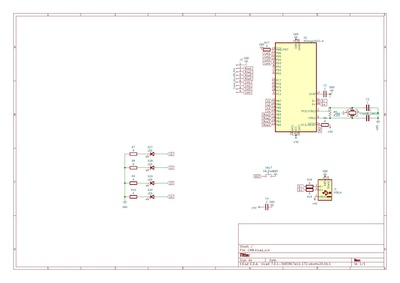
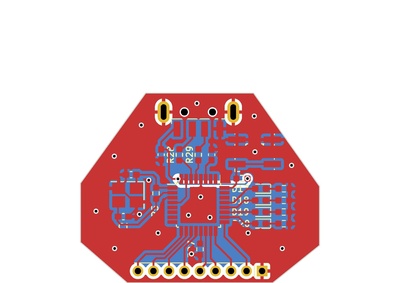
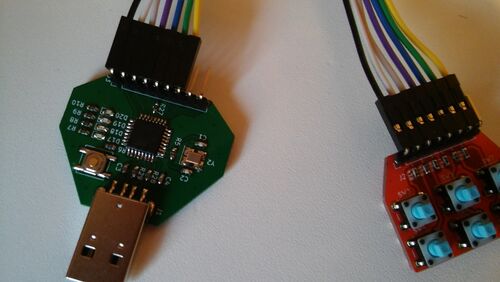
Carte
Carte soudée :
Fichiers
Le circuit imprimé à utiliser est le même que celui du groupe 3 avec le clavier de la carte du groupe 2.
Après quelques problèmes avec le connecteur USB C, une variante de la carte du groupe 3 est proposée avec un connecteur USB A.
Projet KiCAD : Fichier:I2L-2022-CLIPET-MATHON-BOUKELLAL version USBA.zip
Trois parties à faire
- Prog SE:
- LED
- Prog USB:
- LUFA
- Prog PC:
- Lib usb
Prog SE :
Makefile pour automatiser le processus suivant
Par défaut le micro processeur a un bootloader qui permet de faire de la programmation (sans passer par le SPI) , l'utilitaire que nous utilisons est DFU/USB.
"5.2 ATMega328p: Chaîne de compilation (2/2)" de https://rex.plil.fr/Enseignement/Systeme/Systeme.PSE/systeme.html$ apt install gcc-avr avr-libc dfu-programmer // DFU/USB dfu 6 programmer
$ avr-gcc -mmcu=atmega328p -DF_CPU=8000000UL -c -Wall -I. -Os timer.c -o timer.o // compilation source en un . objet
$ avr-gcc -mmcu=atmega328p -g -lm -Wl,--gc-sections -o timer.elf timer.o // édition des liens (afin d'obtenir un exécutable)
$ avr-objcopy -j .text -j .data -O ihex timer.elf timer.hex // nécessaire pour les utilitaires
$ dfu-programmer atmega16u2 erase
$ dfu-programmer atmega16u2 flash timer.hex
$ dfu-programmer atmega16u2 reset
CC = avr-gcc
OBJCOPY = avr-objcopy
DFU_PROGRAMMER = dfu-programmer

CFLAGS = -mmcu=atmega328p -DF_CPU=8000000UL -c -Wall -I. -Os
LDFLAGS = -mmcu=atmega328p -g -lm -Wl,--gc-sections

all: timer.hex

timer.o: timer.c
	$(CC) $(CFLAGS) $< -o $@

timer.elf: timer.o
	$(CC) $(LDFLAGS) $< -o $@

timer.hex: timer.elf
	$(OBJCOPY) -j .text -j .data -O ihex $< $@

erase:
	$(DFU_PROGRAMMER) atmega16u2 erase

flash: timer.hex
	$(DFU_PROGRAMMER) atmega16u2 flash $<

reset:
	$(DFU_PROGRAMMER) atmega16u2 reset

clean:
	rm -f timer.o timer.elf timer.hex
Gestion des entrées-sorties numériques avec avr-gcc
Code : https://github.com/Weamix/shortcut/blob/master/timer.c#include <avr/io.h>
#include <util/delay.h>
int main(void){
CLKSEL0 = 0b00010101; // sélection de l'horloge externe
CLKSEL1 = 0b00001111; // minimum de 8Mhz
CLKPR = 0b10000000; // modification du diviseur d'horloge (CLKPCE=1)
CLKPR = 0; // 0 pour pas de diviseur (diviseur de 1)
DDRB |= 0x01; // direction sortie pour PB0
PORTB &= ~0x01;
PORTD &= ~0x78; // entrees
PORTD |= ~0x78;
while(1){
if ((PIND & 0x40))
PORTB &= ~0x80; // LED éteinte
else
PORTB |= 0x80; // LED allumée
if ((PIND & 0x20))
// open led on pb6
PORTB &= ~0x40; // LED éteinte
else
PORTB |= 0x40; // LED allumée
if ((PIND & 0x10))
// open led on pb5
PORTB &= ~0x20; // LED éteinte
else
PORTB |= 0x20; // LED allumée
if ((PIND & 0x08))
// open led on pb4
PORTB &= ~0x10; // LED éteinte
else
PORTB |= 0x10; // LED allumée
}
}
Ports
B: 8 sorties
C: > 8 sorties
D: 8 sorties
En général 8 fois 3 entrées, ici une vingtaine de sorties
Registre DDR (data direction register) : sens de la LED
Pour chaque bit du port si le bit correspond à une entrée ou une sortie
Voir PB0 / PB1 sur le schéma KICAD
- Par défaut, BIT à 0 en entrée
- 1 pour sortie
Il faut toucher au bit avec le poids le plus faible.
Rappels sur les opérandes en C
& | sont des opérandes bit à bit pas comme les opérandes logiques dans les if && ou ||
tilde is NOT
Le OU exclusif s'écrit PORTB ^ = 0X01
le & avec le tilde permet un bit à 0
le | sans le tilde permet un bit à 1
2 types de registres
Port B -> sortie
PINB -> entrée
Prog Lufa :
Bibliothèque LUFA
- boucler sur la gestion des événements USB USB_USBTask ;
- éventuellement appeler aussi la gestion d’une classe (e.g. HID_Task) ;
- écrire les fonctions de rappel (callback) pour implanter les fonctionnalités souhaitées.
- Modifier le Makefile de LUFA en mettant MCU en atmega16u2 4 premières lignes à modifier seulement (une à none).
- Modifier dans descriptor.c et descriptor.h
Base pour le projet
Comme base pour le programme LUFA vous pouvez prendre le projet LUFA "écho" disponible sur la page Wiki du groupe 2.
Code
https://github.com/Weamix/shortcut/blob/master/lufa/Demos/Device/LowLevel/Keyboard/Keyboard.cvoid SetupHardware(void)
{
...
// LEDS : PB7 à PB4
/* Hardware Initialization */
USB_Init();
DDRB |= 0x01; // direction sortie pour PB0
PORTB &= ~0x01;
PORTD &= ~0x78; // entrees
PORTD |= ~0x78;
}
void CreateKeyboardReport(USB_KeyboardReport_Data_t* const ReportData)
{
uint8_t UsedKeyCodes = 0;
/* Clear the report contents */
memset(ReportData, 0, sizeof(USB_KeyboardReport_Data_t));
// Add shortcuts for copy, paste, and delete
// PB3 à PB0 - PD3 à PD6: touches
if (!(PIND & 0x40))
{
// Copy shortcut: Ctrl + C
ReportData->Modifier = HID_KEYBOARD_MODIFIER_LEFTGUI;
ReportData->KeyCode[UsedKeyCodes++] = HID_KEYBOARD_SC_C;
}
if (!(PIND & 0x20))
{
// Paste shortcut: Ctrl + V
ReportData->Modifier = HID_KEYBOARD_MODIFIER_LEFTGUI;
ReportData->KeyCode[UsedKeyCodes++] = HID_KEYBOARD_SC_V;
}
if (!(PIND & 0x10))
{
// letters
ReportData->KeyCode[UsedKeyCodes++] = HID_KEYBOARD_SC_F;
ReportData->KeyCode[UsedKeyCodes++] = HID_KEYBOARD_SC_P;
ReportData->KeyCode[UsedKeyCodes++] = HID_KEYBOARD_SC_D;
}
}
Prog PC (lib USB) :
Comme base pour le programme PC vous pouvez prendre le programme libusb disponible sur la page Wiki du groupe 2.


